


Green screening is one of the most important techniques in digital video editing.
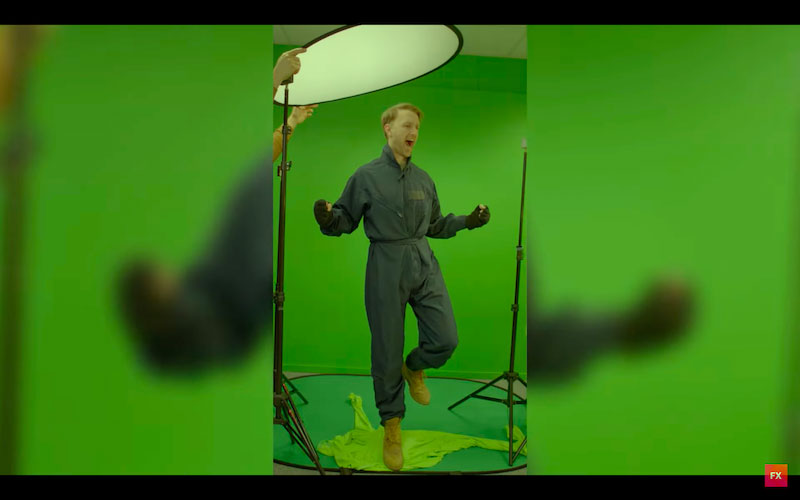
By shooting in front of a flat contrasting color, new backgrounds can be added in post-production. It’s a studio technique that has become accessible to all thanks to software like HitFilm.
In this guide we examine the process by defining what Chroma Key means. By first understanding the basics, we’ll outline how the feature works in HitFilm.
1. What is Chroma Key?
Most simply, Chroma Key or Chroma Keying is the technical name for green screening.
It is defined as the process of layering, or compositing, two images together based on color hues. The word Chroma relates to the “chroma range” that makes up a color.
By selecting a contrasting color in a video shot we can Chroma Key it out. Any sight of that color in a frame can then be replaced by another shot or image.
HitFilm Pro includes an industry-leading Chroma Key effect. The feature delivers accurate, broadcast-ready green screen extraction with amazing realism.
How do I use it within my projects?
Chroma Key green screen has become incredibly easy for everyone to perform.
The same trick used in cinema blockbusters is regularly seen in homemade YouTube videos. Commonly it’s how streamers show gameplay behind them or how podcasters make a living room look like a TV studio.
How you use it is your creative choice, but it all starts with the screen itself…
Quick tip checklist for green screen greatness:
- Green or blue?
Choose the best color that contrasts most with your shoot.
- Keep it clean.
Unmodulated color – no wrinkles, creases, patterns or shadows.
- Light it right.
Not necessarily too bright, but well enough to evenly show color.
- Good distance.
Don’t shoot your actors positioned too close to the screen.
Try this guide for making a homemade green screen and shooting it correctly.
2. Green screening glossary
If all the phrases and terms around green screening seem a bit confusing, have no fear.
Here we identify some key terms to describe the meaning and practical applications:
| Term | Definition | Practical Stuff |
|---|---|---|
| Keying | To “key” a color, you identify the hue and use that value to extract and replace the region in shot. | Makes all automatic green screening possible without the need to rotoscope. |
| Spill (Light Spill) | Light “spill” is when background color is reflected forwards and visible on the actors or objects. | HitFilm’s Spill Suppression tool reduces this for cleaner composites. |
| Luminance | Luminance is the brightness or reflectiveness of a color or screen. | Good screens aren’t overly reflective but light evenly and flat. |
| Compositing | Compositing is the combining of two video shots into a single shot. | Every VFX shot or green screen background is a composite shot. |
| Rotoscoping | Another editing technique used for separating an element from the background of each individual video frame. | Rotoscoping often involves drawing masks that track an object or actors movement for animation or VFX purposes. |
| Masking | In layer-based video editing, masks are opaque or transparent layers that overlay shots. | Masks are used to isolate (block out) video elements, place text, VFX or other shots. |
3. How to Chroma Key in HitFilm
HitFilm has three primary effects for carrying out green screen removal on your videos.
- Color Difference Key is the simplest, basic effect for beginners.
- Hue & RGB Key is an intermediate solution found in all versions of HitFilm.
- Chroma Key effect is a more advanced option promising professional results.
All can be found inside HitFilm’s Effects inside the Keying folder.
In this part we will focus on the last two and explain how to use them on your shots.
TIP: The Color Difference Key lets you quickly key out red, green or blue screens.
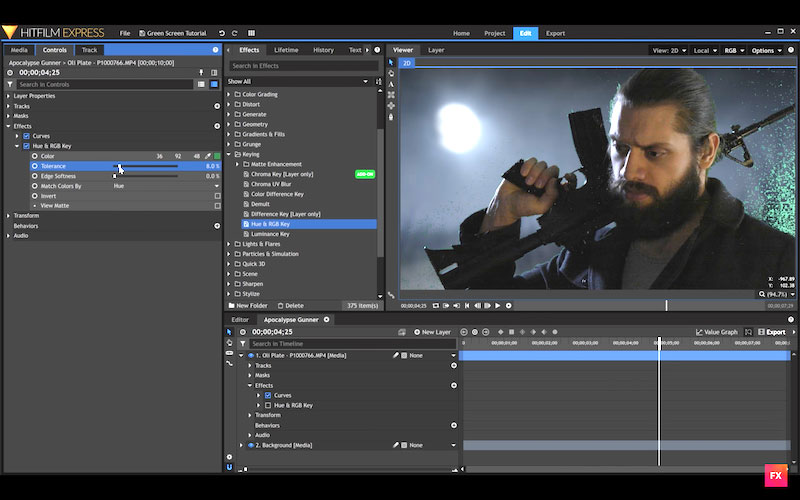
3.1 Hue & RGB Key
The Hue & RGB Key goes beyond the Color Difference Key to allow any color to be picked. It uses a dropper or color picker that you can use to choose your screen color.
- To find this effect, visit Effects>Keying>Hue & RGB Key.
- Use the Tolerance slider (0.0-100%) to set the removal strength.
- Adjust the Edge Softness slider (0.0-100%) to add blur to foreground edges.
The View Matte checkbox is a useful two-tone guide for checking the extraction. If similar colors are being removed from the foreground subject, try changing Match Colors By to RGB instead of Hue.
TIP: Toggle the Invert checkbox to flip the extraction between foreground and screen.
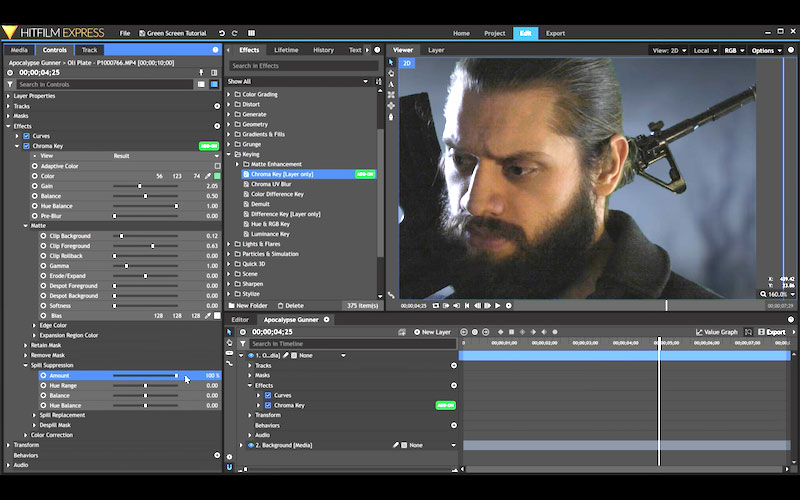
3.2 Chroma Key
For the very best results, the Chroma Key effect has additional controls. As a premium feature, Chroma Key is only available in HitFilm Pro.
- To apply this effect, visit Effects>Keying>Chroma Key.
- Pick the background screen color using the dropper.
- Switch the View dropdown to Matte for a clearer guide.
- Use the Gain slider (0.00-5.00) to adjust the effect strength.
- Refine edges with the Clip Background and Clip Foreground sliders (Matte).
The Spill Suppression controls are an important Chroma Key feature. By adjusting the Amount slider (0-100%) you can set how much reflected screen light is removed.
Take a look at the guide How to green screen in HitFilm (right) for a practical demonstration using all these effects.
4. Extra reading: Image manipulation
Removing your video backgrounds is just the beginning in HitFilm. By combining other manipulations like masking, scaling and positioning you can create impressive composite shots.
To take the next steps, try following these associated guides:
- How to use Masking tools for creating overlays or wipes over shots.
- Scaling & Positioning – Transform and move keyed shots into position for overlays.
- Compositing – Improve shots with our top 5 green screen compositing techniques.
Motion Array is a great way to get royalty-free assets you can practice with. Here you can find stock photos, videos and motion graphics that already have green screens in shot.
Final FAQs for green screening
Green screening can seem pretty daunting, so here’s some answers to frequently asked questions.
There is no certain color you must use, but chroma green is recommended (#009933).
As a general rule you want a color that is distinctly different or contrasting with your shoot. So pick a green that is unique and won’t be confused with other elements in front.
Green screening is a post-production effect so it happens after a shoot. This makes it difficult to preview how a scene might look inside the camera.
CamTrackAR is a mobile app that can help with this. In addition to camera tracking, the paid version offers VFX pre-visualization including Live Chroma Key.
For more on how to use HitFilm try visiting the FXhome blog and YouTube channel for essential practical tips.
