


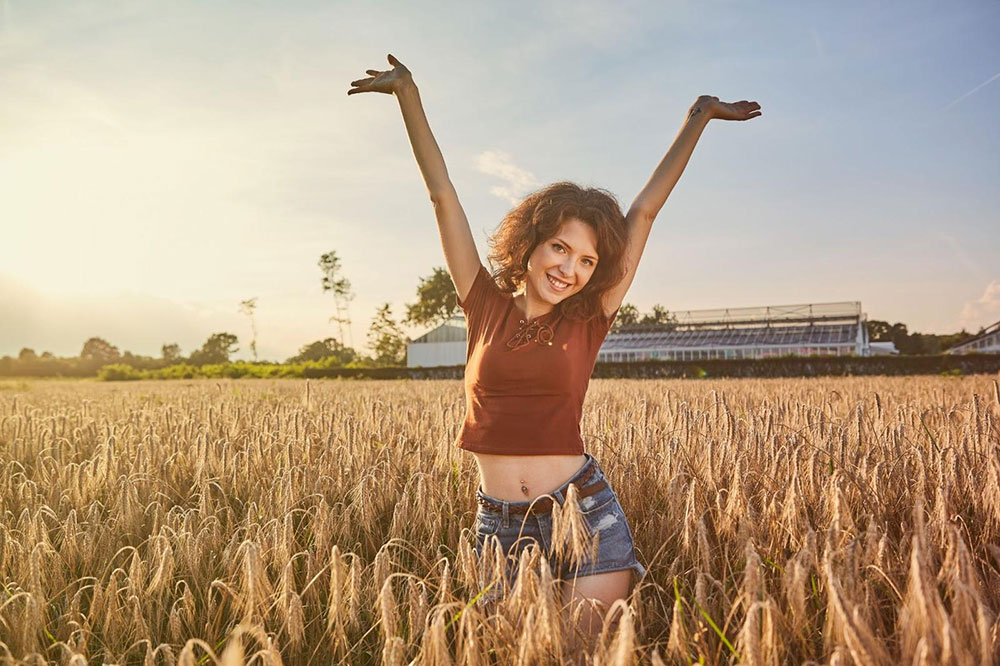
If you’re looking to improve the light for your videos, you’ve come to the right place. Video lighting is an essential part of filmmaking, whether creating business promotions or YouTube videos. Knowing the best lighting for your videos can massively improve your production value and help you create professional-looking compositions.
- Understand why video lighting is essential and what are the best lights for your videos.
- Learn about the best video lighting setup for YouTube Videos.
- Check out our top video lighting tips and tricks.
Why is Lighting important for your Videos?
Video lighting is super important, whether you’re creating a narrative film or a YouTube vlog. Good lighting makes your shots look better, your production value higher, and gives the audience a better watching experience.
While many cameras have a point-and-shoot option, lighting can drastically improve the look of your finished film and allow you to do more with it in the edit. Lighting your videos doesn’t need to be expensive, however, as there are plenty of cost-effective or even free lighting methods for you to use.
What Type of Lamps are Available
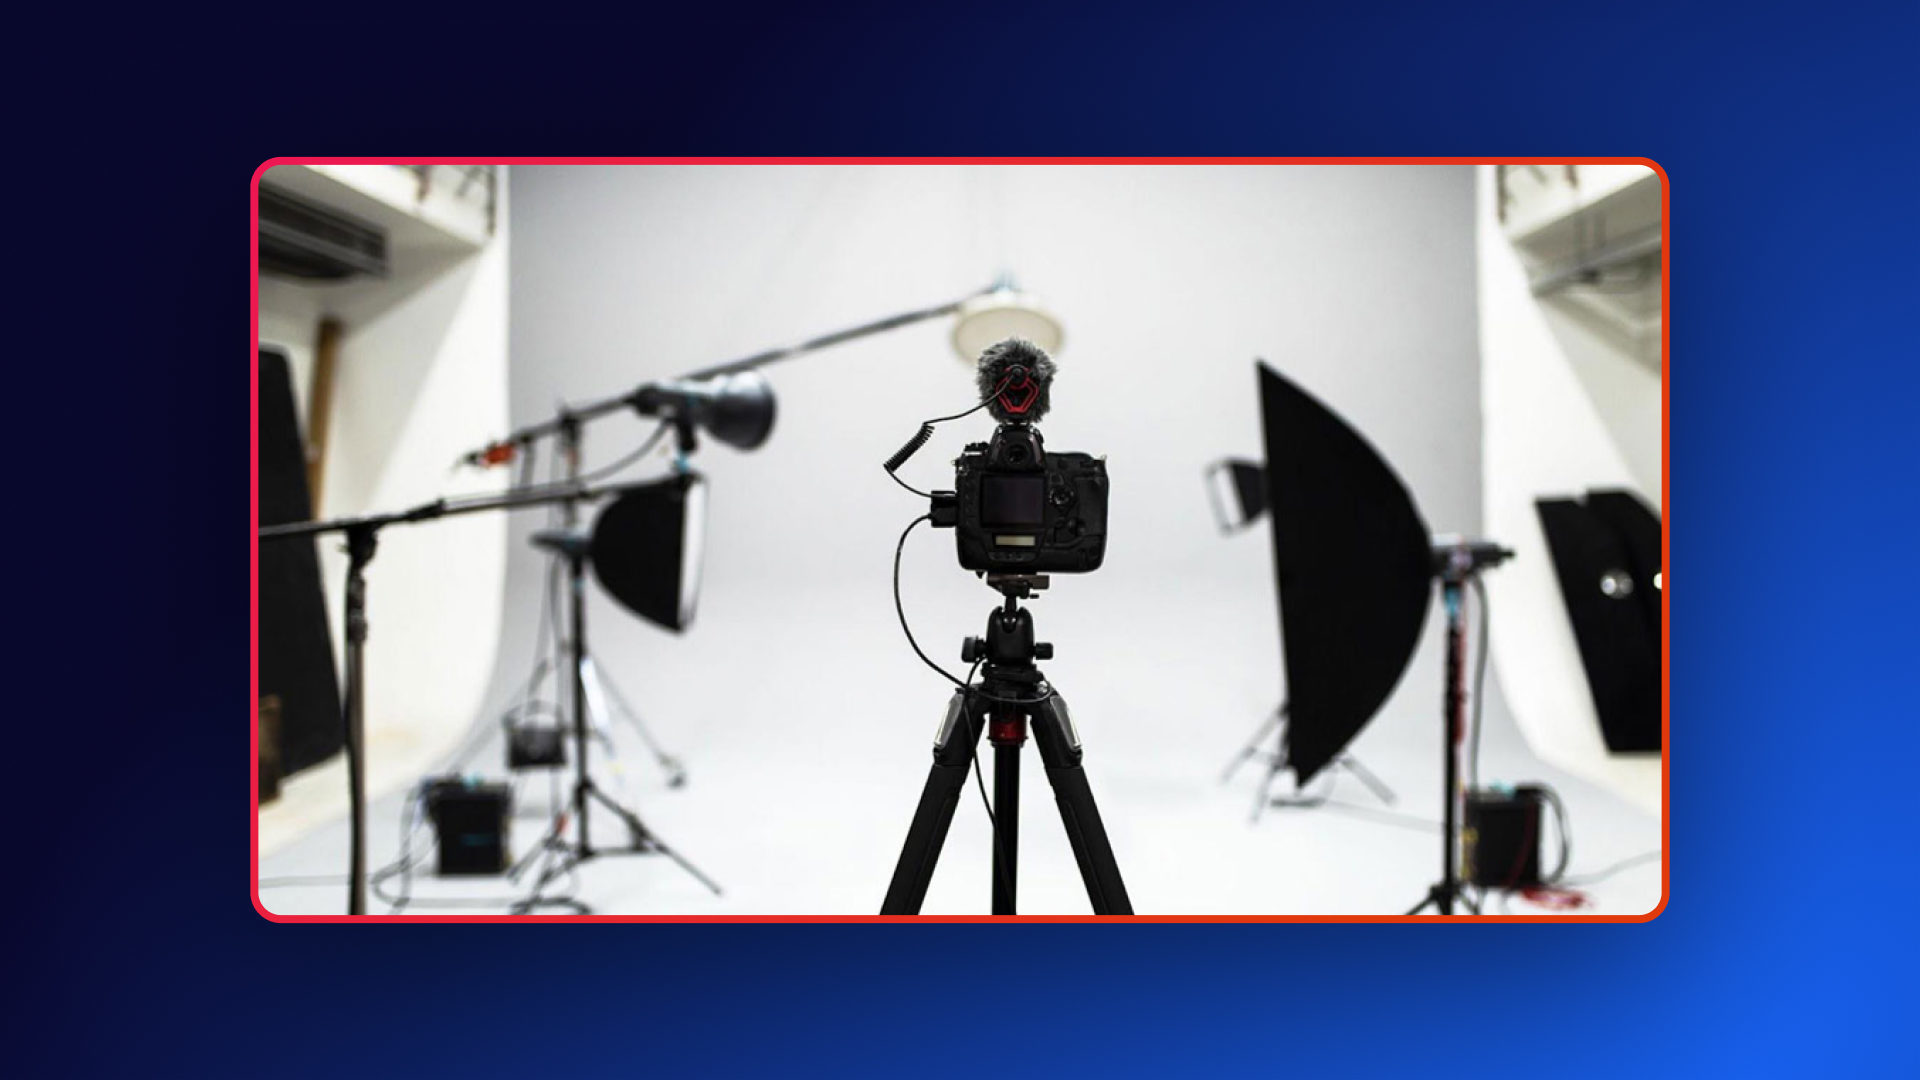
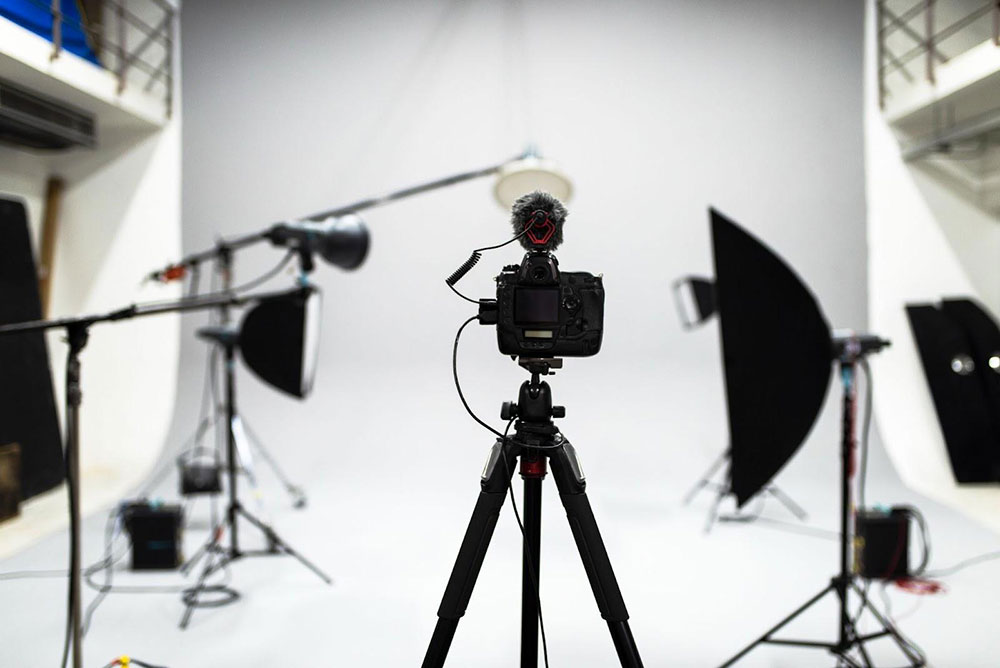
A quick Google search will show you hundreds of video lighting solutions available to buy in all shapes and sizes, but choosing what is right for you can be a challenge. Filmmakers can spend anything from a few pounds to thousands on lighting.
HMIs
HMIs are massively powerful lamps that can recreate daylight. They look how you might imagine a filming lamp to look; large, bright, and hot. HMI lighting is ideal for filling a space with light, making them well suited for studio and stage environments.
A big issue with HMIs is that the bulbs are susceptible and quite expensive. Even the smallest knocks can break an HMI bulb, so you need to handle and transport them carefully. We also strongly advise wearing heat-resistant gloves when working with HMIs, as the bulb and lamp can get incredibly hot.
Softbox Lamps
Many photographers and videographers prefer softbox lamps, as the large box front softly diffuses the light across the subject. While you can use softbox lighting outside, it is generally used in a studio environment.
A considerable advantage of Softbox lights is that they can be incredibly cost-effective; you can even make serviceable diffusion from shower curtains. The soft light is ideal for lighting subjects and models, but they are not bright enough to light entire scenes.
LED Lamps
LEDs are undoubtedly the most versatile type of lamp available for filming. Created from a series of smaller bulbs, LEDs can offer vast amounts of controllable light and work on both mains’ power for studio environments or batteries, making them highly portable.
Another massive advantage of LED video lights is the range of products available. LEDs come in every shape and size you can imagine, from small ring lights to huge color-changing LED panels. Many content creators opt for LED lighting for youtube videos due to their versatility and cost-effectiveness.
Lighting an Indoor Scene
If you are planning to light an interior scene, there are several methods that Filmmakers use. Using these lighting formats can help you build a scene, even if you don’t have professional lighting equipment.
Natural Light
Natural light is an option for interior scenes, but only when there is a useful light source. The more light sources you have in a space, the easier it will be to create a beautiful shot. Using reflectors and smaller LED lamps can be helpful to complement the natural light available.
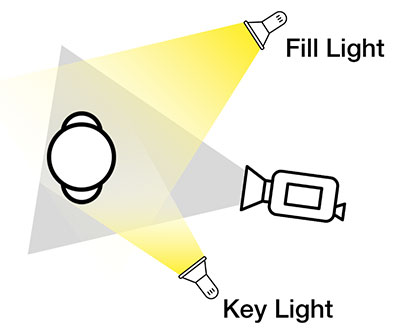
Two Light Video Setup
2 Point lighting is a method that is commonly used for lighting YouTube videos. It requires two lamps to cover your subject; the Key light and the Fill Light. The lamps will be positioned either side of the camera, pointing toward the subject. The Fill light should fill as much of the shot as possible and is responsible for lighting the foreground and background of your shot, while the Key Light is focused on the subject’s face.
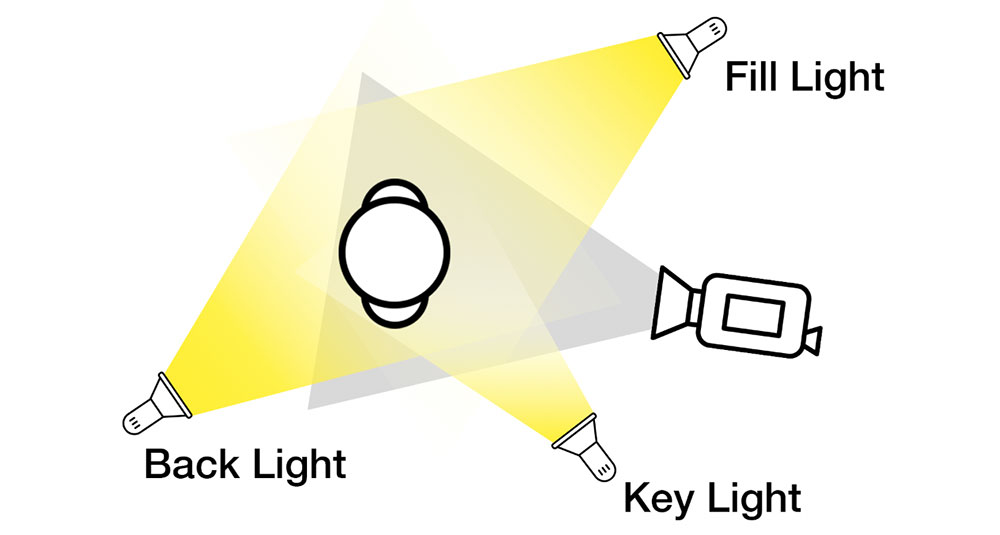
Three Light Video Setup
3 Point Lighting is the most common method for filmmakers to use and requires 3 sources of light. The setup is precisely the same as the 2 point lighting, only with the addition of some backlight. The backlight helps give depth to your shot, separating the subject from the background.
Top Tip: With both 2 and 3 point lighting, you can use a natural light source such as a window as one of the points.
Lighting an Outdoor Scene
If you’re thinking that lighting an interior scene is a little too much work, you can always opt to shoot outside in natural light. A huge advantage of filming outside is that the lighting is free, but there are many additional factors to consider.
First, there is the weather; your camera and kit might not stand up to the elements, and even the best-planned shoot can come undone because of rain. The biggest issue is that natural light is constantly changing, and your shot can go from over to under-exposed in a matter of minutes.
Noon
While shooting outside at the brightest time of day might seem like a good idea, Noon is a very difficult time of day for any filmmaker. The harsh downward light casts many shadows, and it can be hard work to get a good shot without overexposure.
Shooting at Noon does have some benefits, as the lighting gives a natural and realistic feel to your shots, ideal for Westerns or War Films. Even still, if you want to shoot in the middle of the day, you will need some diffusers and light blockers.
Overcast
Overcast days are fantastic for natural lighting, as the clouds do a lot of the light diffusion for you. The clouds act as a natural softbox, bouncing the light around, creating a softer style shot without large shadows.
Overcast days don’t offer a lot of contrast, as the frequent result is it can be challenging to get a lot of depth to your shot. If you plan to shoot on an overcast day, you should be equally prepared for a bit of rain or the sun to peek out from behind a cloud, changing your lighting environment completely.
Sunrise/Sunset
Frequently referred to as the Golden or Magic hour, Sunsets and Sunrises offer a beautiful palette to your videos. Despite being called the Golden Hour, the time you have is only between 20 and 30 minutes after Sunrise and before Sunset.
Many filmmakers love shooting during the Magic Hour, as it offers a warm, diffused light that looks fantastic from any angle. The biggest problem with shooting at this time of day is how quickly the light changes; if you want to take advantage of Golden Hour lighting, you need to be ready to start filming as soon as the light is right and stop before it changes too much.
Tricks to correct light using with HitFilm
Once you’ve finished filming, the only way to change the video lighting entirely is to reshoot. However, editing tools are available to help you improve or stylize your video. Color correction and grading are an essential part of the editing process, but the better your original video lighting, the more you’ll be able to do.

Color Correction Tools
HitFilm has a massive range of Color Correction tools that can help you improve your video lighting during the edit. Curves is a fantastic tool for fine-tuning the Exposure of your shot, while the Color Wheels can help you modify the tone of your light, mid and dark areas.
Use Color Grading Effects
Color Grading is where you can create the look of your film; the overall color and tones are used across all your shots. It is essential to complete the color correction process first, as this will give you a consistent base to start with across your project.
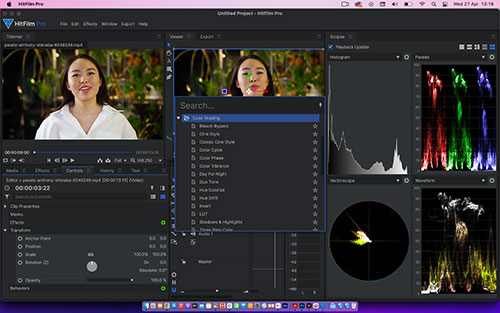
Hitfilm Color Grading effects include native controls such as Vibrance, Hue Shift, and Vignettes, along with LUT effect, allowing you to share, download, and create your own color presets. If you fancy learning even more about Color Grading, check out this handy guide.
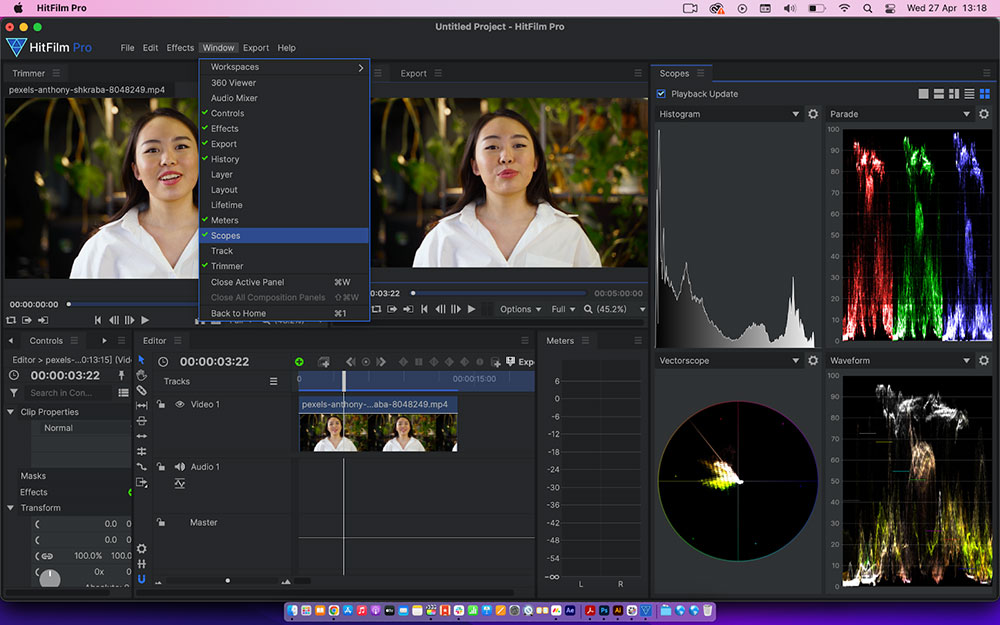
Use Color Scopes
All cameras will have a color profile; some will lean to a pink/orange tone, and others will lean to a blue/gray tone. Your video lighting will also affect the shot’s color, depending on whether you’re using yellow artificial lighting or blue daylight.
Color Scopes visually display the spread of color and light in a frame/shot and can be super helpful in understanding what corrections need to be made. Go to Window > Scopes to add the relevant panels.
Video lighting is a huge part of filmmaking, which is why big-budget productions hire a whole team of lighting specialists. You don’t have to spend a lot of money on video lighting to get started; use what you have available and practice lighting techniques to see the effects you can create. Check out our DIY Video article if you’re looking for some cost-effective lighting hacks.