Color grading for beginners can be a little bit confusing, but once you have the fundamental principles down, it’s really quite simple! Here we’re going to cover our top tips for how to color grade your video for a cinematic look.
What is color grading?
Before we show you how to color grade, it’s important to first understand what it is. Color grading is the process of manipulating the color and contrast of images or video to achieve a stylistic look. It combines technical and creative skills and is important in achieving both tone and clarity in a film.


What’s the difference between color grading and color correction?
Color grading and color correction shouldn’t be confused. To achieve professional, cinematic results it’s important to understand the distinction between the two. They’ll both play a role in your final grade.
Color correction is corrective. The aim being to achieve a naturalistic appearance to the footage (i.e. make it look how it did in real life).
Color grading is creative. The aim being to achieve a ‘look’ or ‘feel’ that reflects the tone of your film, or use color to dramatic effect.
Color correction can in some ways be considered a part of the color grading process because it’s necessary to provide you with a ‘base’ to begin from when grading.
Key terms
Before we delve deeper into how to achieve a cinematic grade to your footage, you’ll need to learn a few basic terms.
HSB
HSB stands for Hue, Saturation and Brightness. When we’re working with color, these three qualities are the main things we’re adjusting to achieve the desired effect.
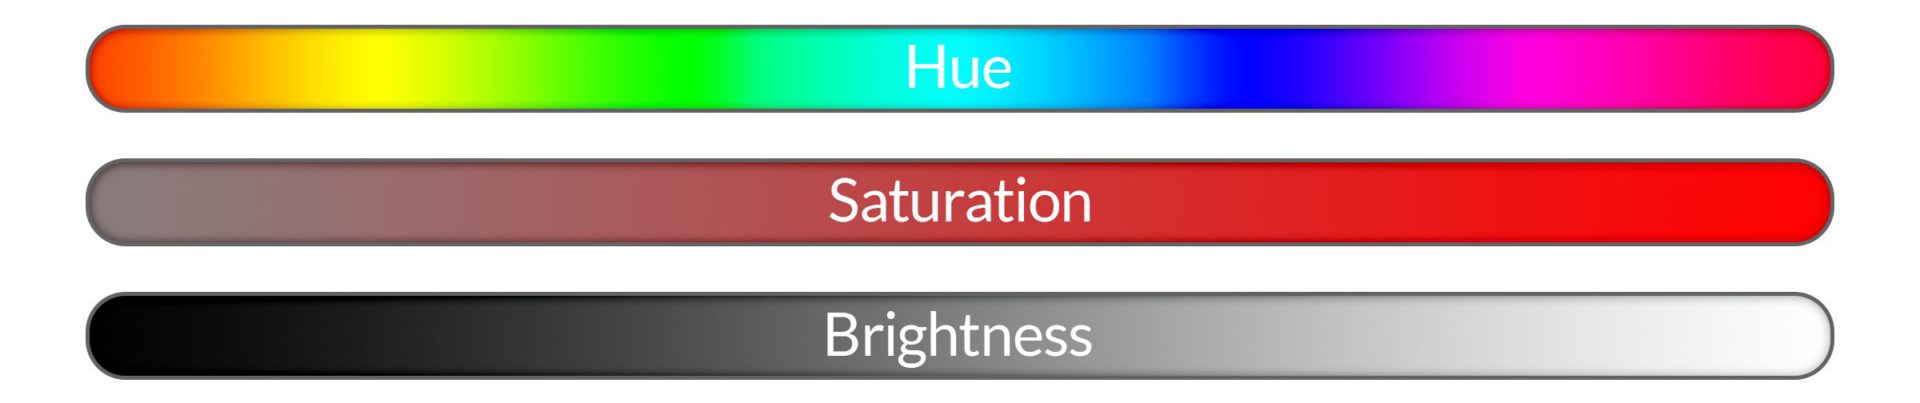
Hue is the difference between red and green. It affects where your color sits along the spectrum of the rainbow and is usually measured as a value between 0° and 360°.
Saturation is the difference between red and gray, i.e. how vivid the color is. Reducing the saturation of a color will make it more muted and move it toward grayscale. Saturation is measured as a value between 0% and 100%.
Brightness is the difference between light red and dark red. If you increase brightness, you move closer to white (100%), decrease it and you move toward black (0%). ‘Luminance’ is another measure of lightness that’s often used in place of brightness (so you might hear the term HSL instead of HSB) – while calculated differently, they work in pretty much the same way in the context of color grading.
RGB

Each pixel in a screen is made up of three lights – one red, one green and one blue (RGB). Combine these three colors at varying intensities and you can make any color. This is why the RGB format is the standard for light-emitting displays.
When color grading, manipulating each of these channels independently offers you greater control over the color in your footage.
Exposure

Exposure is how much light a camera picks up to get the resulting image. If too low, the image will be pitch black, too high and it will be pure white. It’s usually set in-camera, but it’s possible to affect exposure artificially in post-production.
The goal is to find a good balance where there are no areas of flat black or white. But you can sometimes use blown out or underexposed areas to creative effect.
White Balance


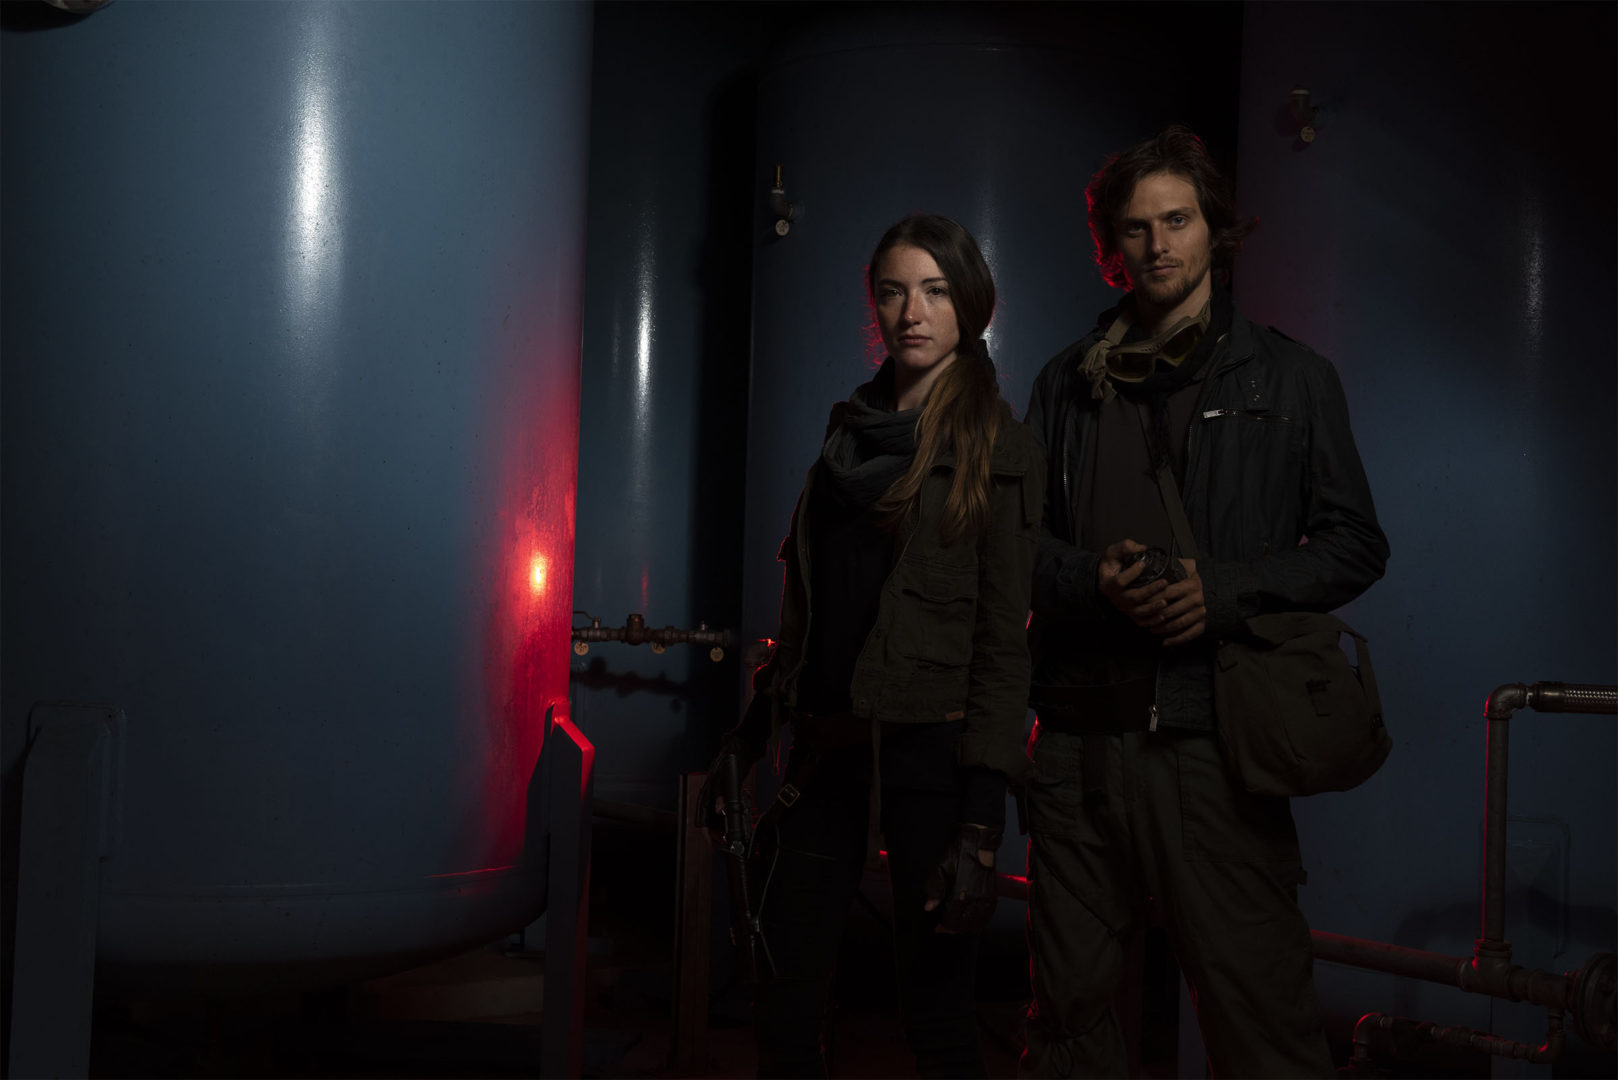
Cool color temperature 
Warm color temperature
You may have heard people refer to footage as ‘warm’ or ‘cool’. This refers to the ‘orangeness’ or ‘blueness’ of the colors in your video. The goal when adjusting white balance is to render neutral colors (like gray) as naturally as possible.
White balance should always be set in-camera to avoid problems down the line (it can be difficult to fix in post-production). Most cameras have a pretty reliable ‘automatic’ setting that will monitor the scene and set this for you, but it can shift as you move between lighting scenarios and cause sudden shifts that ruin your corrections. We recommend using a gray card or using your eyes to dial in a K (Kelvin) value manually.
What’s the best process to follow?
Before you dive right in, we’ll quickly go over the best process to make sure you come out with a clean grade that looks good. Then we’ll show you how to get a cinematic grade on your own videos.
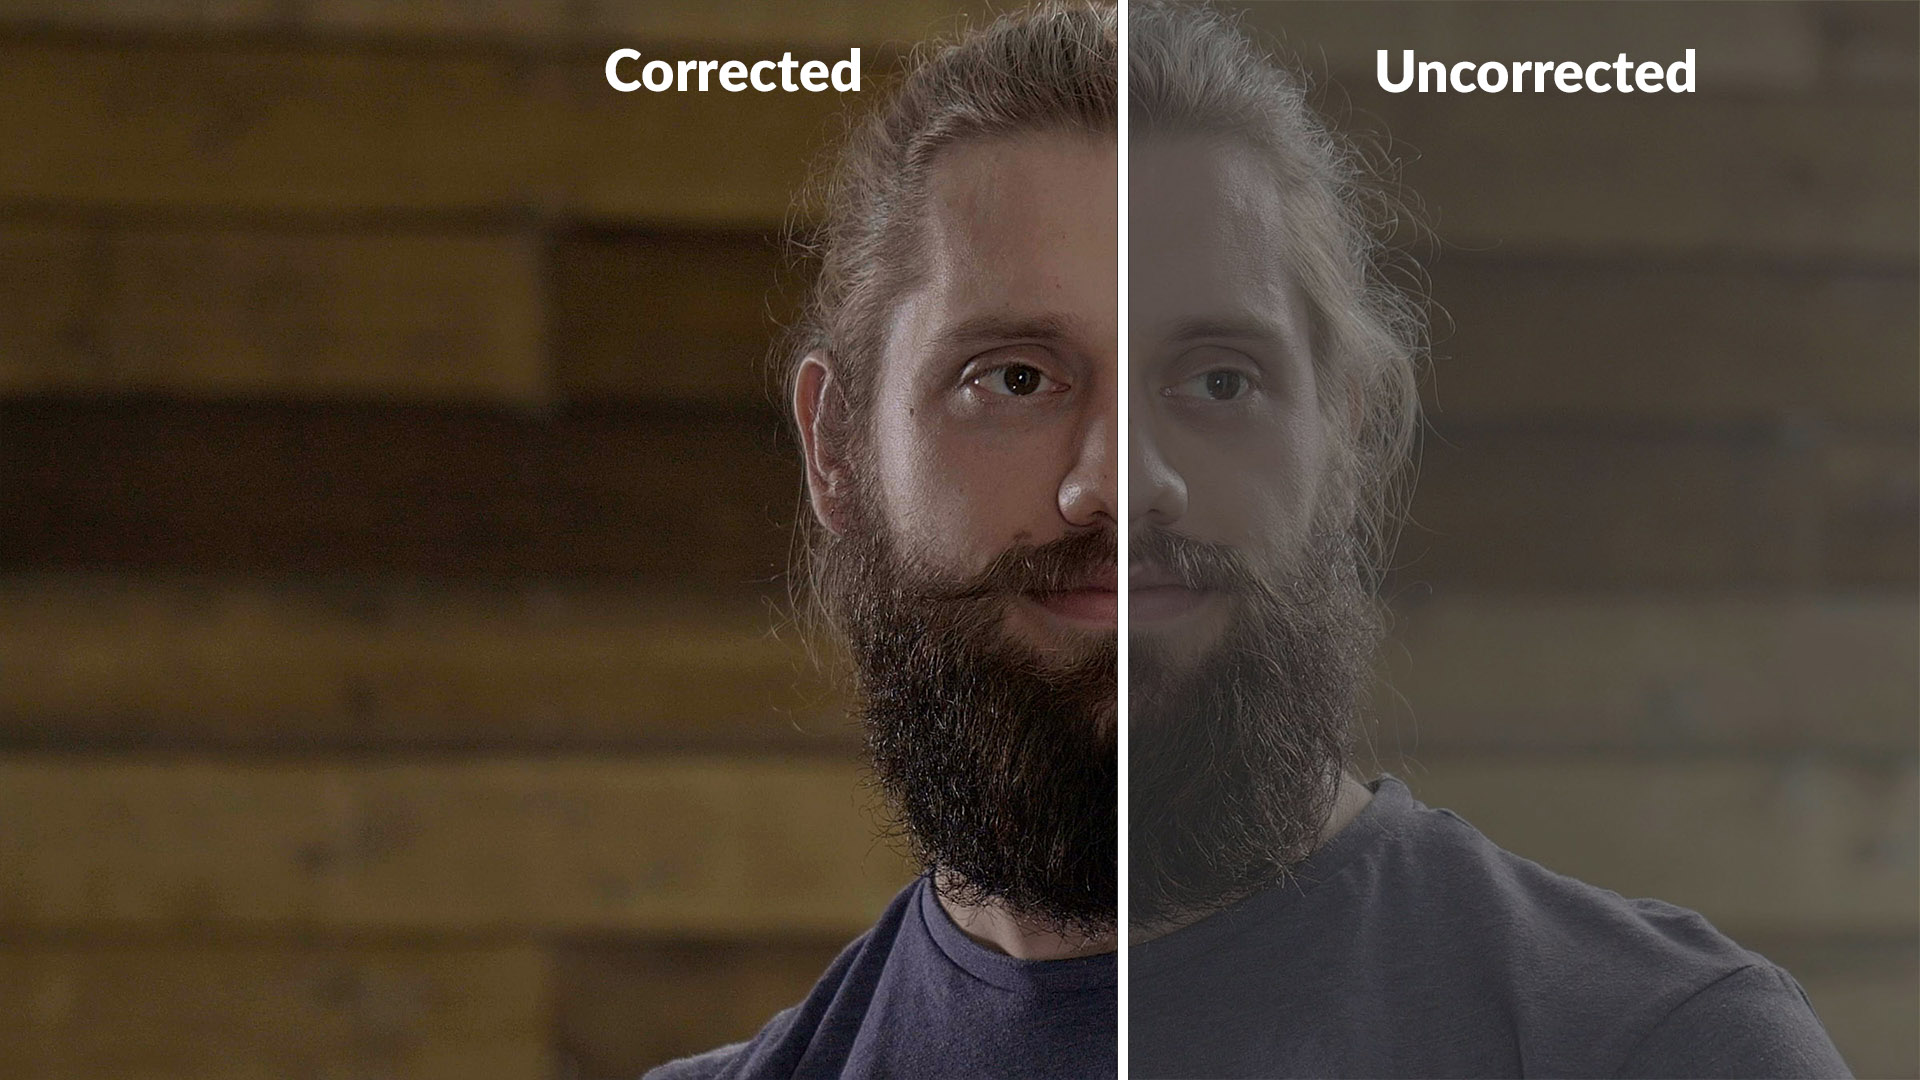
- Color correction
Color correction is all about making your footage look as natural as possible. To do this, we need to ignore any creative preference we have, and just make sure it’s correctly exposed, the right white balance, and the colors look true-to-life.

- Shot to shot matching
Once we’ve corrected the color of our pilot clip, we can apply that same correction to the other clips in the scene. You can do this by saving your color correction effects as a preset and adding them to the other clips.
- Create your ‘Look’
This is where you get to decide how to adjust your contrast, color balance and really fine-tune the mood you want to give off. Keep reading to learn how to get that cinematic grade and make your scenes pop.

- Apply the look across the scene
As with step two, apply your new grade across each of the clips in the scene.
- Apply a final grade
The final step is to polish the finish by tweaking any last parameters to make sure your final grade looks good on each of your shots.
How to get a cinematic color grade
There are no hard-and-fast rules when it comes to grading, but here are a few tips on things to bear in mind.
Keep it subtle
Changing the colors too much will cause the grade to be too distracting and unnatural-looking, which will shatter the immersiveness of the film.
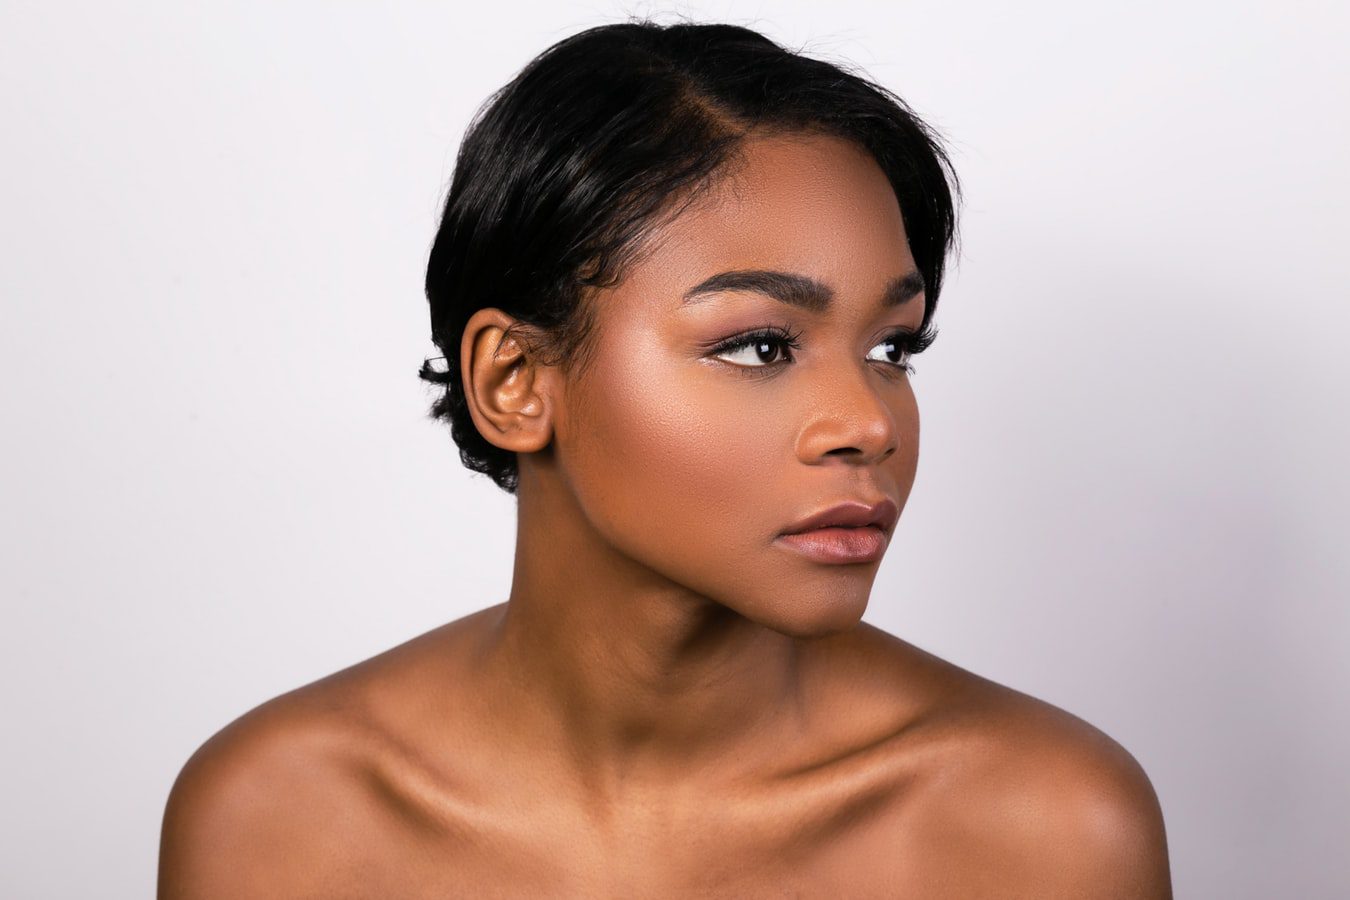
Consider skin tones
Try and keep skin-tones in their natural hues to stop your actors looking sickly or unnatural-looking. This is something we’re programmed to pick up on quite easily. You can use HitFilm’s ‘Vectorscope‘ tool to monitor this in combination with the various other color correction tools available in the software. Learn how to color correct skin tones.
Think about mood
While it’s largely subjective, color does have a strong connection to emotion. Using colors in the right way can help to emphasize mood and will have a huge effect on the cinematic character of your film.
Think about palettes
Professional colorists will usually take an existing image as a ‘reference’. They’ll then color pick some of the important tones in the image to guide their grading process. HitFilm’s handy Grading Transfer effect can do all of this work for you by analyzing the colors in your source image and ‘stealing’ the grade to apply to your own footage.
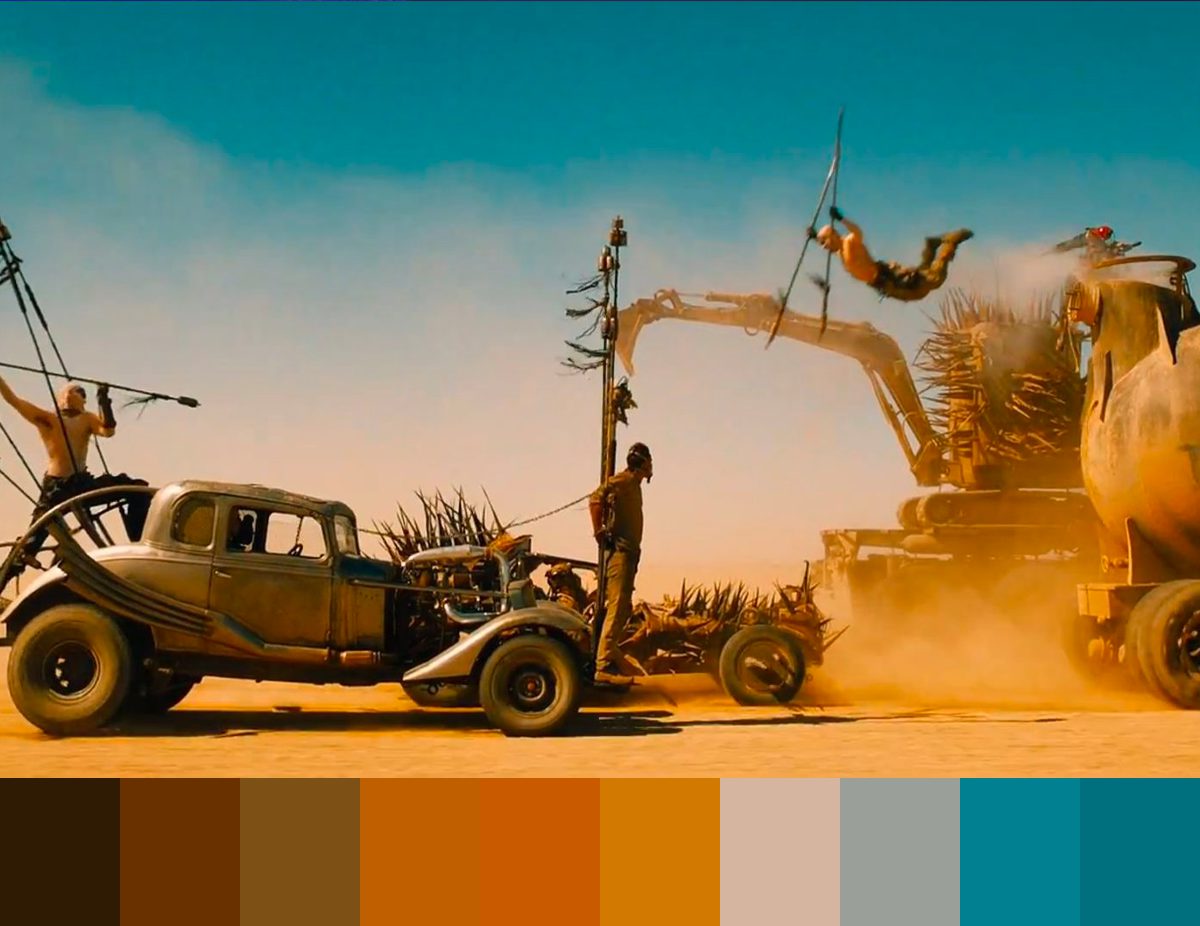
Using complementary colors (colors that are opposite each other on the color wheel) can be a good way to introduce contrast. In contrast, analogous colors (colors that are next to each other on the color wheel) can be used to achieve a strong mood. For cinematic results, try using the Tone Coloring or Duo-Tone to achieve a complementary or analogous color scheme.

Color grading for beginners with HitFilm’s Curves tool
The Curves tool is a colorist’s most powerful instrument. In this tutorial, Javert shows you just how easy it is for even total beginners to get a cinematic color grade in HitFilm.
Start grading today by downloading the latest version of HitFilm – the free video editing and VFX software (it’s the perfect editing and color grading tool for beginners).
Interested in learning more about filmmaking and VFX? Subscribe to our official YouTube channel.
How to brighten a video using color correction
Sometimes your footage can look a bit flat. If it doesn’t really pop and looks like it should be a bit brighter, there’s a better way to brighten a video than just raising the brightness of the footage. Enter the Levels Histogram tool in HitFilm Express.
By using the Levels Histogram tool and some simple color correction techniques, we can make our footage brighter without damaging the quality or blowing out the highlights. Download the free video editing software HitFilm to get started.
Firstly, import your footage into HitFilm from the ‘Media’ panel, and add it to your timeline. Then, search for the Levels Histogram effect in the ‘Effects’ tab. You should see a chart that looks like this in the ‘Controls’ tab. If you can’t see it, make sure you’ve got the dropdown for the effect expanded.
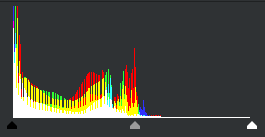
This chart tells us the brightness of the pixels in our footage on a scale from zero to one hundred. As you can see, in our example, the brightest pixels are only around sixty percent. That’s a lot of headroom! Let’s move our white point slider down until it’s almost touching our brightest pixels:
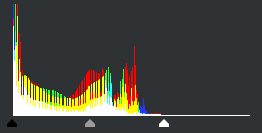
Looks a bit better, right? If you’re footage still looks a bit dark, there’s one more thing you can do. The middle slider is our ‘midpoint’. The midpoint tells us which pixels will be at 50% brightness. If we move it up, it will make most of the pixels darker, if we move it down, it will make them brighter, without affecting our brightest or darkest colors. This means we can boost the brightness of our footage without ‘blowing out’ the highlights by simply moving it to the right.
And there you have it, a quick and easy way to brighten a video using free video editing software. Make sure to subscribe to the FXhome YouTube channel for more weekly tutorials on video editing and visual effects.