


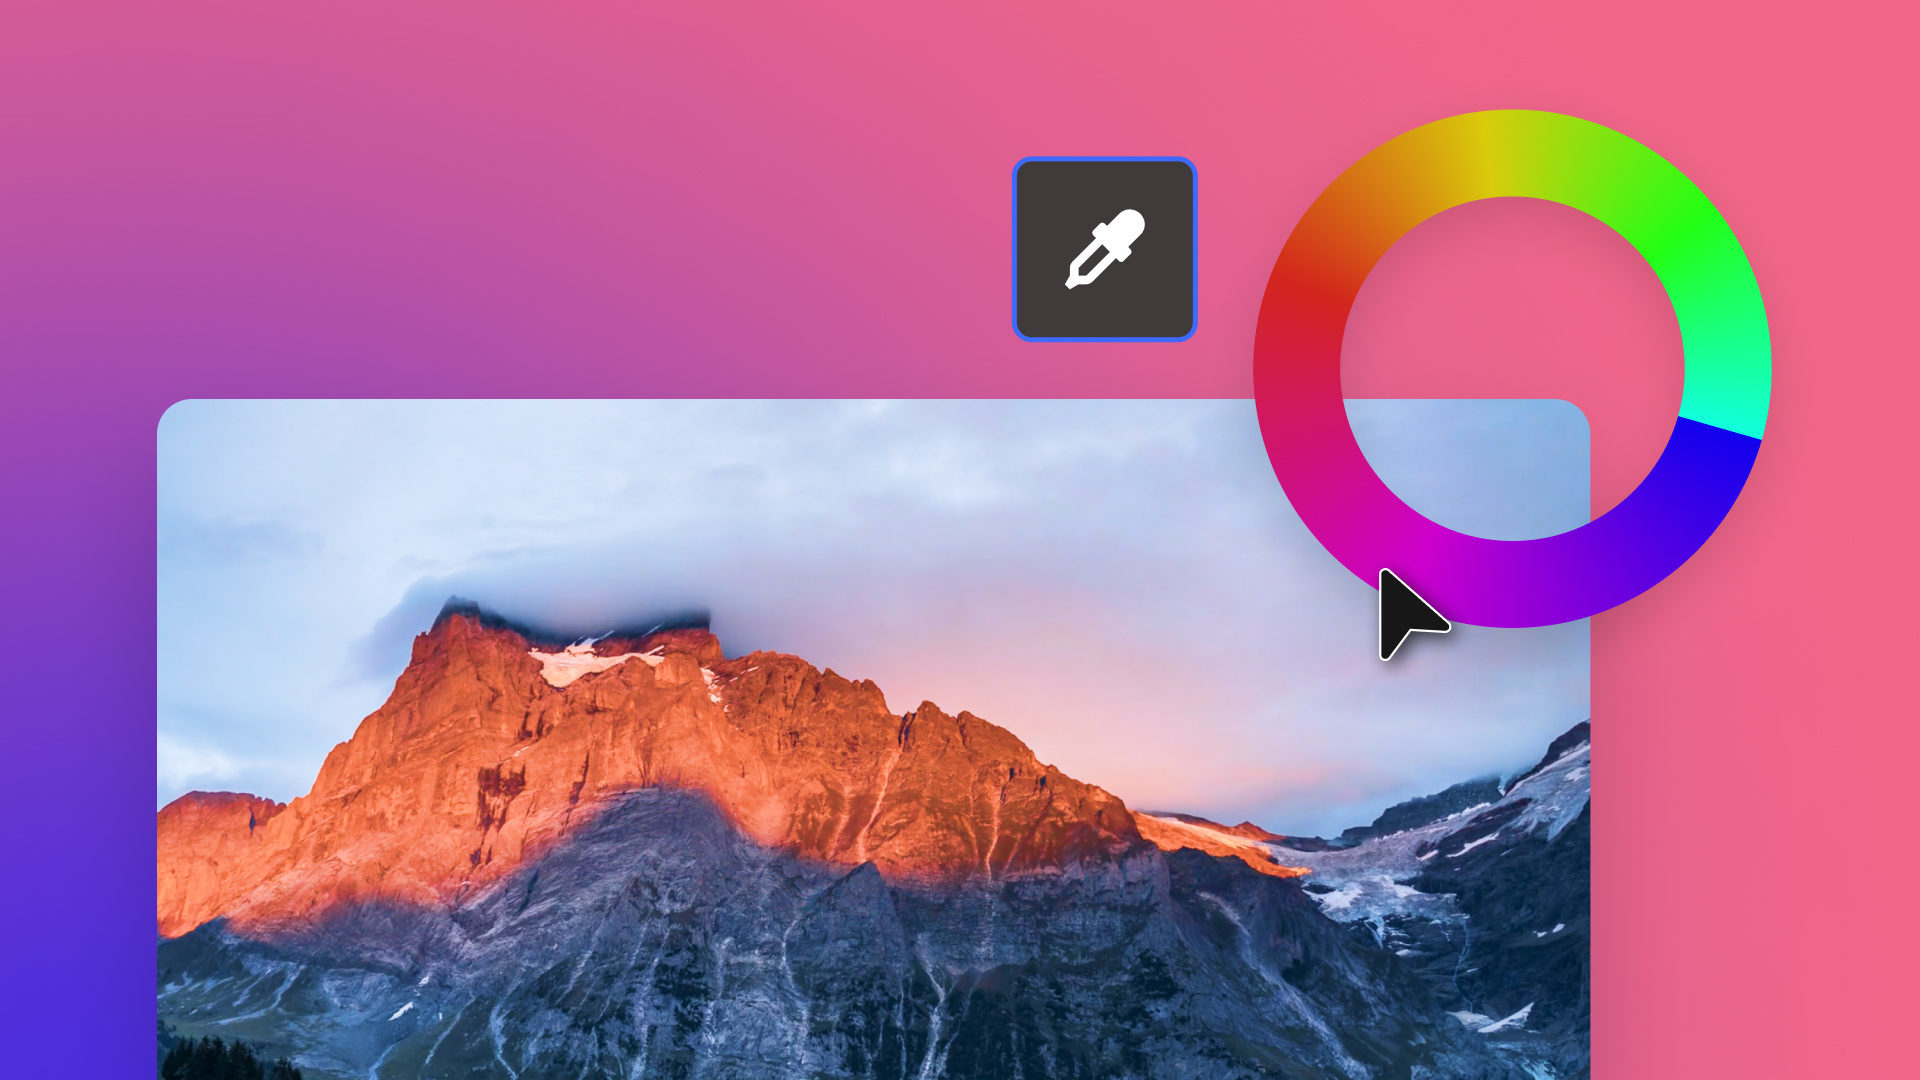
Color grading video is an important part of the post-production editing process.
Also called color “timing” for film color grading, both refer to manipulating image color. It can instantly make shots rich with vibrancy or more drab and dark.
To understand the process in more detail, let’s start with a color grading definition.
What is color grading?
Color grading in video editing refers to purposefully changing its color. Our footage starts with one color palette that we then amend or enhance digitally, but why?
Primarily it’s for additional creative control. Color grading allows an editor to use color in a consistent or artistic way, directing the viewer’s eye and emotional response.
In some cases it becomes a hallmark of a director’s style. Wes Anderson for example, is known to use intense color work to dramatic effect.
TIP: Try to think of the movies or TV shows where you really noticed the use of color.
Color grading vs. Color correction
Color grading and color correction are both performed in post-production. However, they are very different things done for different reasons.
Color correction is about finding a neutral baseline. Not just basic color levels but also white balance, exposure and contrast are “normalized” across every shot.
Correction makes footage look unprocessed and how we see it in real life. Only then should the stylistic, hyper-real enhancements be made in color grading.
TIP: Rec.709 is a display conversion that corrects footage to a standard “on-set” look.
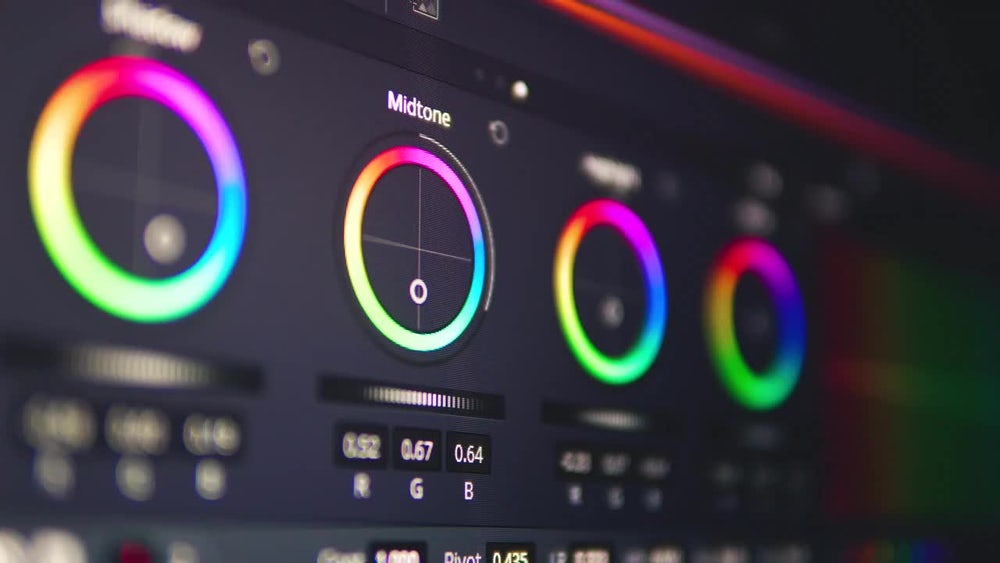
Color theory within filmmaking
Skilled directors, editors and colorists will have some knowledge of color theory. They often use the color wheel to develop high-contrast cinema palettes.
Teal and orange became one such Hollywood favorite for movie grading. It is often used in desert-based action films like The Hurt Locker (2008) and Mad Max: Fury Road (2015) for example.
It helps sand dunes and skies pop because teal and orange are complementary colors. They are opposites on the color wheel, making the difference stark to the eye.
Grading by template (LUTs)
Thankfully we have color grading presets to simplify the editing process.
LUTs or “look-up-tables” are effectively coloring templates or shortcuts. They are used to apply favored color grades in one click, almost like Instagram filters.
LUT packs are often created and freely shared by filmmakers and colorists to make cinematic color grading instantly more accessible.
Whether it’s a nature documentary, rap video or sci-fi blockbuster, there is a LUT to match your vision.
TIP: LUTs are not generally recommended for color correction, only for grading.
How HitFilm makes the grade
One of HitFilm’s many strengths are its editing effects and presets. It has many for both color correction and color grading built-in, with a number of extensions also.
HitFilm Pro even has a “Colorist” workspace available that places important tools up front and ready to go.
Here we’ll identify some top color grading features found in both versions.
Color grading tools and effects
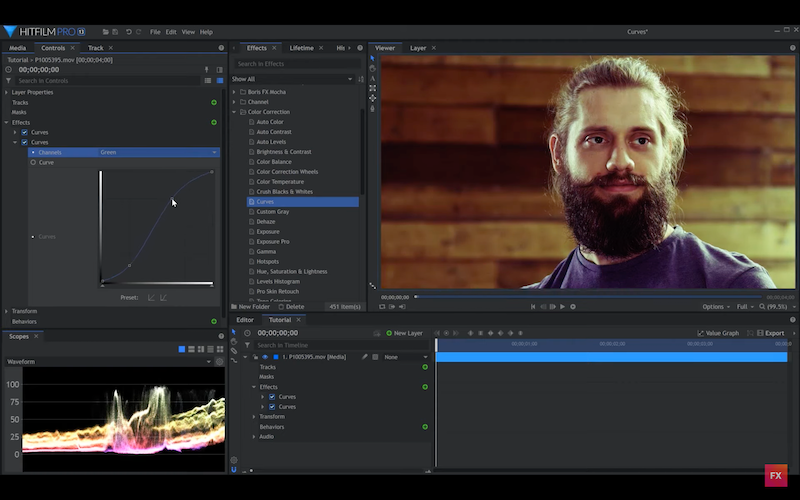
1. Curves: With curves, each RGB channel can be adjusted along two axis, left being dark areas and right being lighter. HitFilm makes it easy to apply multiple Curves effects (Effects > Color Correction > Curves) to a layer and apply an “S-Curve” preset for adding contrast.
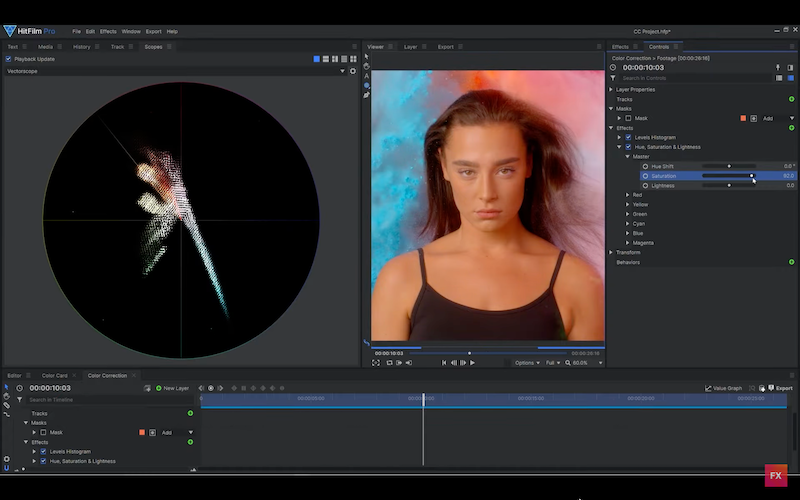
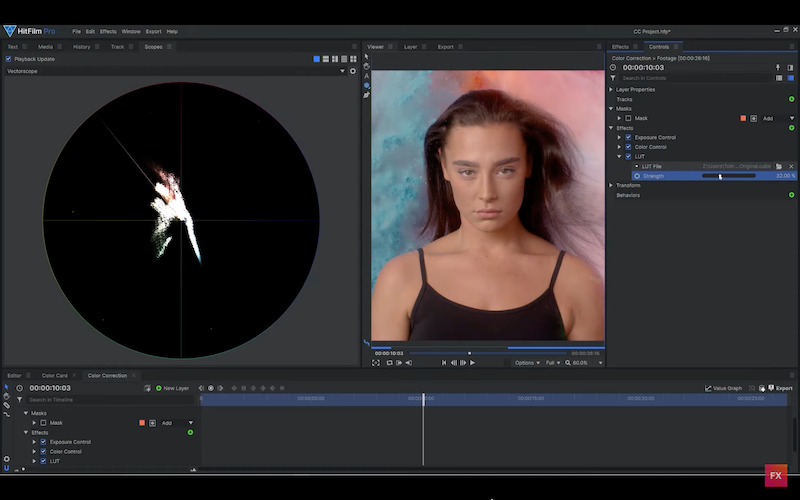
2. Scopes: Used to color correct and grade, scopes are basically graphs. Waveform for exposure, Parade for RGB spread and Histogram for brightness are 3 examples. The Vectorscope for viewing the levels of color saturation is particularly useful when grading, with all scopes available within HitFilm Pro.
3. LUT Effect: Available as standard in HitFilm Pro and found under Effects > LUT, this allows .cube files to be imported for instant LUT color grading.
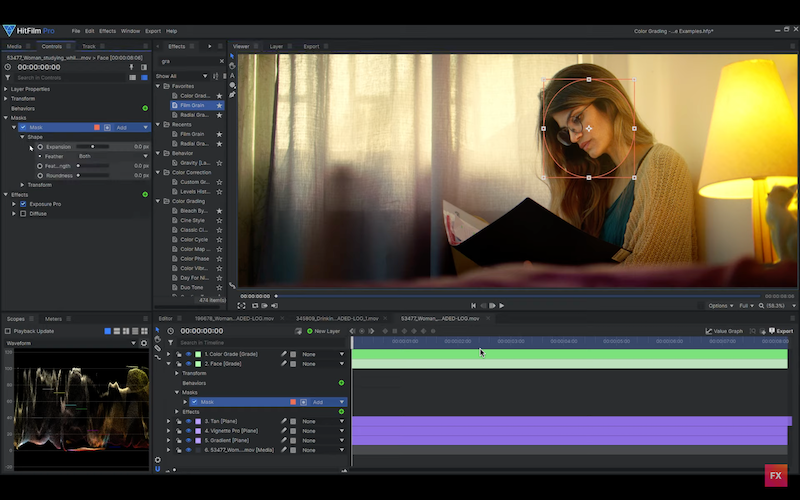
4. Masks: HitFilm supports effect masking when color grading. Use layer masks to select a particular portion of a shot and make corrections or grades only to that area. Very useful for preserving skin tones, highlights or shadows.
5. Hue & RGB Key: This effect can be used to apply a selective, single color to video images. By inverting a color selected by its color picker and dialing down the tolerance, you can pinpoint only certain hues to show in otherwise monochrome sequences.
HitFilm’s various color presets
There are several coloring presets that arrive as standard within HitFilm Express. Here we’ll identify four to describe what they do and suggested use.
| Name | Description | Mood / Use |
|---|---|---|
| Day For Night | Uses a horizon property to apply a gradient that instantly makes day shots look nocturnal. | Turn a sunny afternoon scene into a sultry evening using gamma, brightness and hue controls. |
| Color Cycle | Cycles and shifts colors using a number of presets to achieve extreme results. | Colors look psychedelic or as if shot using an infra-red camera. |
| Invert | Flips each color channel to their opposite tonal values, turning light areas dark and dark areas light. | Provides a film negative effect that can make video look processed like an X-ray or shot in a nuclear flash. |
| Two/Three Strip Color | Simulates the outdated Technicolor film processes used to colorize old filmstock. | Gives artificially rich and deep colors, great for emulating early cinema footage. |
Final tips for top color grading
Color grading is always most effective when you optimize the shoot for the process.
Here are a few final tips worth following before post-production begins:
- Set the scene
Color the things you are shooting to match your grading palette.
- Light it right
If you want color-tinted lighting then use it on set, to boost rather than re-color later when grading.
- Good skin care
Color-correct skin tones to preserve natural flesh complexion.
- Configure cameras
Use recording modes or levels that assist color grading, such as a “log profile” if available.
Log is a special video camera setting or “gamma curve” that captures more visual information to increase dynamic and tonal range.
Shooting in log, such as Sony’s own S-Log, reduces contrast to capture highlights and shadows in greater detail. Although appearing foggy or washed out initially, it offers more flexibility for color grading.
For more on how to edit videos in HitFilm be sure to visit the blog and YouTube channel. HitFilm color correction and how to edit white balance are the ideal next lessons for budding colorists.
TIP: Try reducing camera sharpness, contrast and saturation levels if log is unavailable.
