Learning how to color correct skin tones can be a difficult thing to master. Luckily, finding that ‘sweet spot’ is a lot easier than it seems and can be achieved in a few easy steps. In this article, we’ll show you how to color correct skin tones in any NLE.
First, open your editor. We’ll be using the video editing and VFX software HitFilm for the purposes of this article, but you should be able to follow along in any NLE with similar tools. You can try HitFilm for free if you want to follow along with the specific tools we’ll be using.
Things to think about before you shoot
The best way to see great results is to get it close to perfect in-camera first. If you’ve already got your footage and are eager to start correcting, you can skip on along to the next section.
Utilize proper color planning
Planning the colors you’re going to use in your shots beforehand can save you a ton of headaches in post-production. Where possible, aim for clear color separation between the skin tones and the other areas in your footage. Not only will this make your subjects stand out more, but it will also make it much easier to isolate skin tones for adjustments in the color correction process – especially if you’re planning on a particularly heavy color grade.

White balance
For best results when color correcting skin tones, make sure you capture an accurate white balance on-location. A gray card or color chart can help with this, but using your eyes to manually dial in the right white balance can work just as well.
Avoid using an auto white balance (AWB) when working with video, as this can change over time causing sudden changes in color that will make your footage difficult to work with.
File formats
The file format you choose is going to affect how much data you have to work with. Generally speaking, larger formats will allow you to be more flexible in color correction, but will also consume a lot more storage space.
Most cameras shoot in 8-bit file formats. This means that each pixel can be any of 256 tonal values (from black to white) at any one time. Your camera may also give the option to shoot in 10-bit file formats, allowing a total of 1024 tonal values, or even 12-bit formats that boast a whopping 4096 values per pixel.
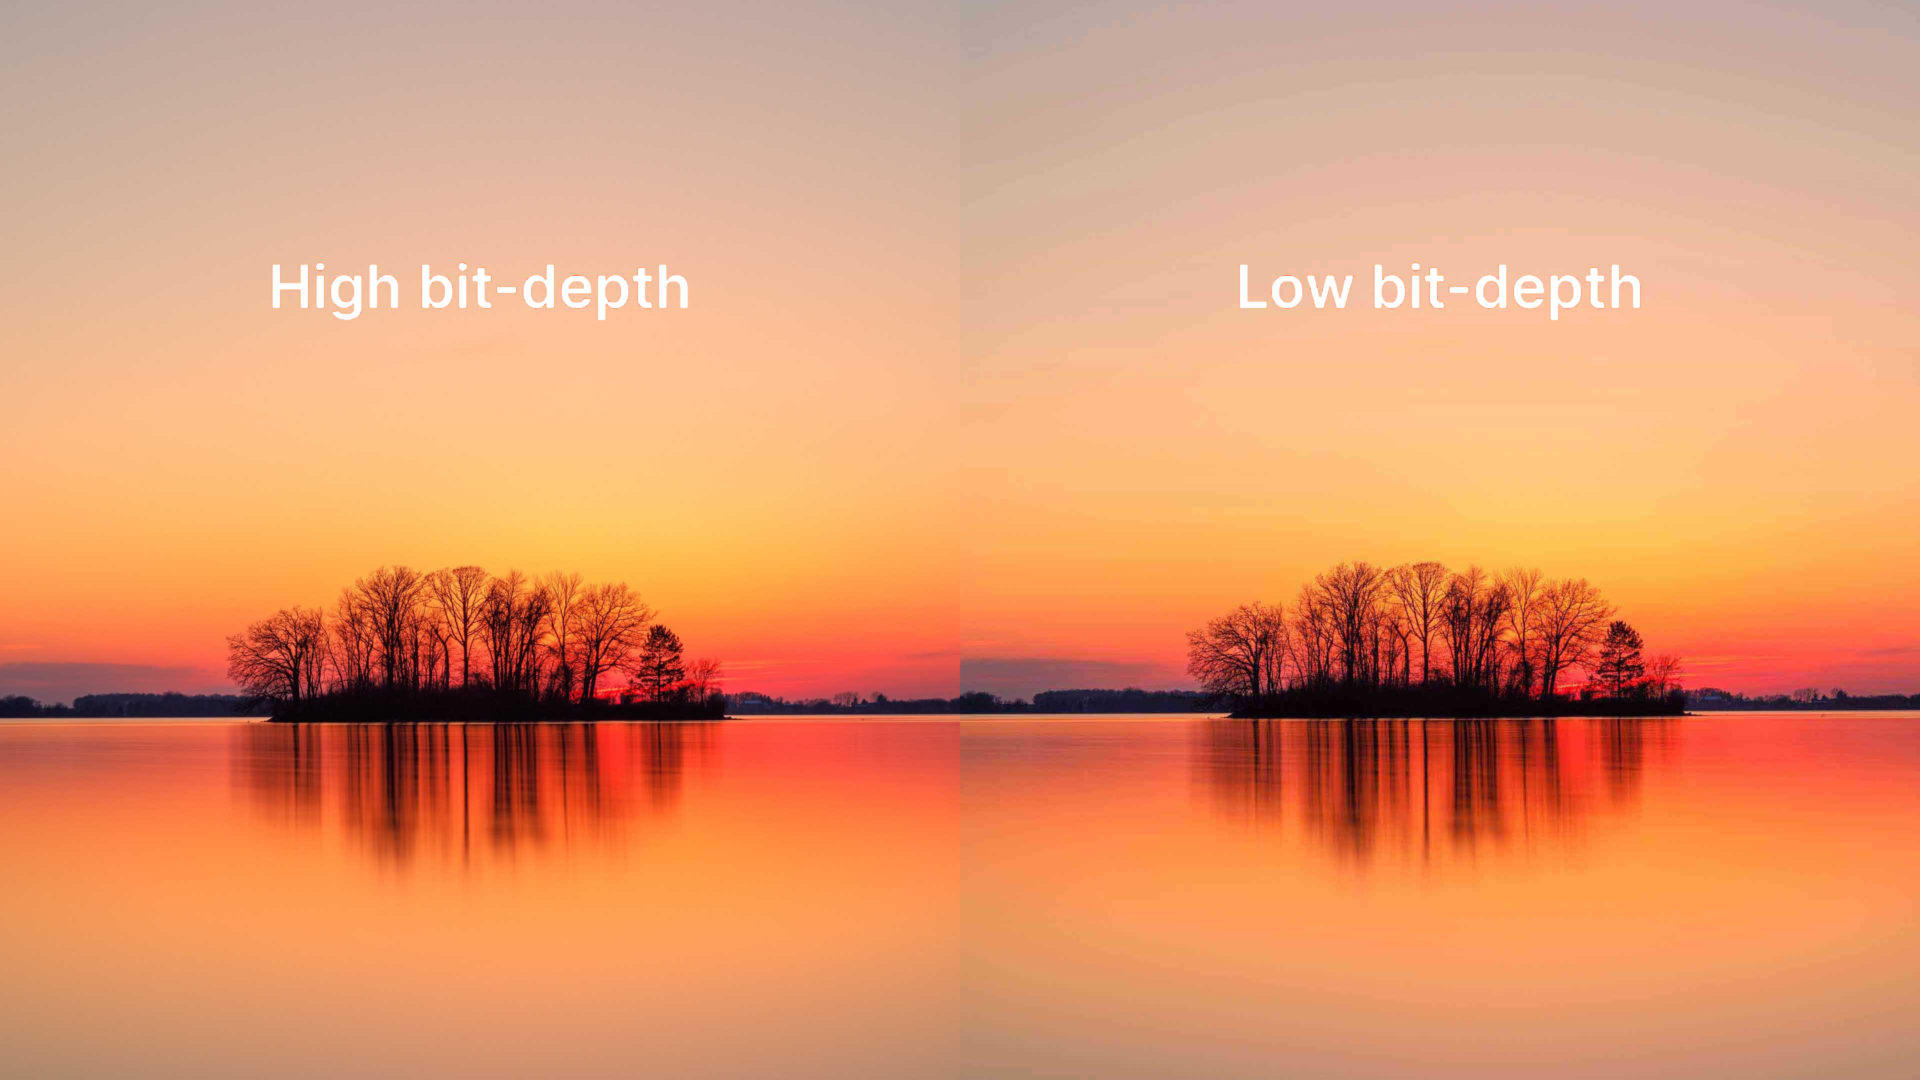
Shooting in higher bit-depth formats gives you more flexibility to push tones around when correcting or grading your footage without suffering from that ugly ‘color banding’. But all of that extra data has to go somewhere, so you can find yourself running out of storage pretty quickly. It’s also worth bearing in mind that your computer may not be powerful enough to process – or might not even support – 10 or 12-bit footage, so use with caution.
If your camera only supports 8-bit footage, don’t worry. It’s perfectly possible to get great-looking footage with normal, 8-bit file formats. You don’t need a high-end camera to make great content.
What is log footage?
Log stands for ‘Logarithmic Gamma Curve’ and is a special way that some cameras expose footage in order to preserve more details in the highlights and therefore achieve a higher dynamic range.
To break down what this means in layman’s terms, ‘Gamma’ is the exposure of any individual pixel in an image, and a ‘Gamma Curve’ takes the input Gamma of the pixels in your footage and applies a corresponding output Gamma along a curve (like a ‘Curves’ effect).
A Logarithmic Gamma Curve is a Gamma Curve that tells the camera “the higher the input exposure, the less I want the output exposure to increase by” making the footage better at exposing strong highlights or scenes with high dynamic range.
Log footage usually looks pretty bad straight out of the camera, but usually gives you more flexibility for color correction in post-production.
How to color correct skin tones in any NLE
We’re going to assume for the purposes of this article you know how to get a good base correction on your footage. If you’re using log footage, convert it to a standard profile, make your exposure adjustments, and if you need to – adjust your white balance. Once you’ve got your footage to a good starting point, it’s time to learn how to color correct skin tones in your software of choice.
How to use a vectorscope
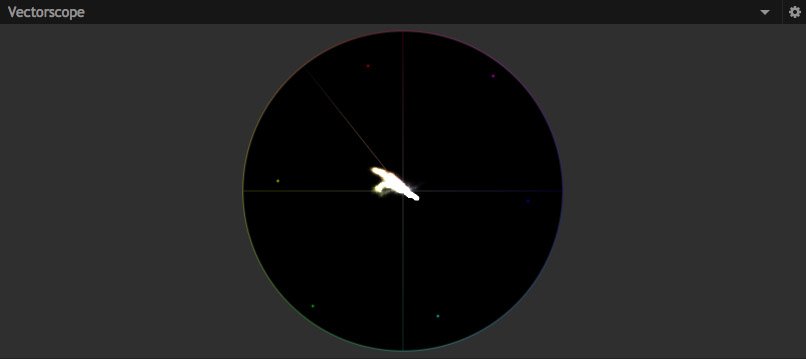
The Vectorscope is the secret to color correcting skin tones. If you’re not familiar with Vectorscopes, they are essentially a tool that allows you to visualize the distribution of color in your footage.
The position around the ‘wheel’ is the hue (e.g. red, blue, or orange), and the distance from the centre is saturation. A higher concentration of white ‘values’ on the scope indicates that the colors represented in that particular region have a higher presence in the image.
Most vectorscopes include a ‘Skin Tone Marker’ (no prizes for guessing what it’s for). This marker – which is usually represented as a line between the red and orange areas of the scope – gives you a guideline for where skin tones should lie. Regardless of your ethnicity, the natural color of your skin is likely to fall along this line in a properly corrected image.
Quick tip: Mask around the skin in your footage so your vectorscope is only showing the skin tones. This removes distractions and makes it much easier to see how close to the Skin Tone Marker the colors already are.
If the skin tones in your footage are already lining up with the Skin Tone marker on your vectorscope, great! You don’t need to make any adjustments. Time to move on to getting that perfect color grade! If your on-screen talent is still looking a little sickly, here’s how to color correct your skin tones for the best results.
Using Color Correction Wheels
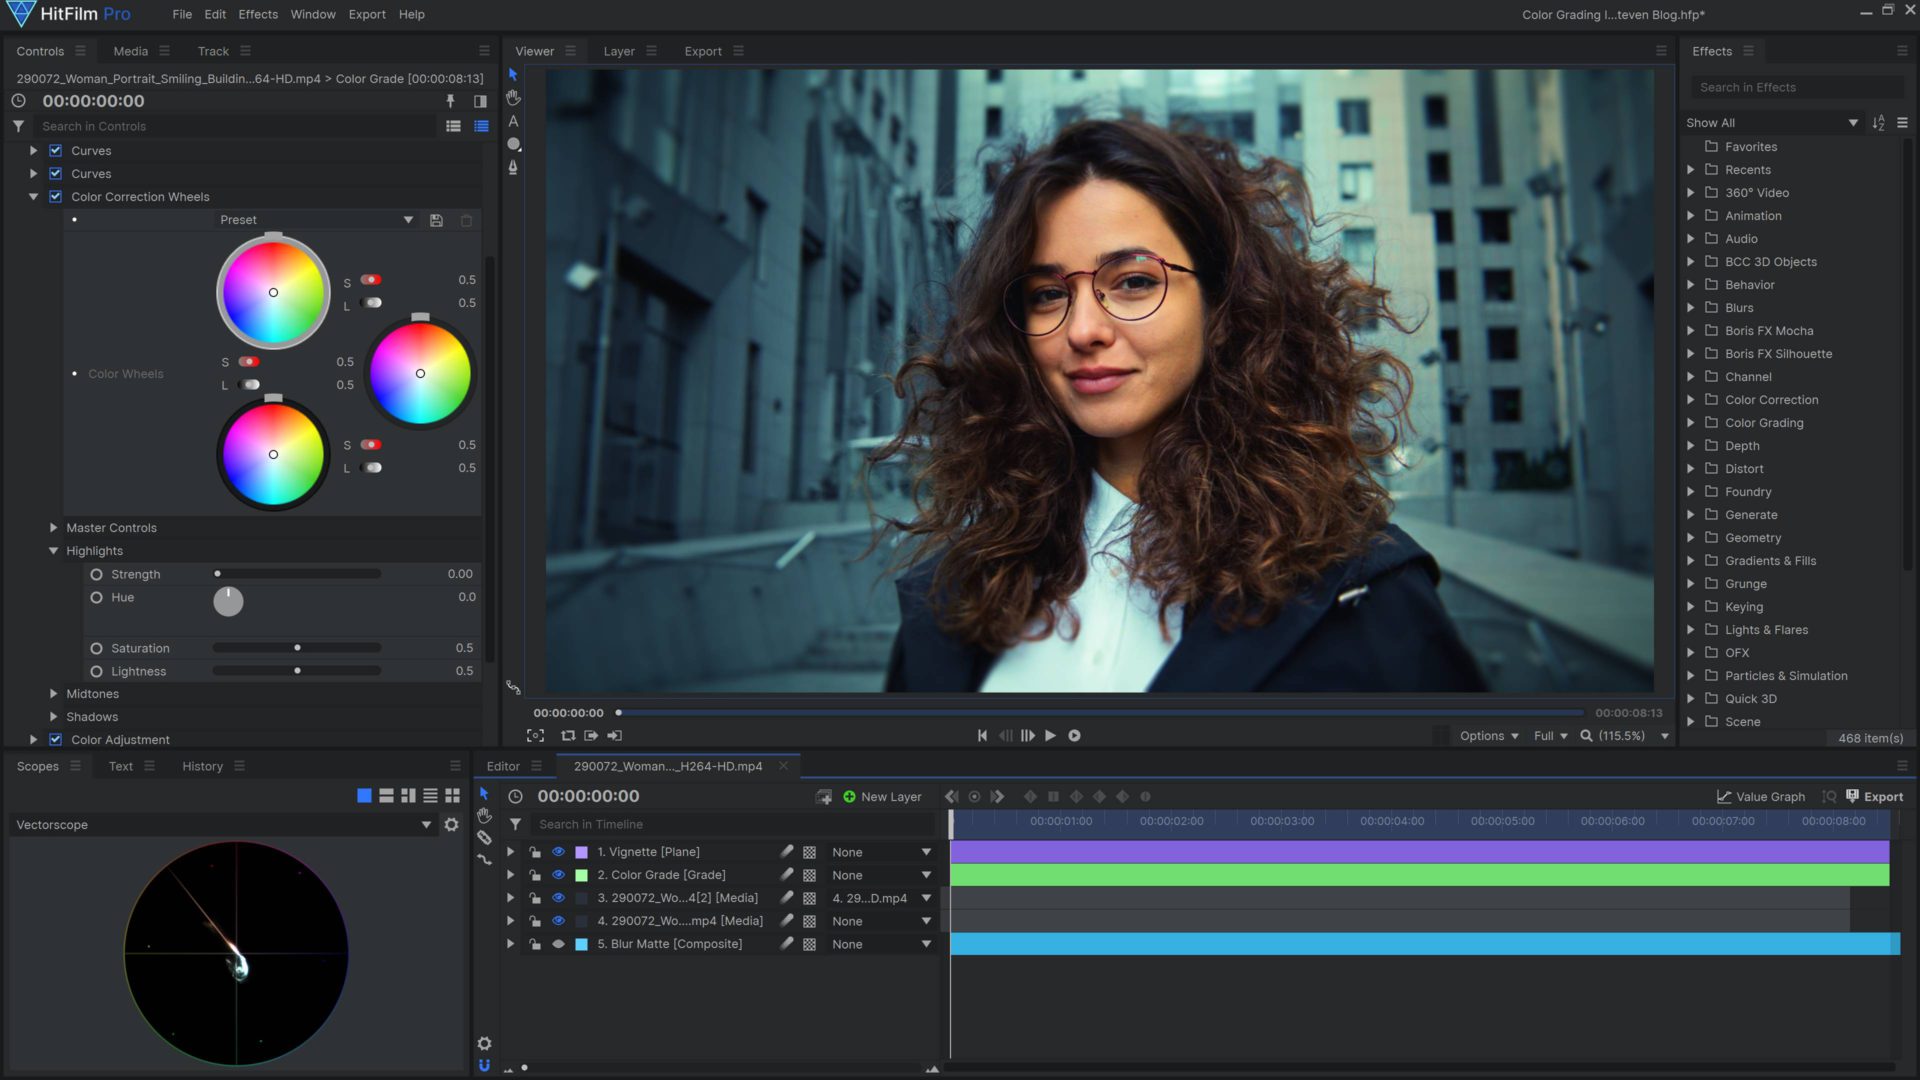
Color Correction Wheels allow you to adjust the color balance of shadows, highlights, and mid-tones independently of each other. Color Correction Wheels are a quick and easy way to make small adjustments to footage on the fly.
Depending on where your skin tones already sit in relation to the Skin Tone Marker, you’ll want to make an adjustment with these wheels to move it closer. Knowing what to move and where is a fairly intuitive process, as you’ll be able to see how your adjustments are affecting the position of data in the Vectorscope in real-time. Once your skin tones are sitting neatly along the Skin Tone Marker, you’re good to go!
Using Curves
Like Color Correction Wheels, Curves can also be a powerful tool for making custom color adjustments. Curves are probably the most versatile tool in a colorist’s toolkit, but they definitely come with a bit of a learning curve (pun most certainly intended).
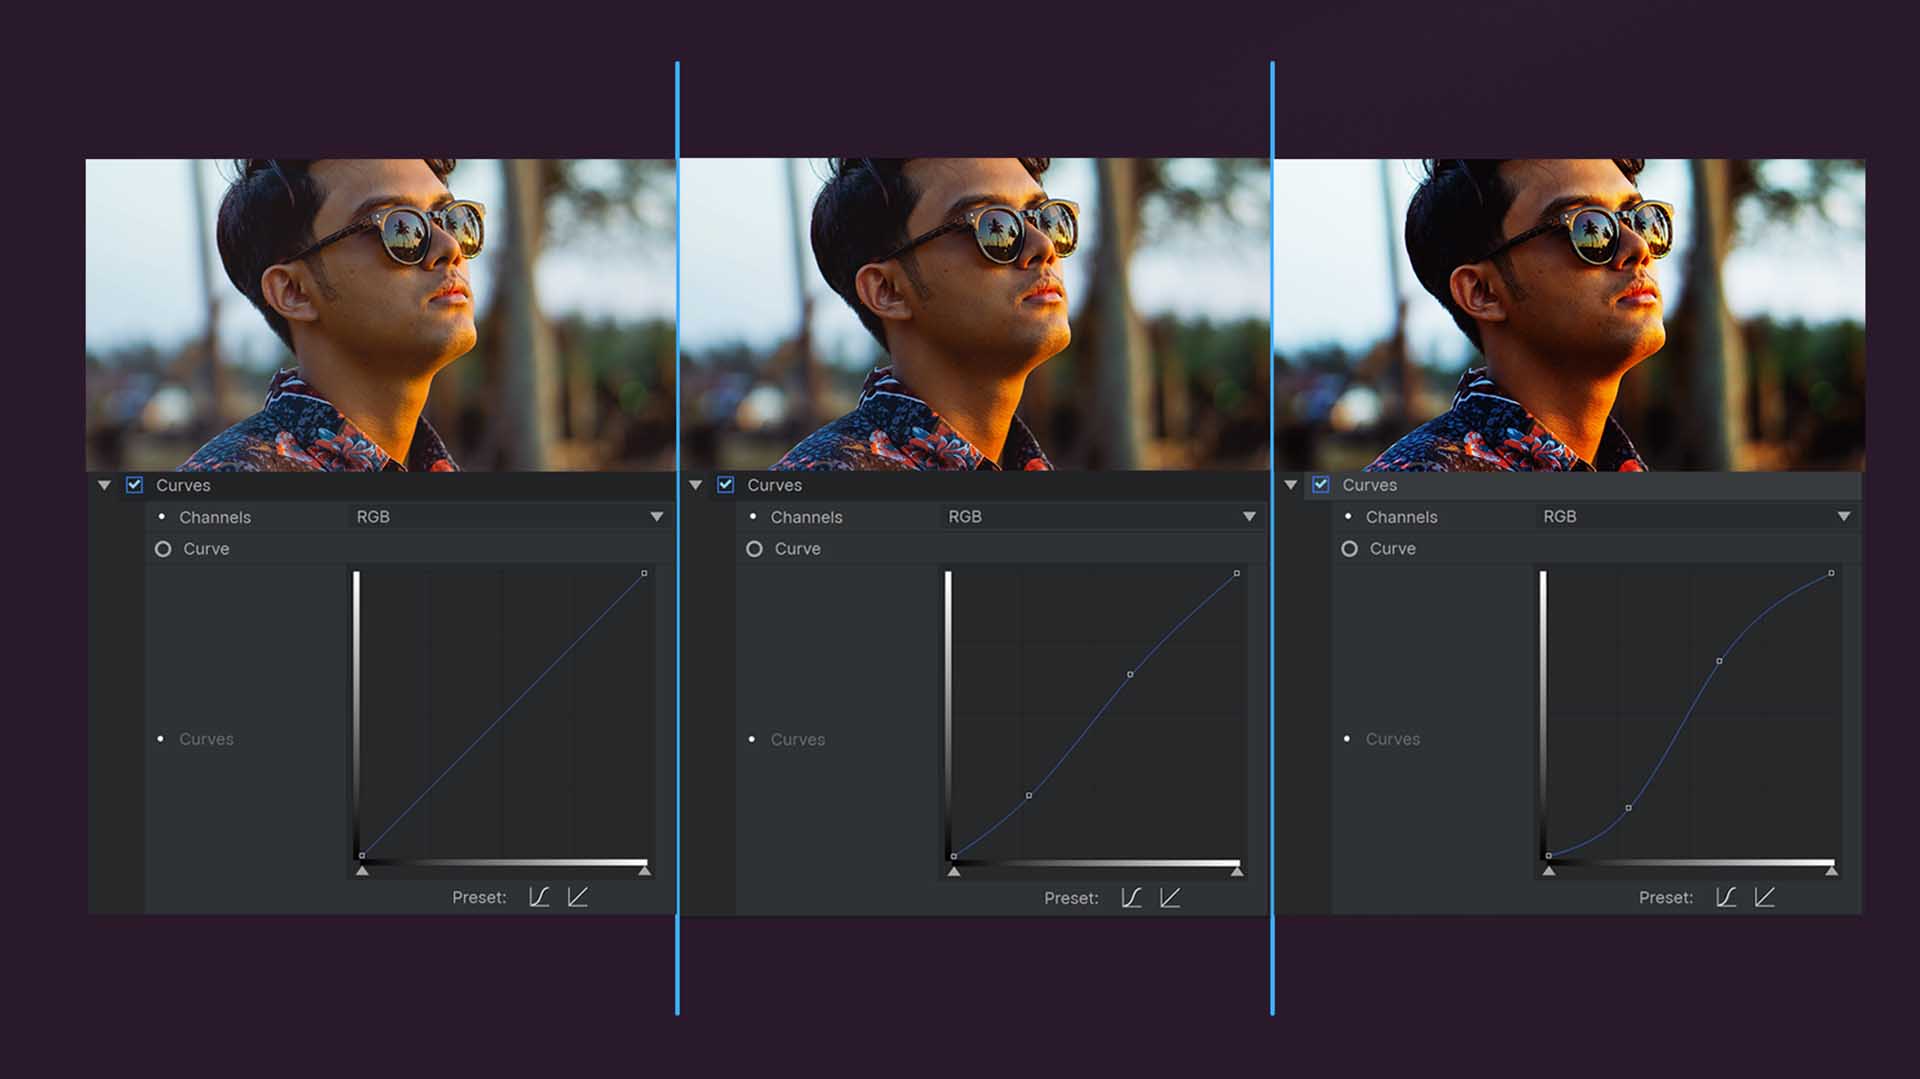
Most Curves tools will come with a ‘global’ curve, as well as a curve for each of the three RGB color channels (Red, Green, and Blue). The RGB curves are the ones we’ll be using to correct our footage.
The thing to remember about Curves is that the X-axis is your input value, and the Y-axis is your output. To provide a few examples: If you move the bottom-left value up the Y-axis, the ‘black’ pixels in your footage will become gray. If you move the top-right value down the Y-axis, the ‘white’ pixels in your footage will become gray. If you place a point in the middle of the curve and drag it down, the midtones will become brighter whilst leaving your blacks and whites where they are.
Much like the Color Correction Wheels, Curves can be used to adjust the color balance of different regions of exposure in different ways. Curves have the advantage of being completely flexible in these adjustments, unlike Color Correction Wheels.
Using curves for color adjustments can require some mental gymnastics. If you’re trying to add more red, green, or blue into the mix it’s pretty intuitive, but as you only have these three channels to work with, you have to figure out how other colors relate to red, green, and blue.
The easiest way to do this is by referencing a color wheel. If you’re trying to add more cyan into your footage, it’s opposite red, so you need to bring the red channel down. If you’re trying to add more yellow, it’s the opposite of blue, so you should reduce the blues.
When working with curves, it’s important to keep your adjustments subtle. Big curve changes can result in unnatural-looking footage because it always squishes brightness values together over a given range.
The easy way to correct skin tones in HitFilm
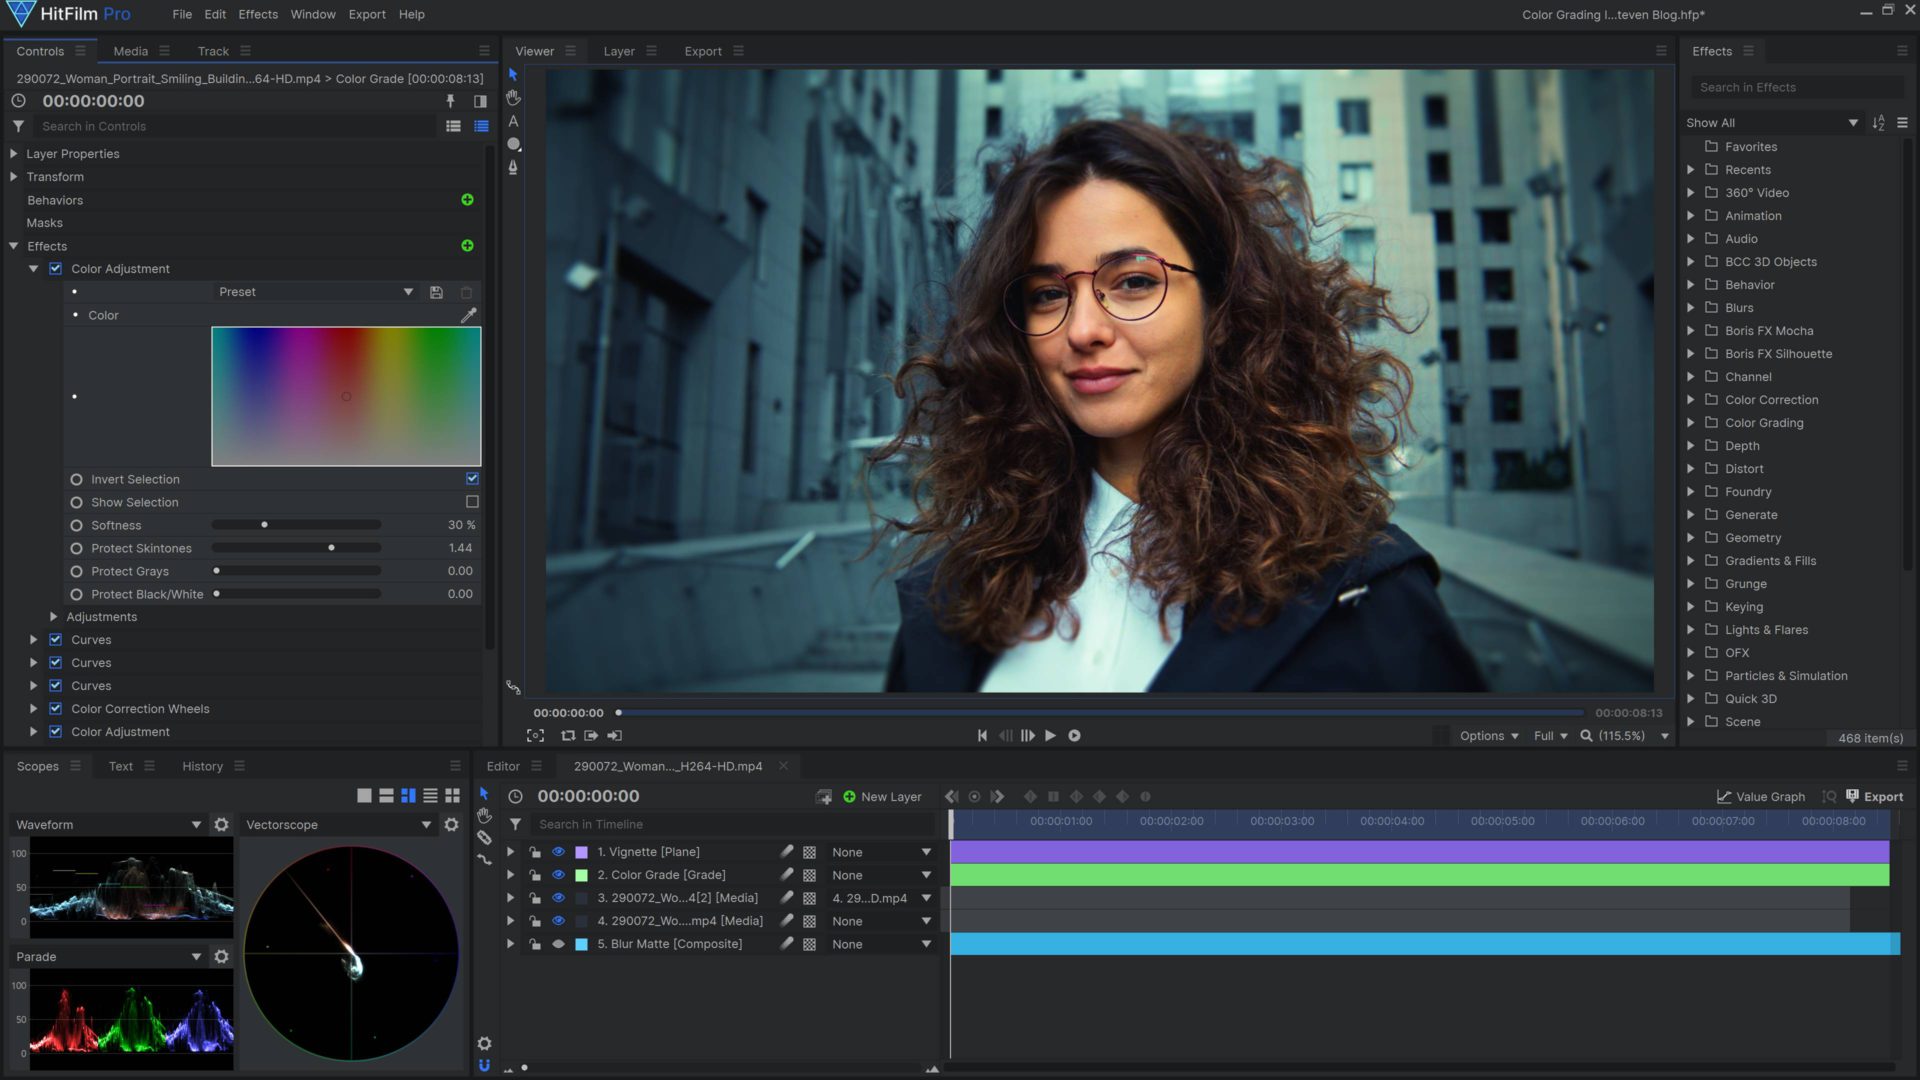
Curves and Color Correction Wheels are both tried and tested methods for color correction, but there is an easier way. HitFilm includes a handy ‘Color Adjustment’ effect that brings the whole process into a single tool so you can easily make skin tone adjustments on the fly.
This tool can be broken down into three parts
- The color selector
- Mask refinement tools
- Color adjustments
The color selector allows you to select any color range based on a cross-section of hue and saturation.
Below it, you also have options to ‘Protect Skintones’, ‘Protect Grays’, and ‘Protect Black/White’ – which carve out those areas of color from the adjustment. You also have a ‘softness’ option which dictates how harsh of a selection the adjustment makes.
Below this is the ‘adjustments’ menu which allows you to ‘shift’ or ‘replace’ the selected color values in a customized way.
To correct skin tones in the Color Adjustment effect, leave the color selector on the whole spectrum, then check the ‘Show Selection’ option, and raise the ‘protect skin tones’ slider until the skin tones in your footage are black and everything else is white (or as close as you can get to it).

Once you’ve found a good selection, just check the ‘invert’ option and you’ll have selected the skin tones in the footage. You can then go to the ‘Adjustments’ menu and make changes to hue, saturation, or lightness to bring your colors in line with the Skin Tone Marker. Make sure to set your adjustment to ‘Hue Shift’ rather than ‘Hue Replace’ as this preserves the subtle variation between red, orange, and yellow that is characteristic of natural skin tones.
Bonus tips for color correcting skin tones
Check your work
It’s crucial when performing color correction or any kind of color adjustment that you scrub through all of the frames in your footage to check everything is working as expected. If you base your entire correction on a single frame, you could end up with some unexpected effects in the other frames that ruin the look of your footage. Adjust, scrub, perfect, repeat.
Bump up the realism
Sometimes isolated tonal changes can make the colors in your footage feel slightly ‘flattened’ toward a particular hue. Whilst usually not necessary, it can be worthwhile to make some small adjustments in the shadows and highlights to recover the natural hues you’d expect to see – particularly when correcting skin tones.
One such technique is to use the Color Wheels (or Curves if you’d prefer) to add a little bit more of a red hue to the shadows in your skin tones. This emulates the subtle red light that’s sometimes reflected through the shaded areas of human skin.
In the same vain, we can sometimes accidentally change the bright reflections on the skin to look mismatched to the color of the light source illuminating it. In this case, we can utilize a similar technique to shift the highlights back toward the original light source’s color again.
Using the above two techniques on top of our standard skin-tone color correction process, we can achieve skin tones that appear both accurate but also true to the environment in our shots.
There you have it, a step-by-step guide to color correcting skin tones in any NLE with standard color adjustment tools. If you haven’t already, make sure to try HitFilm for free here, and check out our Filmmaking 101 masterclass for all of our top filmmaking tips.