Welcome back to another episode of our CamTrackAR Masterclass. In the previous tutorials, we had shown you how to film a scene using CamTrackAR, the benefits of the paid vs. free version, and how to take your footage and composite it in HitFilm using a pre-rendered CG background. In this tutorial, we’ll walk you through how to take your CamTrackAR data and apply it to your CG background so you can composite it in HitFilm.
How to use your CamTrackAR data in Blender
In order to use CamTrackAR data in Blender for the first time, you’ll need to install a plugin – this only has to be done once:
- First, navigate to Edit > Preferences > Add-Ons.
- Select Install, then navigate to the CamTrackAR folder
- Select the Python file and install.
- Lastly, ensure that “Enabled Add-ons Only” is ticked.
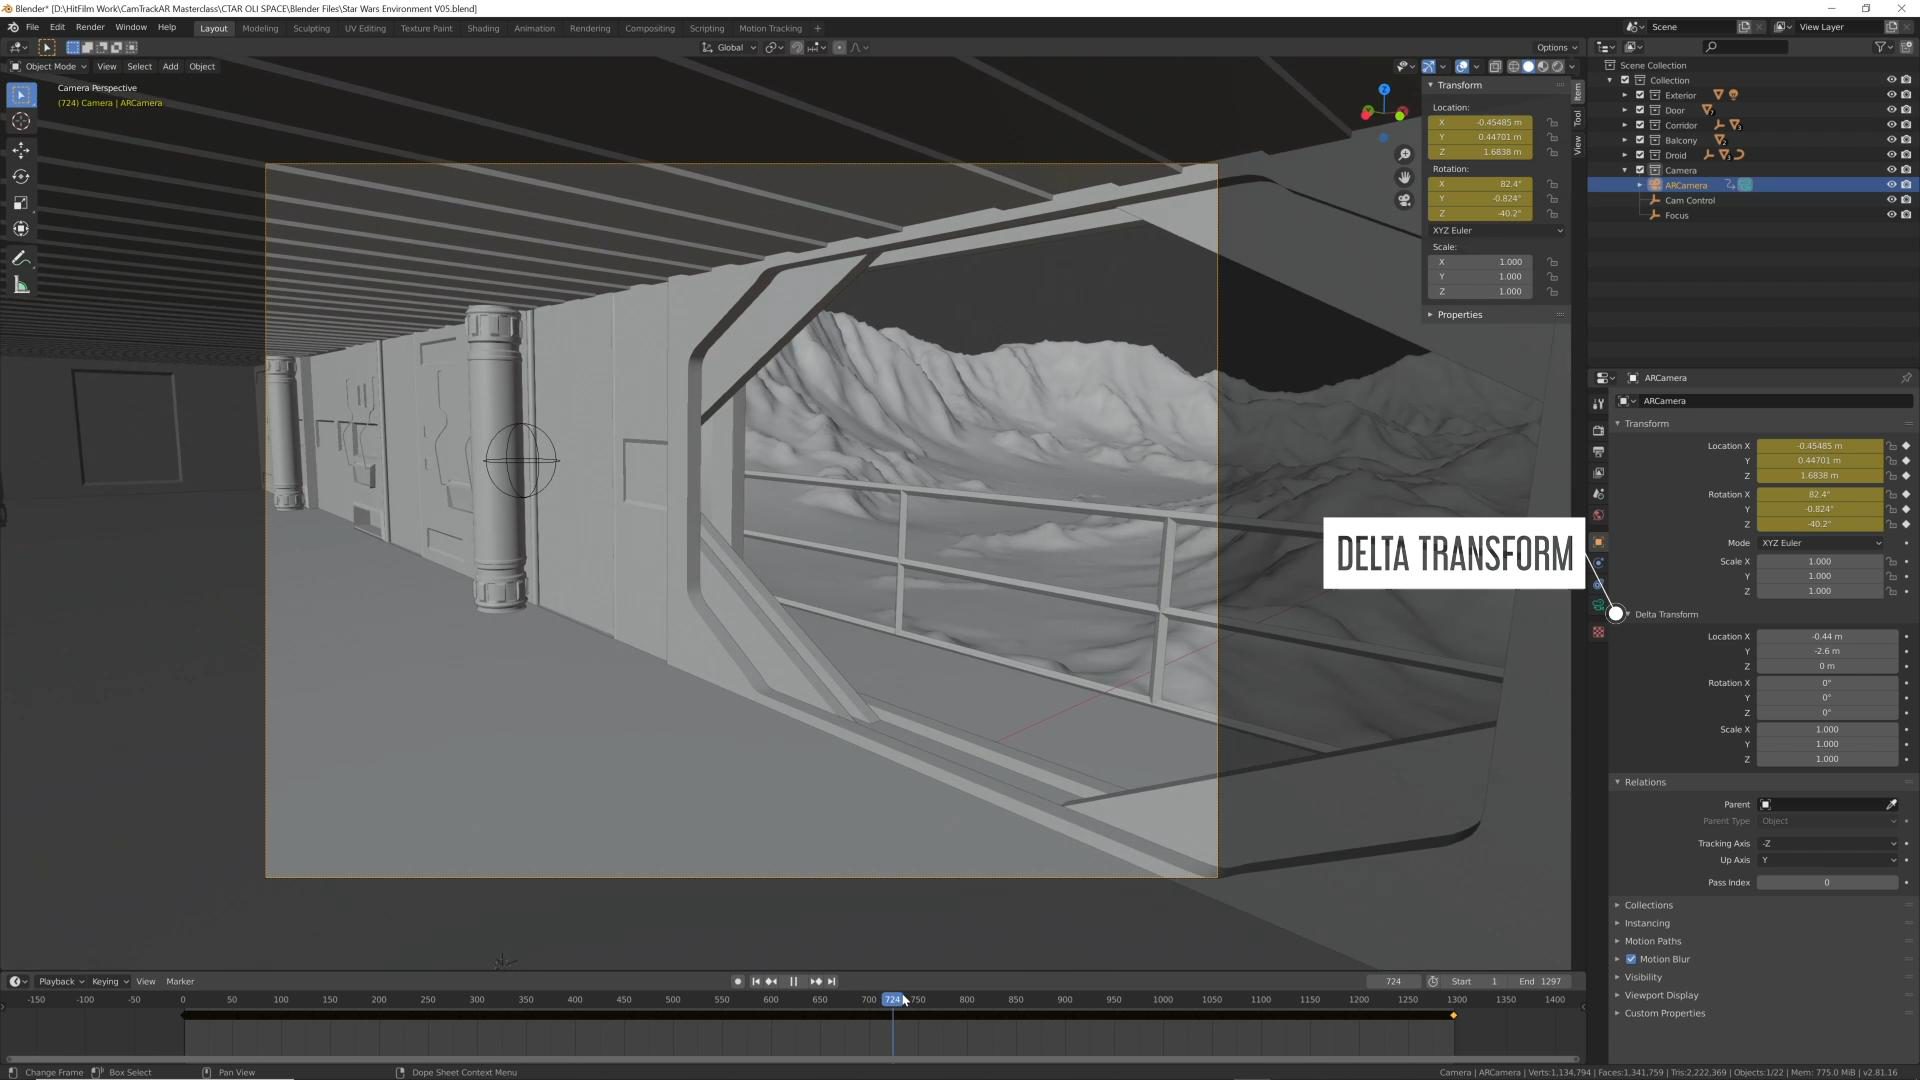
Our scene was made using assets from Video Copilot’s Star Pack and Sketchfab for the mountain. To import the CamTrackAR data go to File > Import > HitFilm AR Tracking Data. Next, find the take you want and select the .hfcs file. Lastly, select the layer and hit 0 on your keyboard to view the scene from your Camera’s perspective – now, your virtual camera should match the camera’s movements when filming on set.
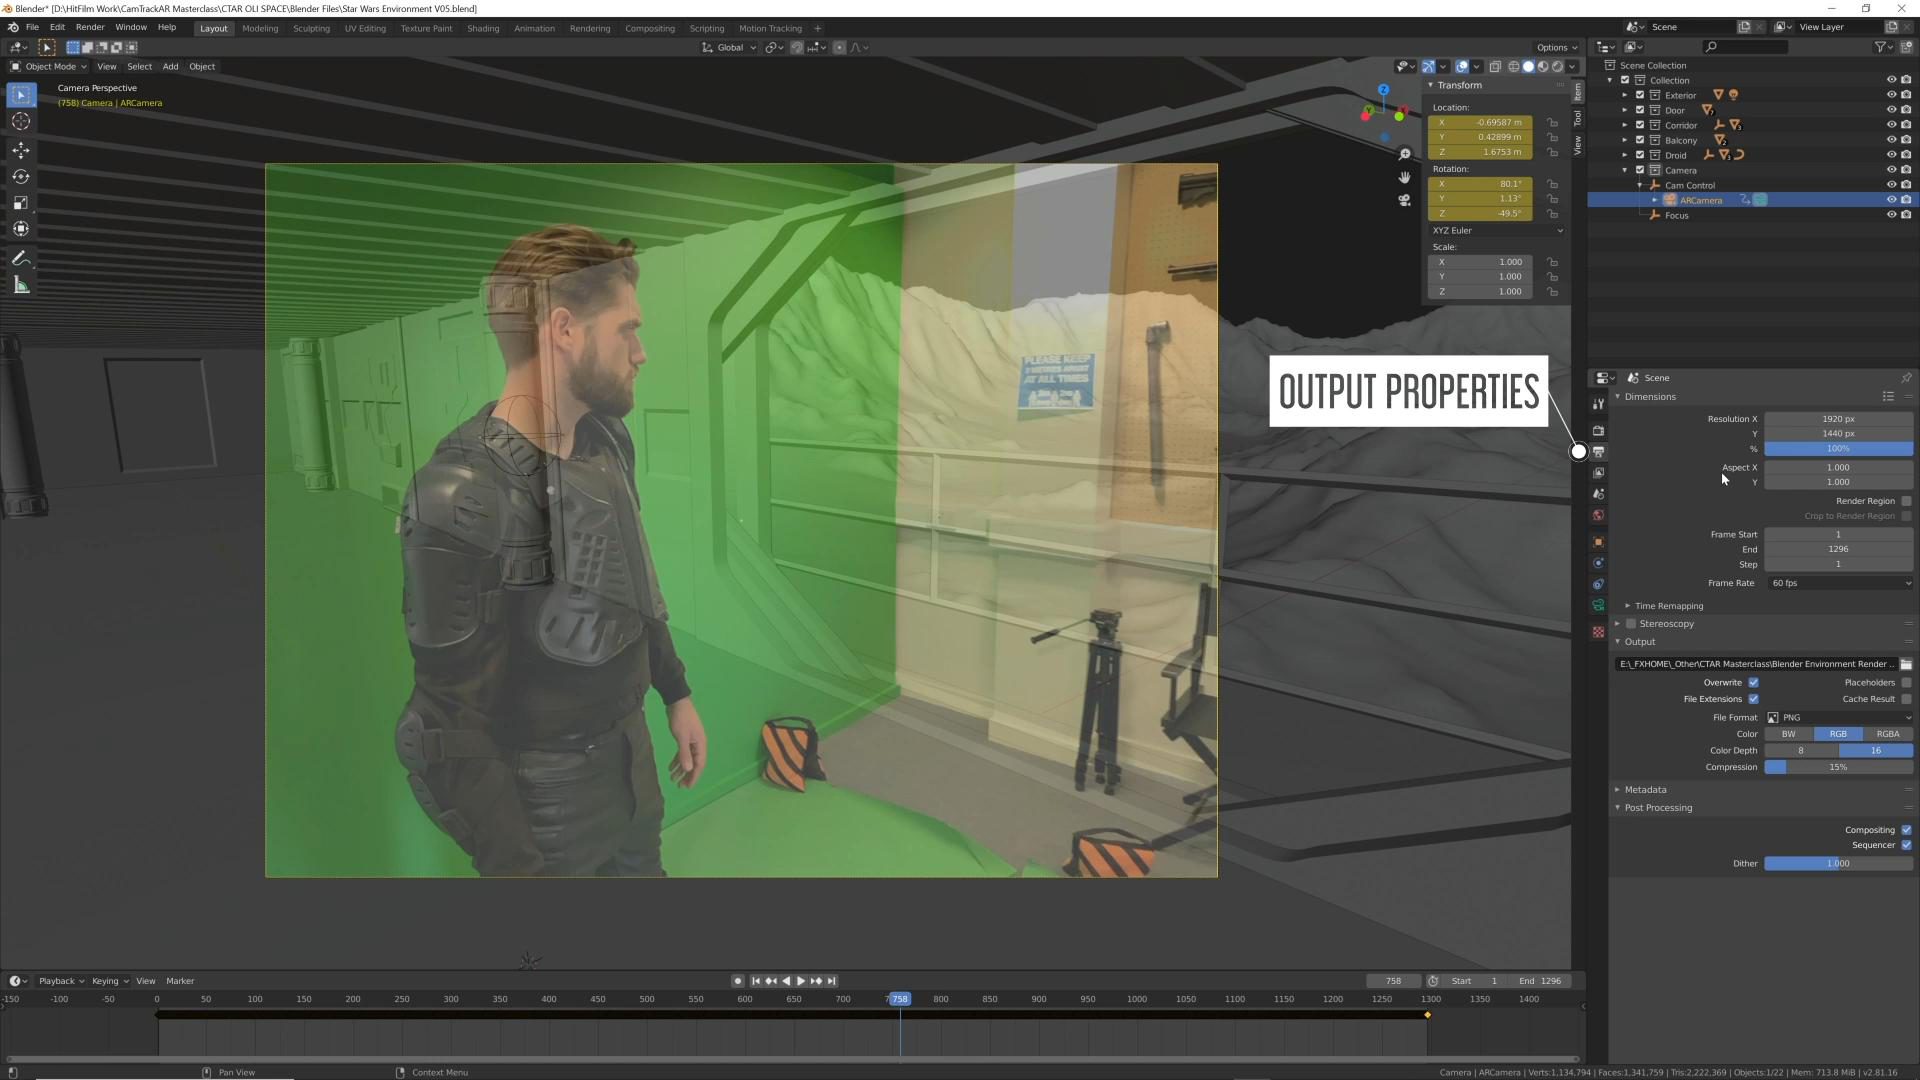
It’s unlikely that the camera is positioned correctly; You can fix this by adjusting the Delta Transform in the settings on the right. This will move the camera but maintain the tracking data. One thing that might be useful is to be able to see your video footage. To do that, go to the Object Data Properties tab and checkmark Background Images. Select Add Image, change the Background Source to Movie Clip, then open the video file. Lastly, change the Depth to Front to have the video in front of your 3D scene.
Before you export your background, check the Output Properties and make sure everything is correct, including the frame rate. We changed the resolution to 2560 by 1440 as CamTrackAR records at 1920 by 1440. This means that our 3D render needs to match the height of 1440 plus have extra on the sides to maintain the 16:9 aspect ratio.
When you are happy with your scene, pick the folder it’ll be exported to; in this case, it’s exported as a PNG sequence. Then come up to Render and select Render Animation.
How to use your CamTrackAR data in Unreal Engine 4
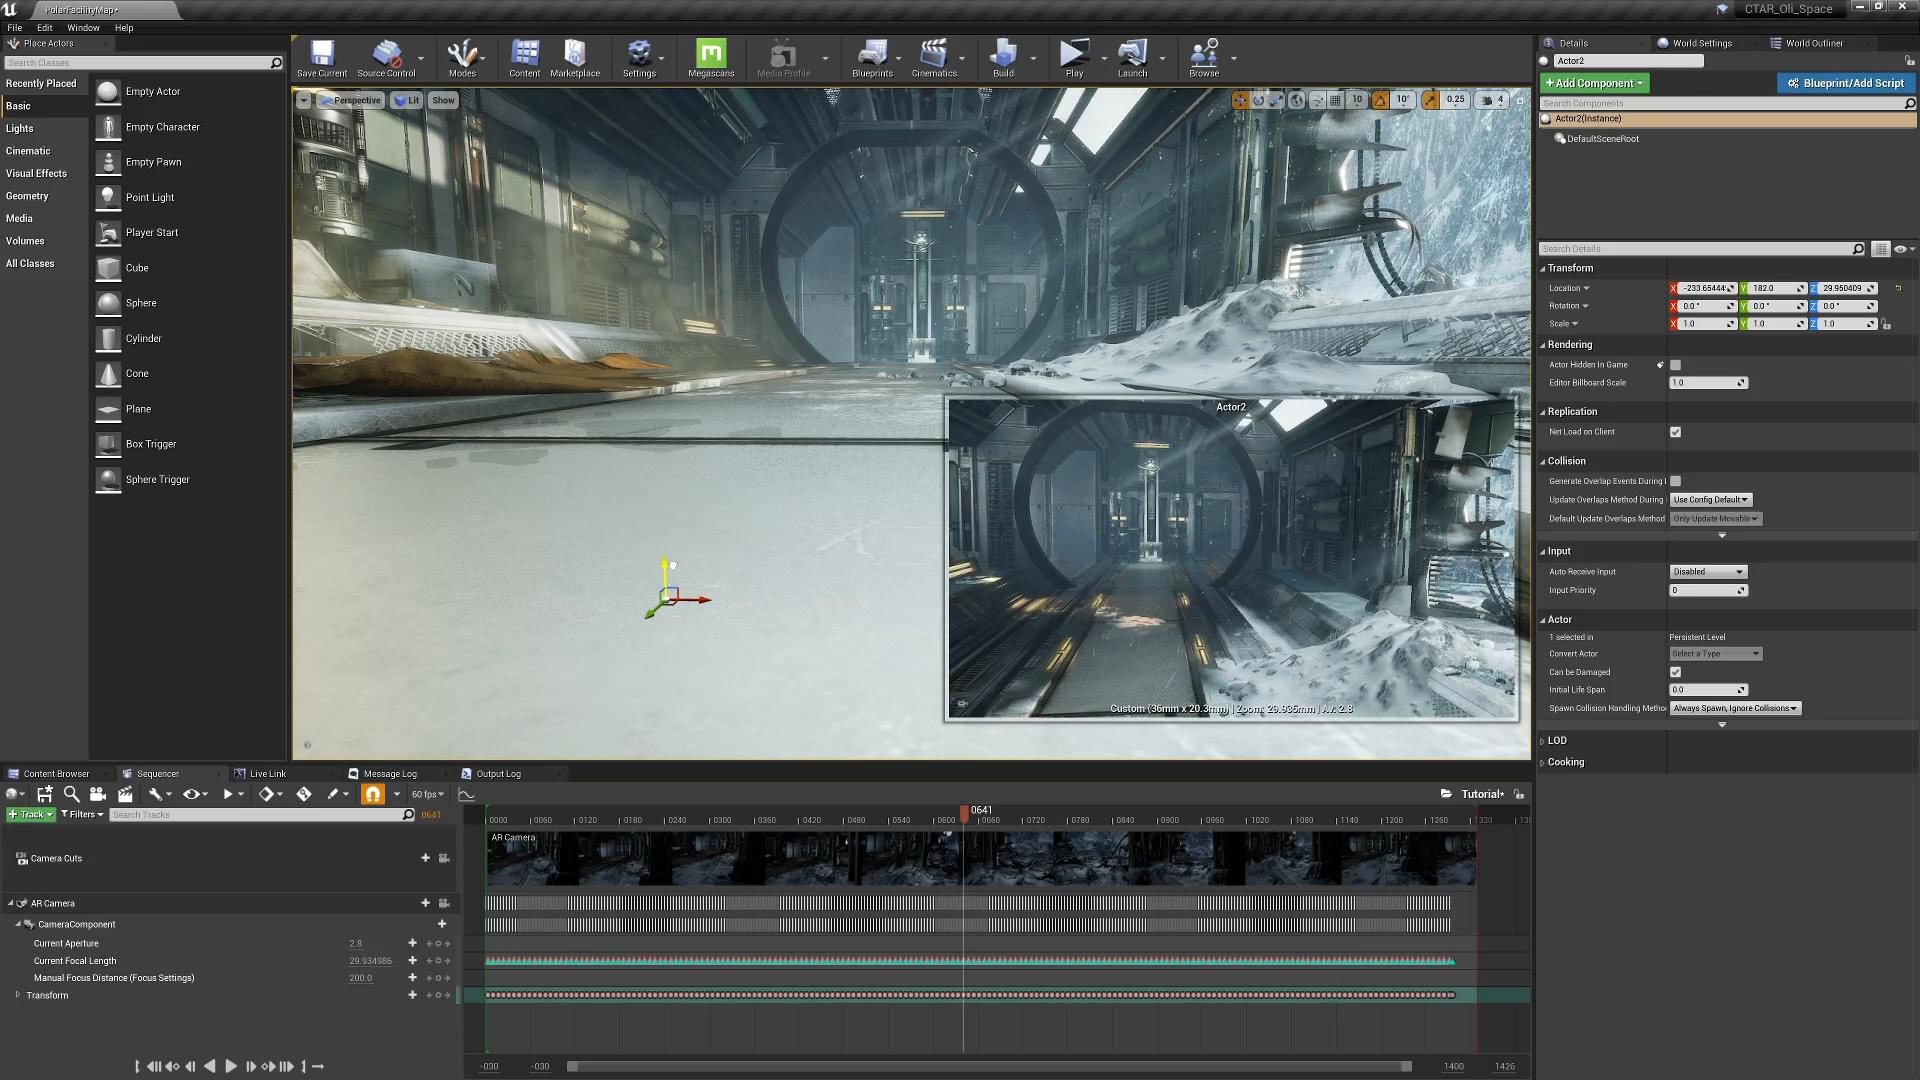
Now let’s learn how to use the tracking data in Unreal Engine 4, which is also free. In our example, we used a Polar Facility map, which is available on the Epic Games Marketplace.
To open the Sequencer timeline, navigate to Cinematics and select Add Level Sequence. Once opened, come over to the Actions icon, select Import, and navigate to the CamTrackAR folder – the FBX file is the one we want. Uncheck everything except Create Cameras and hit Import. Lastly, be sure to change the fps to 60 as it may default to 30.
Upon import, you’ll want to extend the view range with the numbers at the bottom of the interface, move the Out point (which is the red line) and extend the length of the Camera itself to cover the whole timeline. The camera-shaped button beside Camera Cuts will lock the viewport to the camera’s perspective so that you can see the movement. Like we did in Blender, we’ll want to move the camera’s position to be in the correct spot. To do so:
- Drag an Empty Actor into the scene and 0 out its Position in the Details panel.
- In the World Outliner, drag the ARCamera on top of the Empty Actor to parent the former to it. This allows you to use this Empty Actor to move the camera around and maintain the tracking data.
- Lastly, align the Actor with the floor of the scene.
With your camera properly positioned, you can begin to export the scene:
- Select the ARCamera and come into the Details panel.
- Change the Filmback value to 48 height and 27 width- this matches the 16:9 aspect ratio we’ll be going with in the composite.
- Click the Render button in the timeline, leave it as an AVI but change the resolution to 2560 by 1440 to maintain a 16:9 aspect ratio.
- Then click Capture Movie and the scene will be exported.
How to use your CamTrackAR data in After Effects
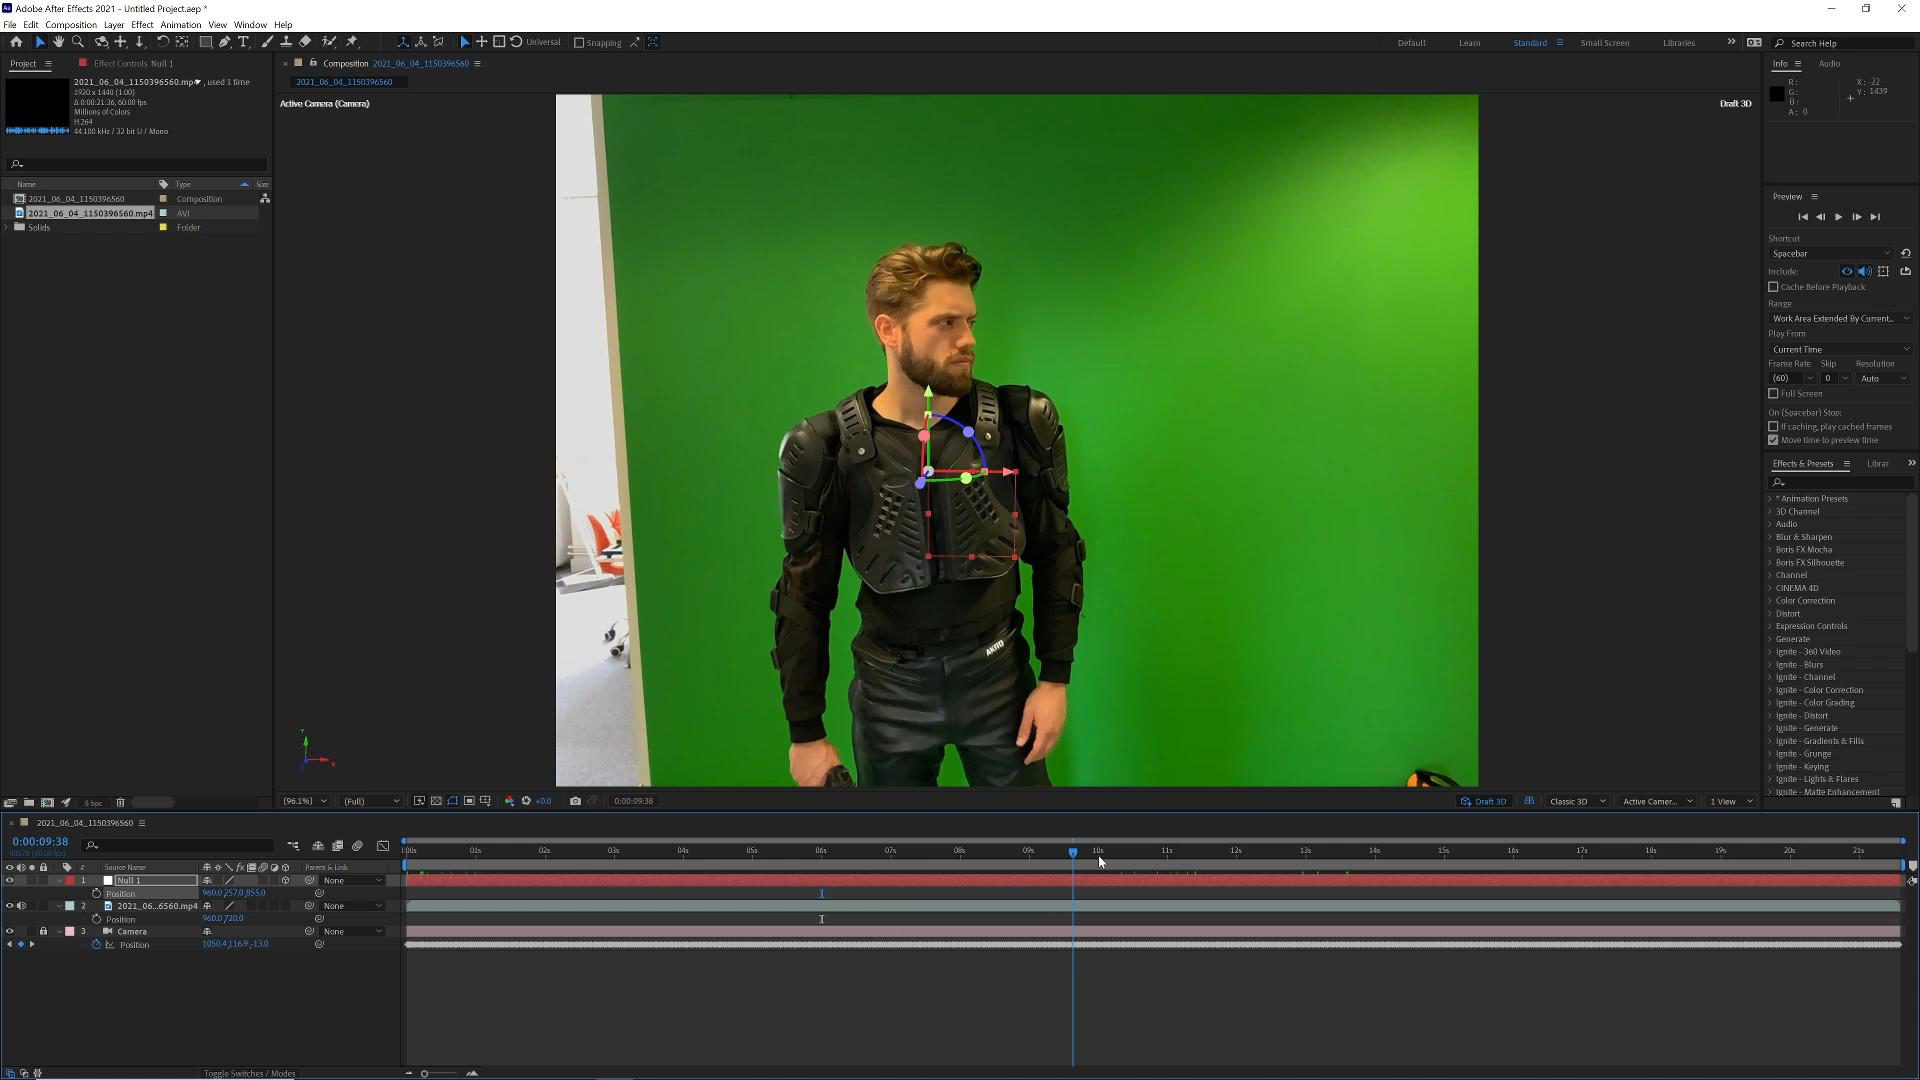
For import into After Effects, what you’re going to want to do is simply go to File > Scripts > Run Script File and open the .jsx file to create a new composition with the footage imported as well. Now you’ll have your footage and your tracked camera on the timeline – any anchor points will appear as null objects.
We hope you have enjoyed this CamTrackAR Masterclass. If you haven’t already, be sure to check out the other tutorials in the Masterclass (How to get started with CamTrackAR and How to composite CamTrackAR tracked footage in HitFilm) as well as the app for free on the iOS App Store. See you next time!

