Masks are incredibly versatile and are used to manually create a matte. A matte determines which parts of a layer are visible. Practically, this means that masks are used to cut holes in your layers. This is super helpful for motion graphics artists and anyone who is looking to composite multiple layers.
Using masks in HitFilm is super easy!
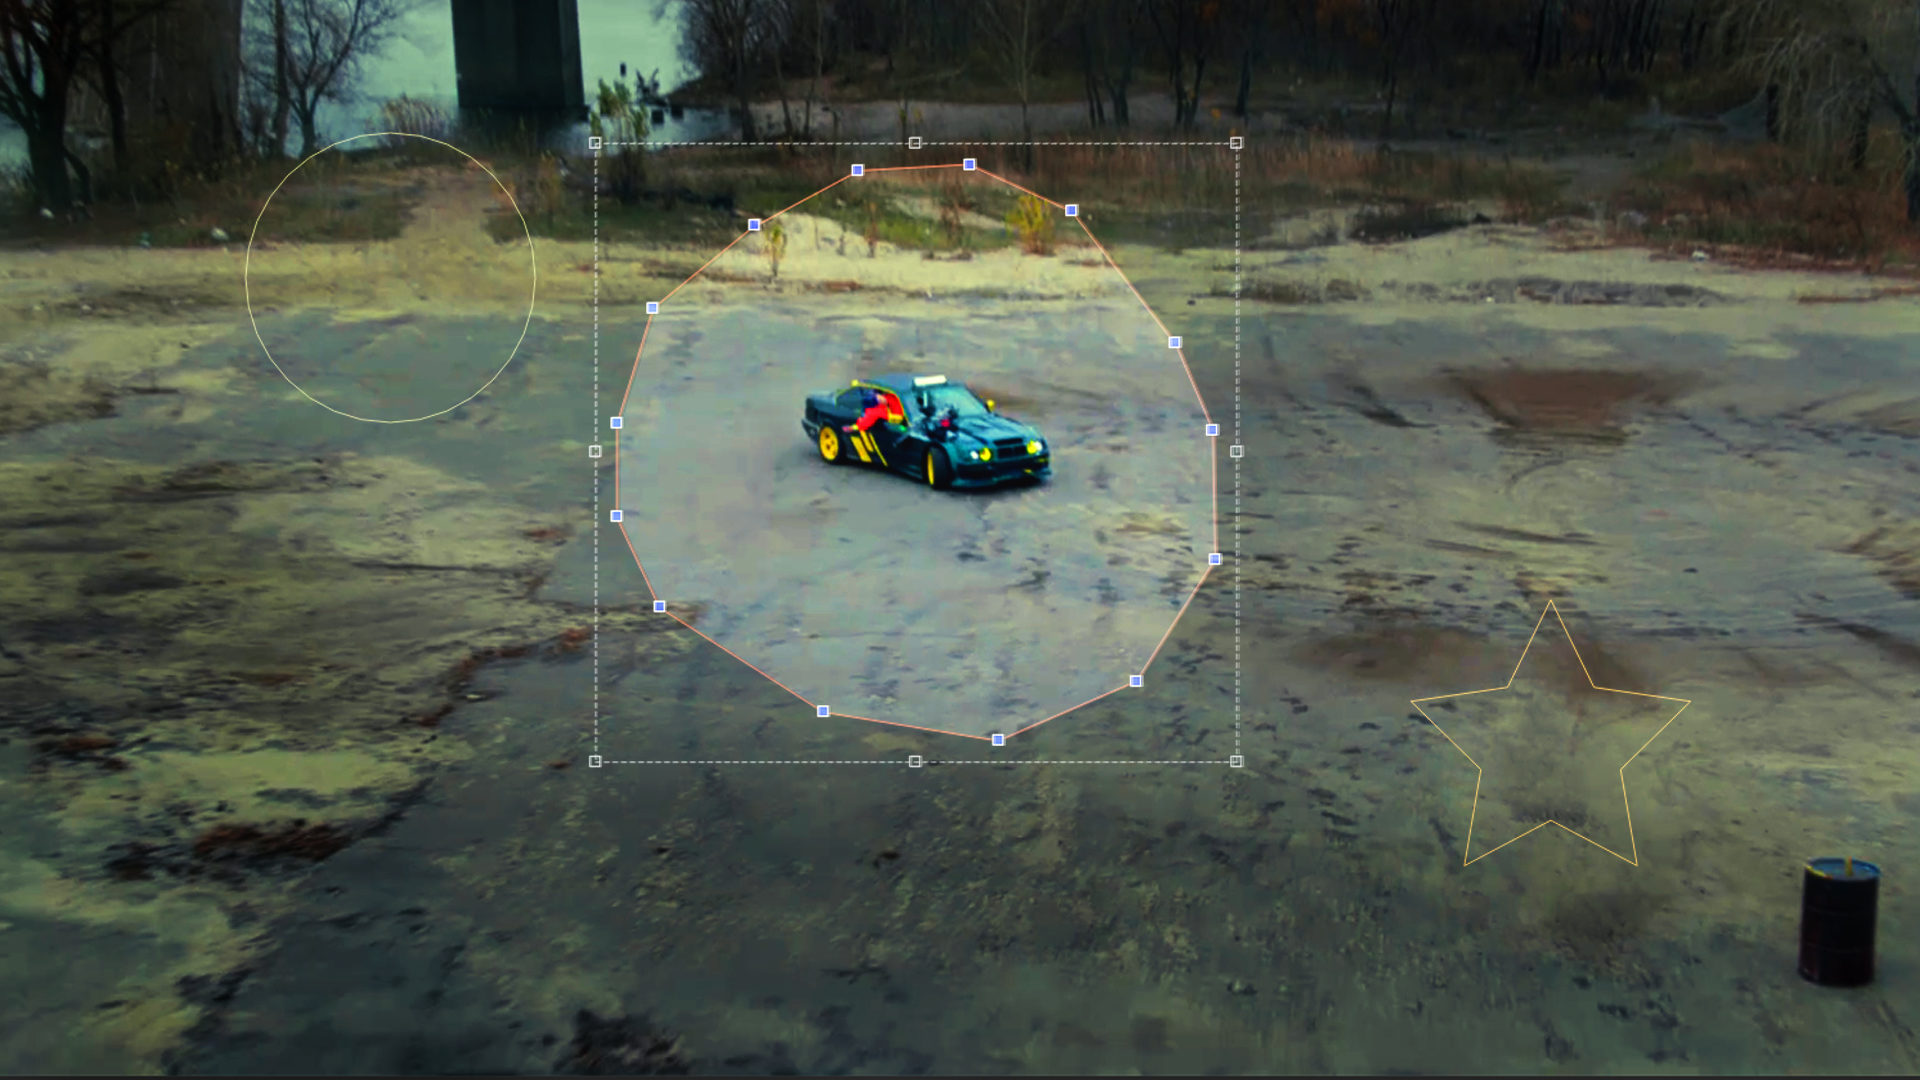
You can create a mask using the mask drawing tools, which can be used to draw elliptical, rectangular, and freehand shapes. Find the Masking tools in the Viewer in HitFilm.
- Click and hold the Rectangle Mask icon to see all of the shapes available. Select the one you would like to use.
- With shape masks, just click and drag until you have created the size shape you want.
- With a Freehand mask, which offers more flexibility if trying to create a custom shape, click around the viewer until you have closed the mask by clicking on the first point.
- Once you have created the mask shape you want, you can resize and reposition it with the handles.
Sometimes, you don’t want to cut out shapes with harsh edges. Using the Controls panel, you can adjust the Expansion of the mask, the feather (which is how blurry the edges are), and the Roundness. The Invert icon will make the mask do the opposite action.
You can also animate a mask by clicking or dragging pre-existing points. If animating, this should be done using the Path property’s keyframes enabled.
HitFilm’s Learn Panel gives you access to this video and many more, right within the software! Download HitFilm and follow along in real-time to build up your skills.


