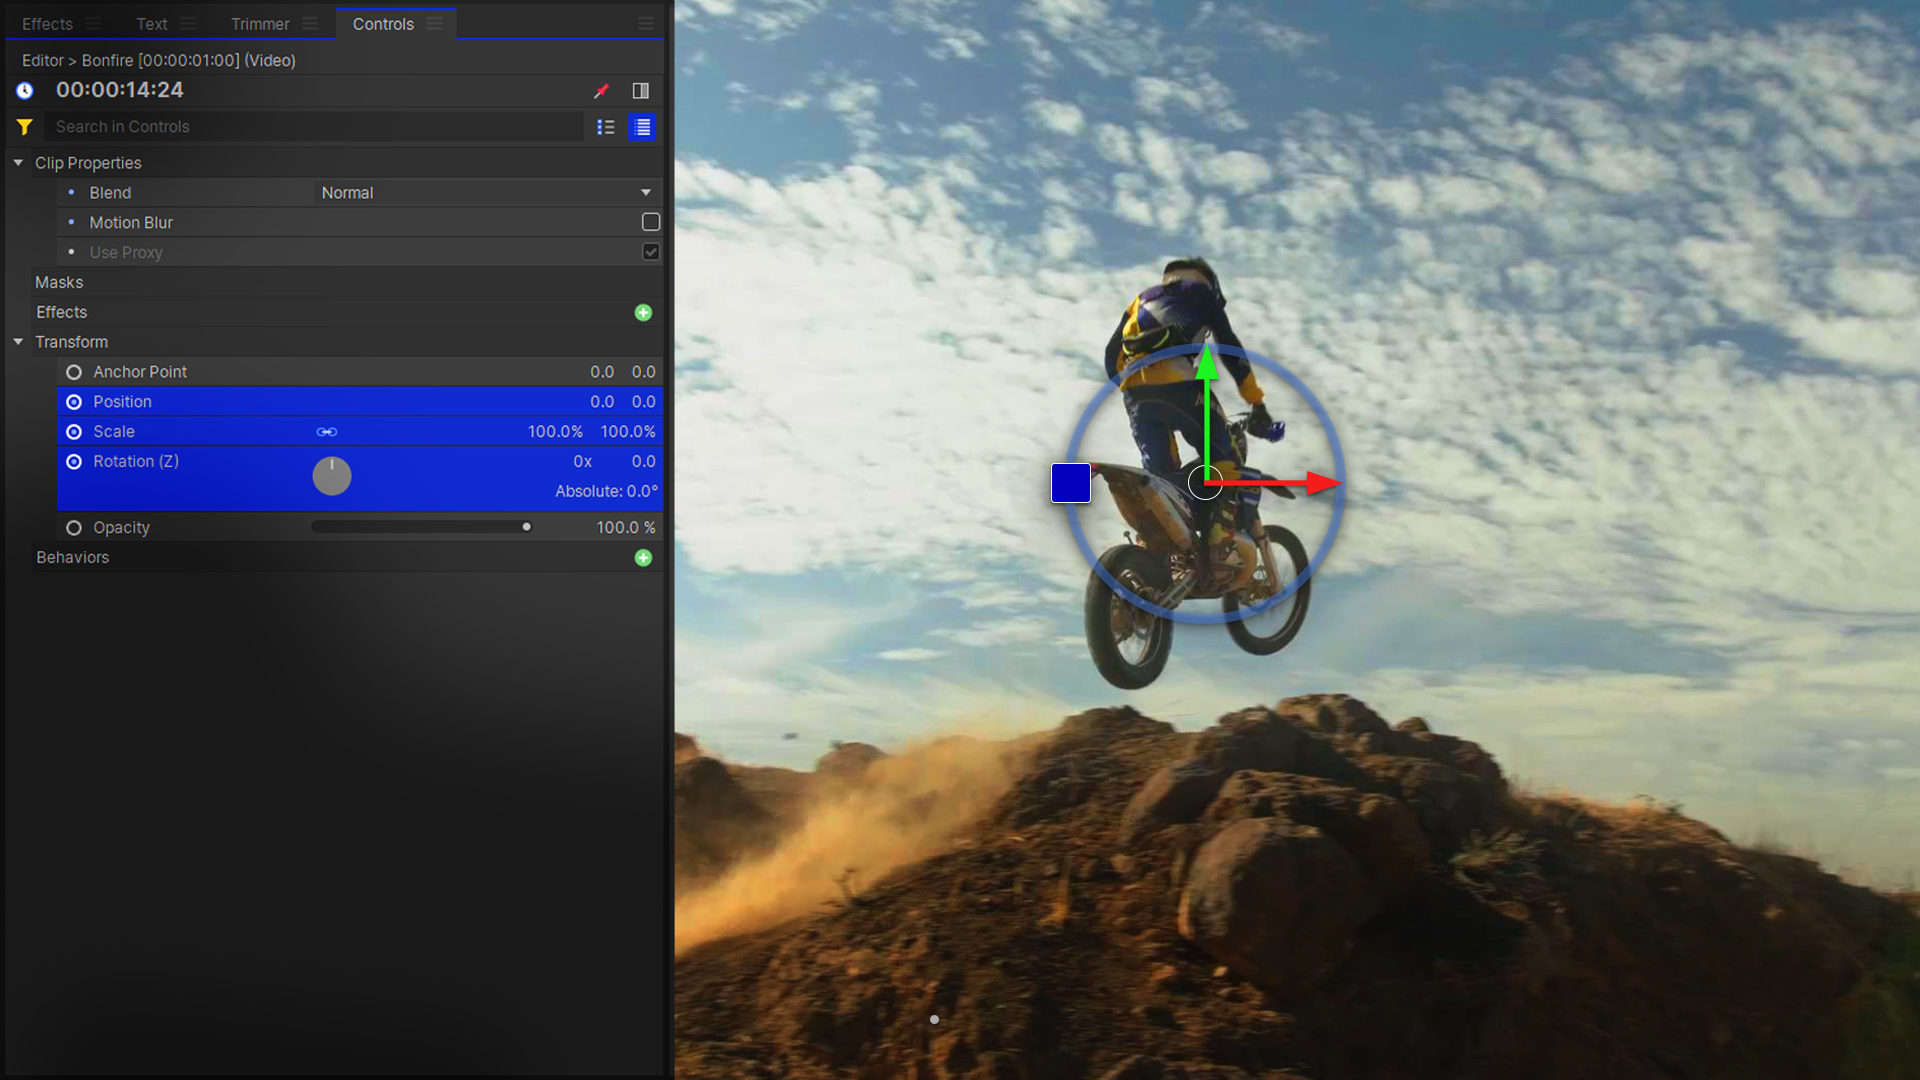
Transforming a layer means changing its position, scale, or rotation. When you select a clip in the timeline, it will become active in the Controls panel. Within this panel, you can adjust properties for media on your timeline.
Using the Transform dropdown to customize your clips in HitFilm is super easy!
- When you open the Transform dropdown, you will see a number of values that can be adjusted in order to produce the exact effect you need.
- The left number is the X value, which affects the left-right position of the layer. The right number is the Y value, which affects the up-down position of the layer. The position can also be changed with the green and red arrows in the Viewer panel itself.
- The Scale property is the size of the layer. Like the Position, these values represent the X and Y size and are linked together by default. If you click the chain link icon, they can be changed independently.
- You can rotate the clip with this control. The point at which the clip rotates can be changed by adjusting the Anchor Point.
- The Opacity is how transparent the layer is. Anything lower than 100% will begin to show the layers beneath.
Some additional properties are available for 3D layers.
HitFilm’s Learn Panel gives you access to this video and many more, right within the software! Download HitFilm and follow along in real-time to build up your skills.

