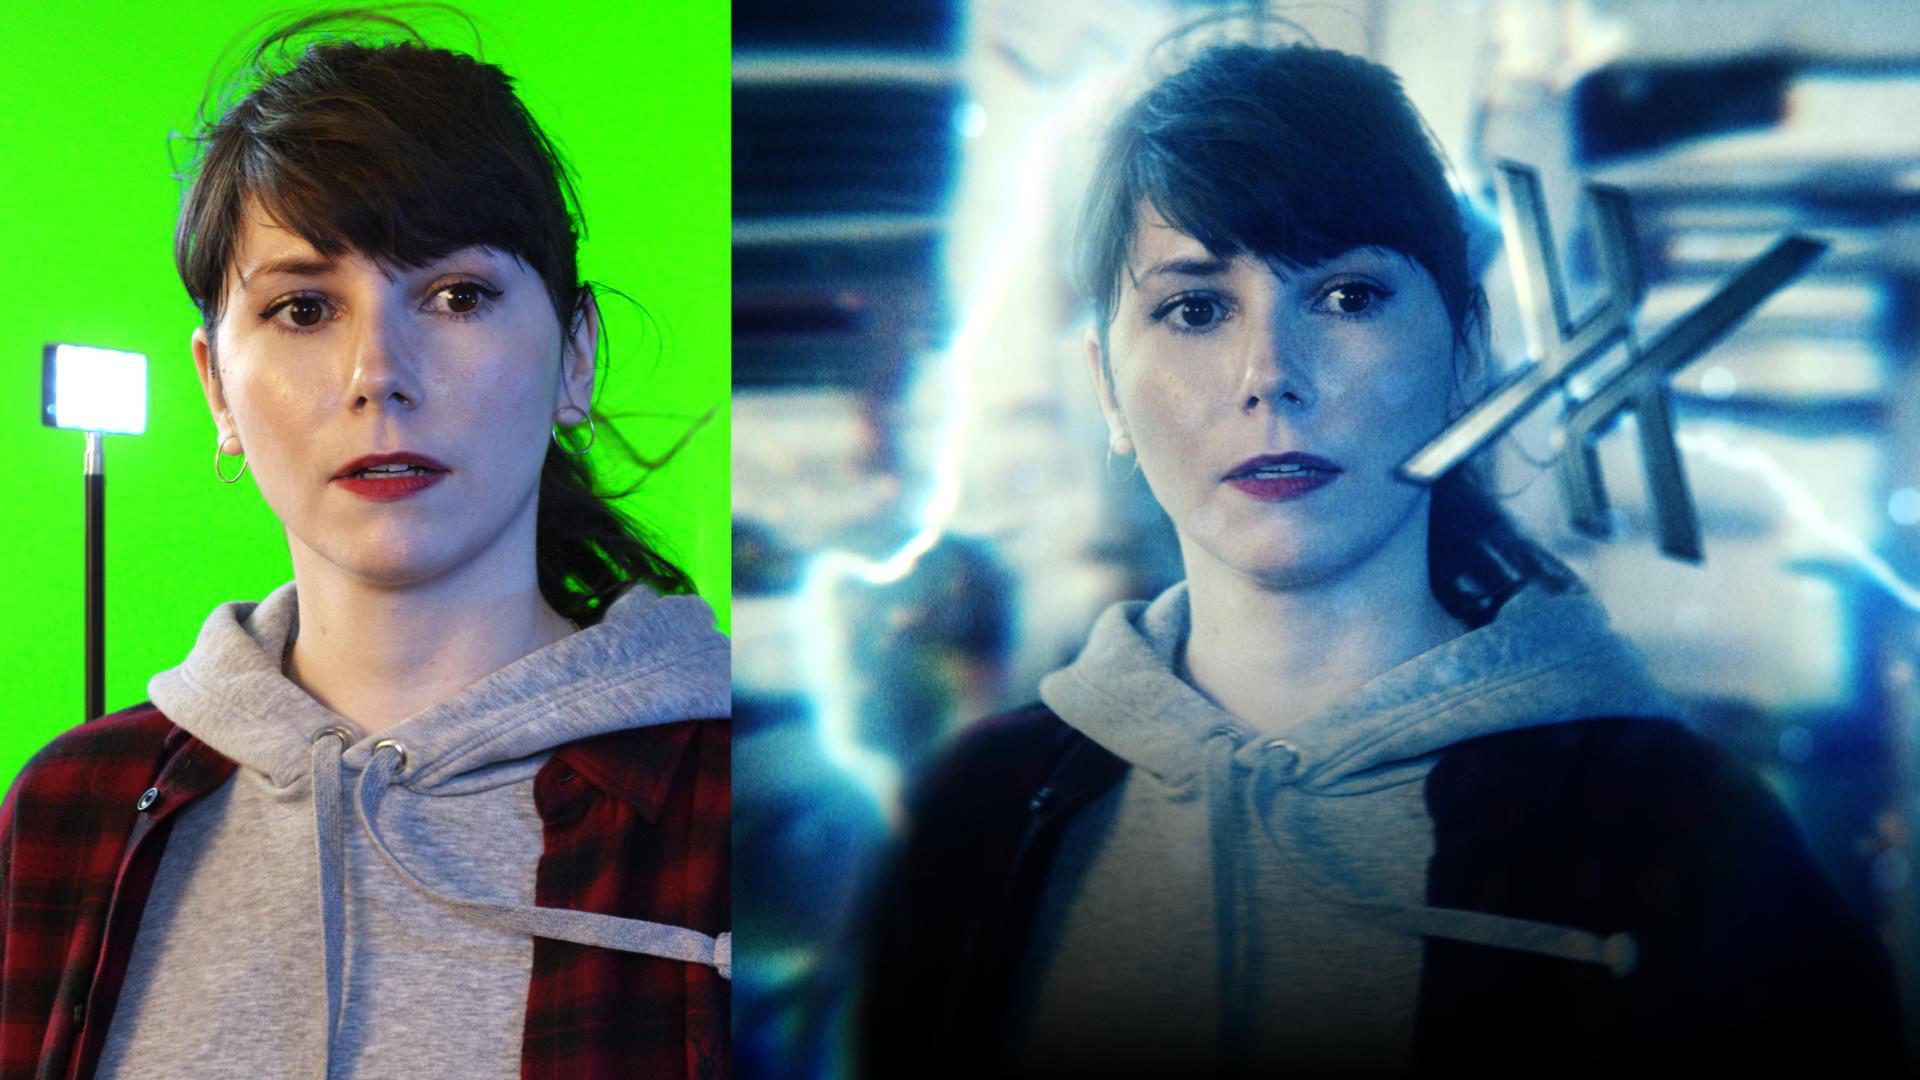
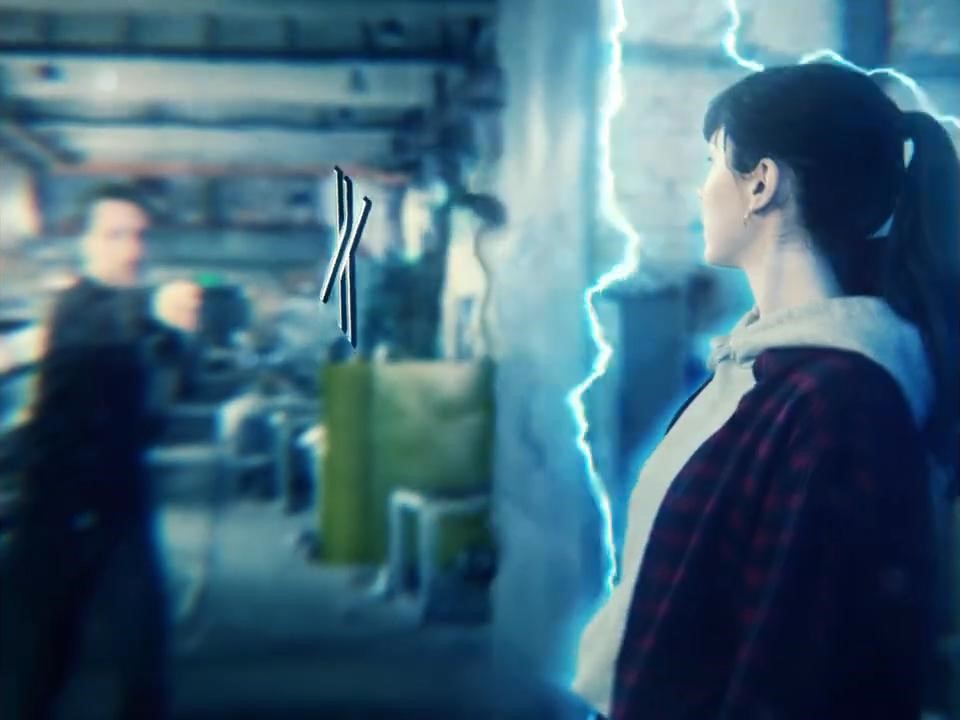
In this Justice League-inspired tutorial, we’ll show you how to unleash the powers of HitFilm to recreate the Flash’s Flashtime effect.
Step 1: Record your footage
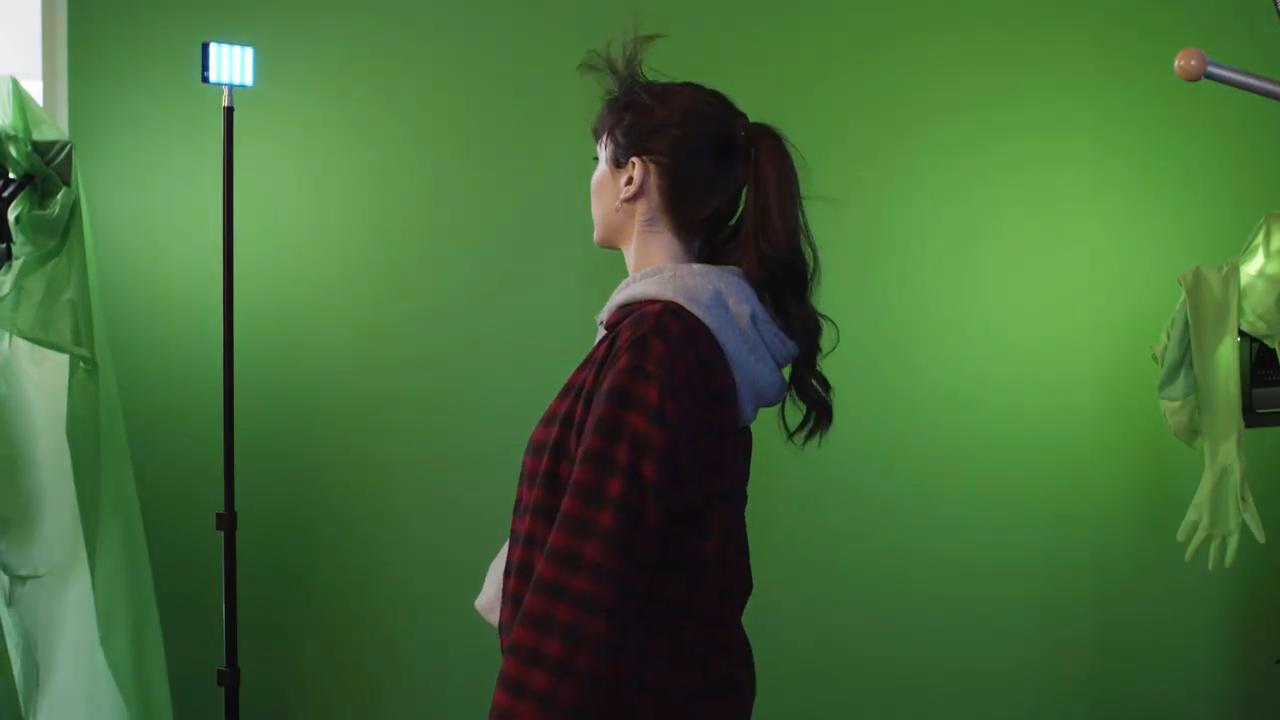
When recording your footage, the most crucial step is to record using a high frame rate. Instead of the usual 24 or 30 frames per second, we recommend using a framerate between 60 and 120 fps to achieve a seamless slow-mo effect. We recorded our subject in front of a green screen as we would later be replacing the background via chroma keying in post-production.
Step 2: Key out your green screen
After importing your footage into a HitFilm project:
- Create a new Composite Shot.
- Drag and drop your footage into said shot and apply the Chroma Key effect to the footage layer.
- Adjust the effect’s settings to achieve the perfect key.
Step 3: Add lightning bolts to the scene
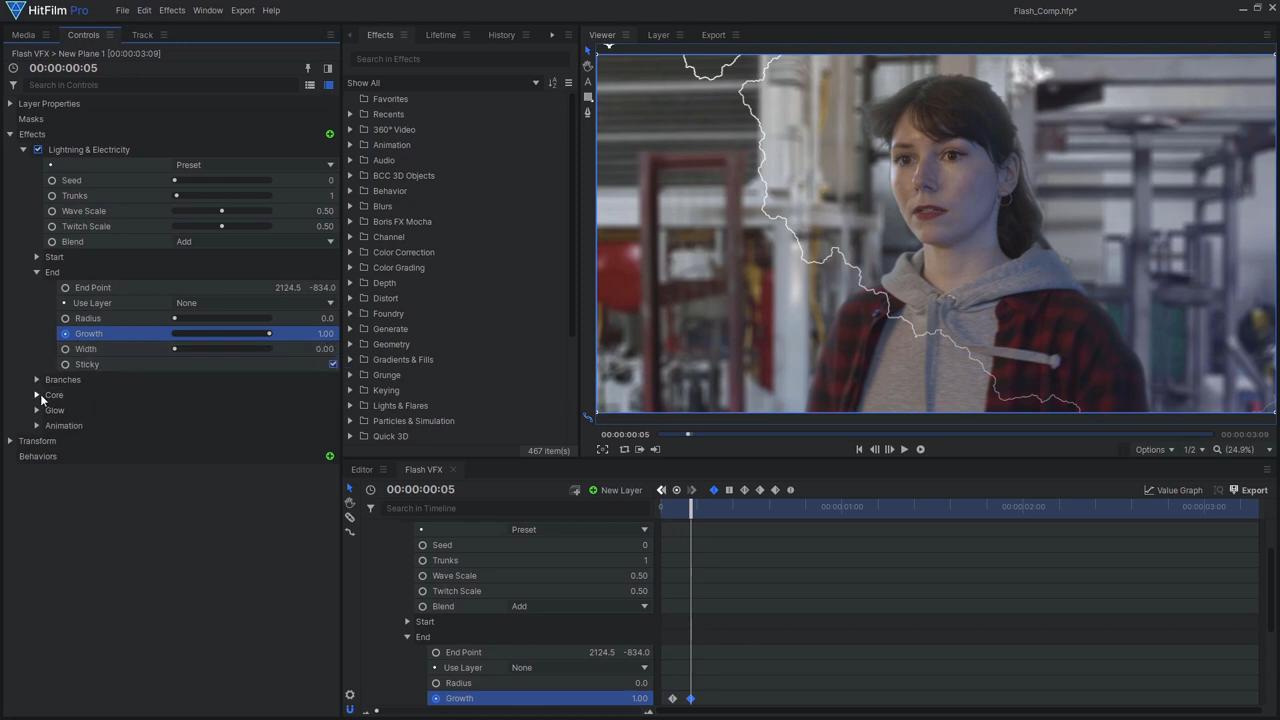
An iconic part of the Justice League Flashtime effect is lightning bolts. To make the bolts:
- Firstly, create a new black Plane to which you’ll add the Lightning and Electricity effect, setting the layer’s Blend Mode to Add.
- Secondly, move the Start and End points to position your lightning bolt, then remove the Branches.
- Then, remove the effect’s built-in glow as we’ll use some custom Glow effects to better achieve the desired result.
- Animate the End Growth from 0 to 1 to make the bolt quickly appear
- Animate the Core Opacity and Feather to fade out the bolt after a few frames.
- Customize the various Lightning parameters such as Width, Seed, Wave Scale, and Twitch Scale.
- Reduce the Speed and Jitter of the Animation.
- Duplicate this Lightning effect multiple times, changing the Seed to produce a unique look for each bolt.
- Move the keyframes on the timeline so the lightning strikes at a different time.
To make this lightning appear more dynamic:
- Add an Energy Distortion effect, followed by a Zoom Blur effect to imitate the appearance of motion blur.
- Then, stack a few Glow effects and even more Energy and Heat Distortion effects.
- Use the Curves effect to adjust the brightness and color of the lightning and end with a Chromatic Aberration effect.
- Remember to reduce the speed on any distortion effects to enhance the appearance of the slow-mo effect.
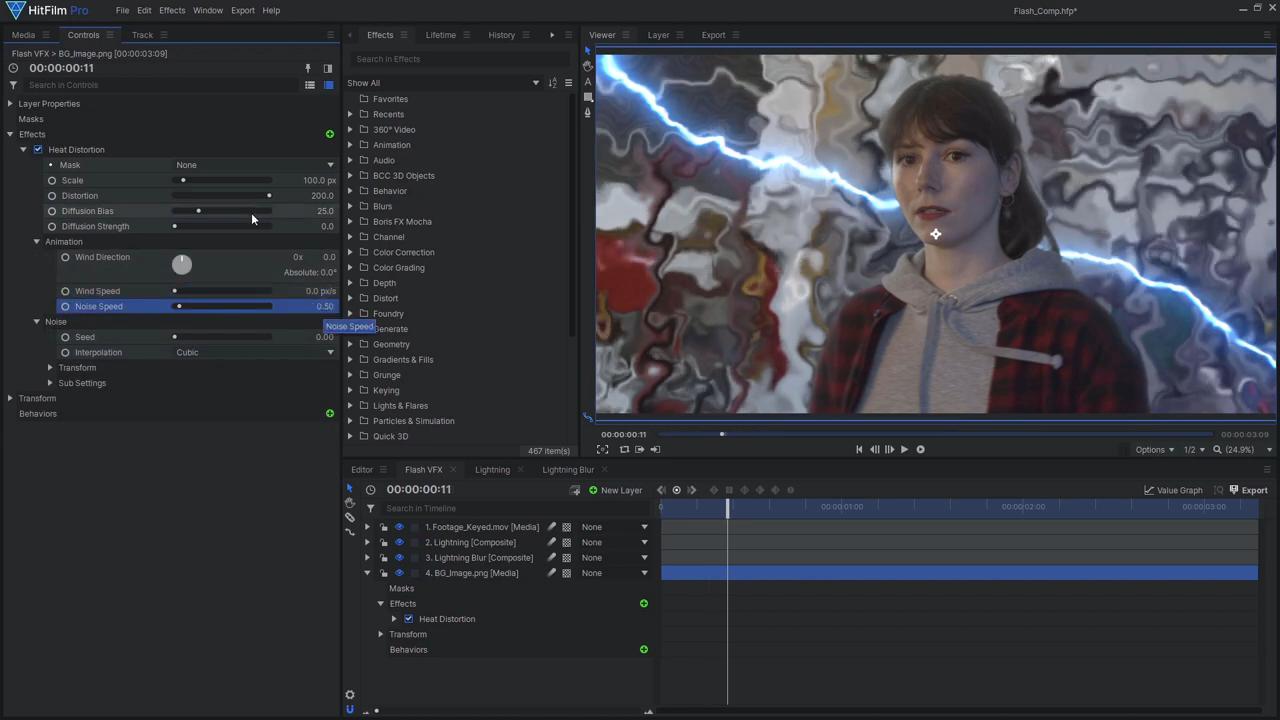
To better integrate the lightning into the scene, we decided to add some distortion to the background layer (a generic image). To do so, make the lightning plane layer into its own Composite Shot, moving the effects with the layer. Drag this lightning composite shot into another new composite shot and apply a heavy Blur effect. Add a Demult effect to ensure that the layer’s background is transparent. Then, bring this comp back onto the main timeline. If you set the Blend Mode to Screen and lower the Opacity, this layer can also act as an extra glow effect. Add a Heat Distortion effect to the background layer, reducing the detail in the distortion’s noise and slowing it down. In the Heat Distortion effect’s settings, select the blurred lightning as the Mask; this allows for some interesting interactions between the lightning bolts and the background. To further match the Justice League’s look, add a Zoom Blur effect and some strong Chromatic Aberration to the background layer.
Step 4: Add a 3D Model to the scene
For this Flashtime effect, we created the Batarang (or FXarang) using Blender – there are various tutorials on YouTube showing how to turn a logo into a 3D model, which you can find here. When Importing the model into HitFilm:
- Set up the materials to look like metal using the Metallic-Roughness shader and some image textures from ambientCG.
- Make sure to set the Metallic Strength to 100 and to increase the Roughness Strength.
- Turn up the Reflectivity settings to see some reflections on the model.
- Drag the model onto the timeline, and adjust the Orientation controls for the initial alignment.
- Animate the position and rotation to make it slowly fly across the screen.
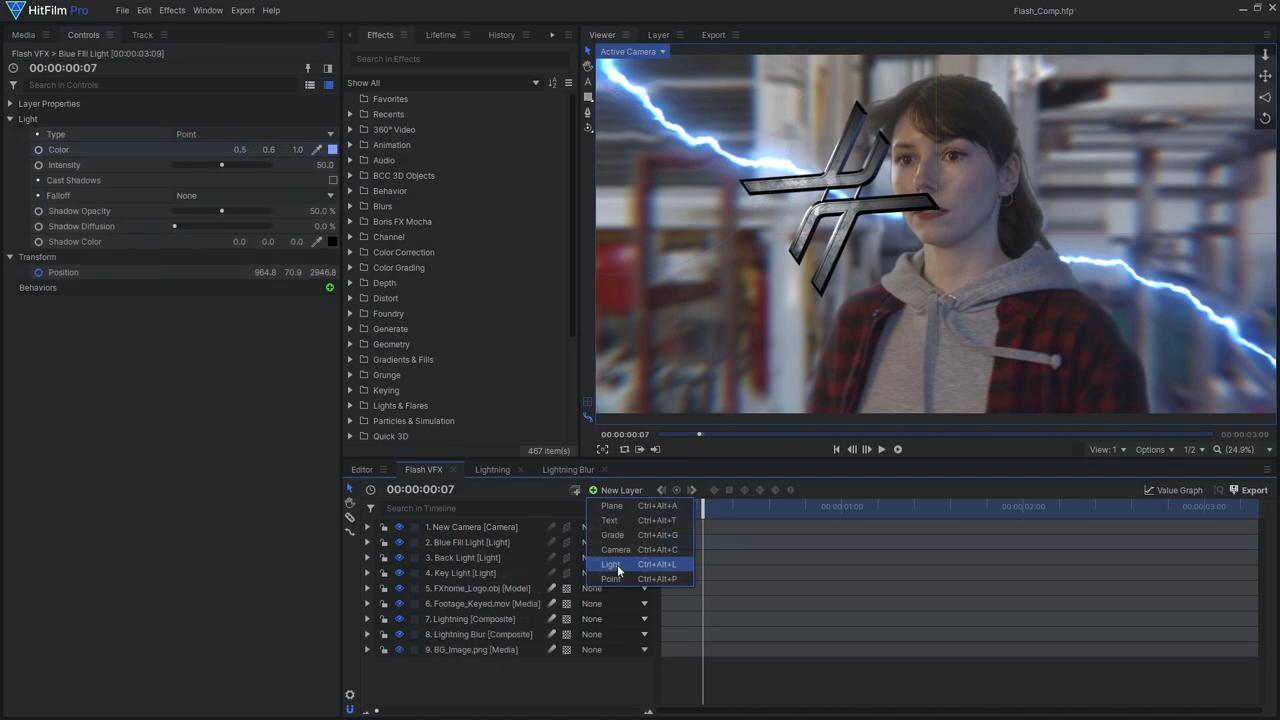
- Add in some lights to match the lighting in your footage and background
- Use some additional lights with the Intensity animated to add blue flashes whenever a lightning bolt is on screen.
- Make sure to choose an Environment Map, enable reflections, and enable Ambient Occlusion. (Here’s a tutorial for more information on working with 3D models in HitFilm: https://youtu.be/2hUiaGSs2x8)
- Since this object is closer to the camera, add a Lens Blur effect to make it appear out of focus. Set the effect’s Source Channel to Full On to apply the effect at full strength across the whole layer.
When you’re happy with your model, duplicate the layer and add the Motion Trails effect to the lower layer. This effect can be pretty slow to render, so we’d suggest replacing the Lens Blur with a regular Blur and disabling reflections and Ambient Occlusion on this model layer. Set the duplicate’s Blend Mode to Screen, and add some Heat Distortion and Chromatic Aberration.
Step 4: Dial up the drama with sparks and flares

To ramp up the shot’s interest and movement, we can use the Particle Simulator to create some slow-motion spark explosions. To do so:
- First, add the built-in Sparks preset to the primary composite shot.
- Then, delete the Sparks particle system, so only the stars remain.
- Under the Movement settings, reduce the Speed value to slow the movement of the particles, and the Scale value. Extend the lifetime of the particles with the Life value, so they remain on screen for longer.
- Add a force to act like gravity.
- Increase the number of particles.
- Position the particle effect over one of the lightning strikes, then adjust the emitter’s trajectory to fire the sparks in the desired direction.
- If your background is very out of focus like our’s, add a Lens-Blur effect to the sparks to make them look more realistic.
To create the light bursts we used the Custom Light Flares effect in addition to the regular Light Flares effect. For the standard flare:
- To a new Plane layer add the Light Flares effect and set the Flare Type to Chromatic Hoop.
- Reduce the hotspot brightness to 0 to view only the rainbow hoop and soften its appearance with a Diffuse Effect.
- For the Custom Flare, add the Custom Light Flares effect to the plane layer and use the default preset.
- Remove the Rays and Iris of the preset to only view the blue glow.
- Position these flares just outside of the frame where the lightning is, then adjust the Pivot Position of the regular light flare to ensure that the rainbow hoop is visible.
- Animate the flares’ Intensity to flash with the lightning, then duplicate the layer.
- Move the duplicate along the timeline to the next lightning strike, and reposition the flares.
Step 5: Color grade your footage
To achieve the final look, to a Grade layer, add a few Curves effects and a Bleach Bypass to adjust the color and add contrast. The Curves effects gave the footage a green tint, resulting in the lightning appearing more cyan. To make the scene appear bluer, a Blue Plane was added with its Blend Mode set to Soft Light and its opacity reduced. To finish off the Flashtime effect, a subtle and slow Shake effect was added as well as even more Chromatic Aberration, Lens Dirt, Lens Distort, and Film Grain.
And that’s how you can create your own Justice League Flashtime effect in HitFilm! Don’t forget to check out our other Justice League tutorials, including Cyborg and Superman Heat Vision. See you next time!