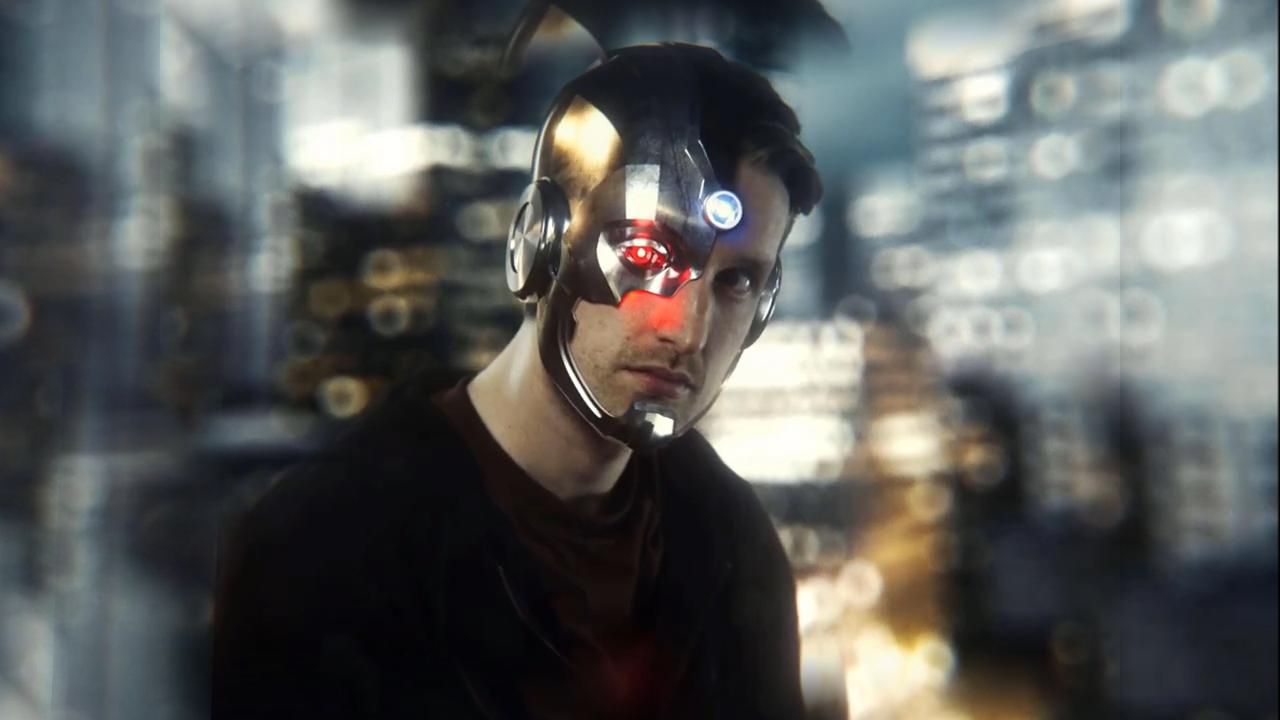
In this tutorial, we’ll show you how to create your very own VFX Cyborg effect, inspired by Zack Snyder’s Justice League. We’ll use Blender to track a 3D model onto Tom’s head, and will composite the rendered result for free in HitFilm!
Pre-Production
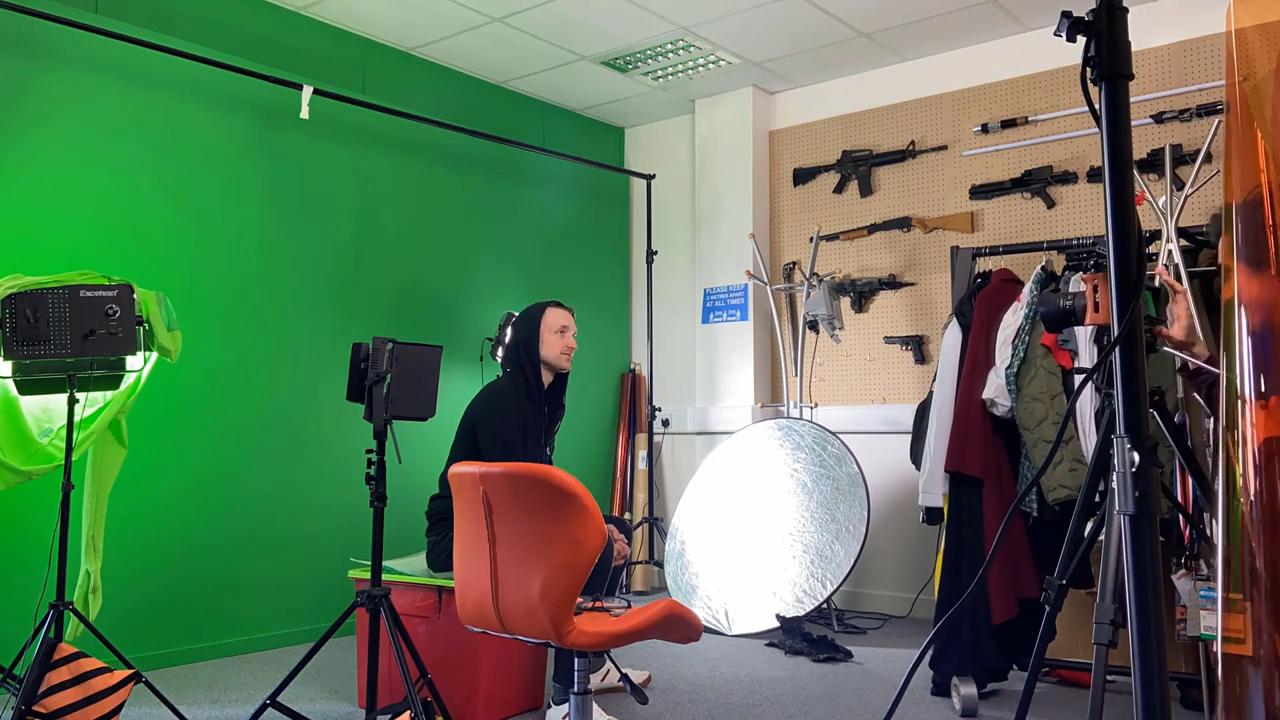
Integrating 3D models into your footage is a complex process that requires some planning even before you hit record. To ensure that the footage was stable, we used a tripod, so Tom’s head was the only thing moving. Tracking markers were also drawn on the side of Tom’s face, where the Cyborg effect model was to be placed, to allow Blender to track his face easily and to prevent unnecessary paint-out-work. We also took note of the lighting setup and the camera’s focal length to ensure that they can be easily replicated digitally in post-production.
Tracking Your Actor’s Face
To use our footage in Blender, we’ll first need to convert it into an image sequence. To do this, we imported the video clip into HitFilm; before exporting, we used the Curves effect to enhance the clip’s contrast, which is perfect for tracking. Then we created a new folder to which we exported the clip as a PNG image sequence.
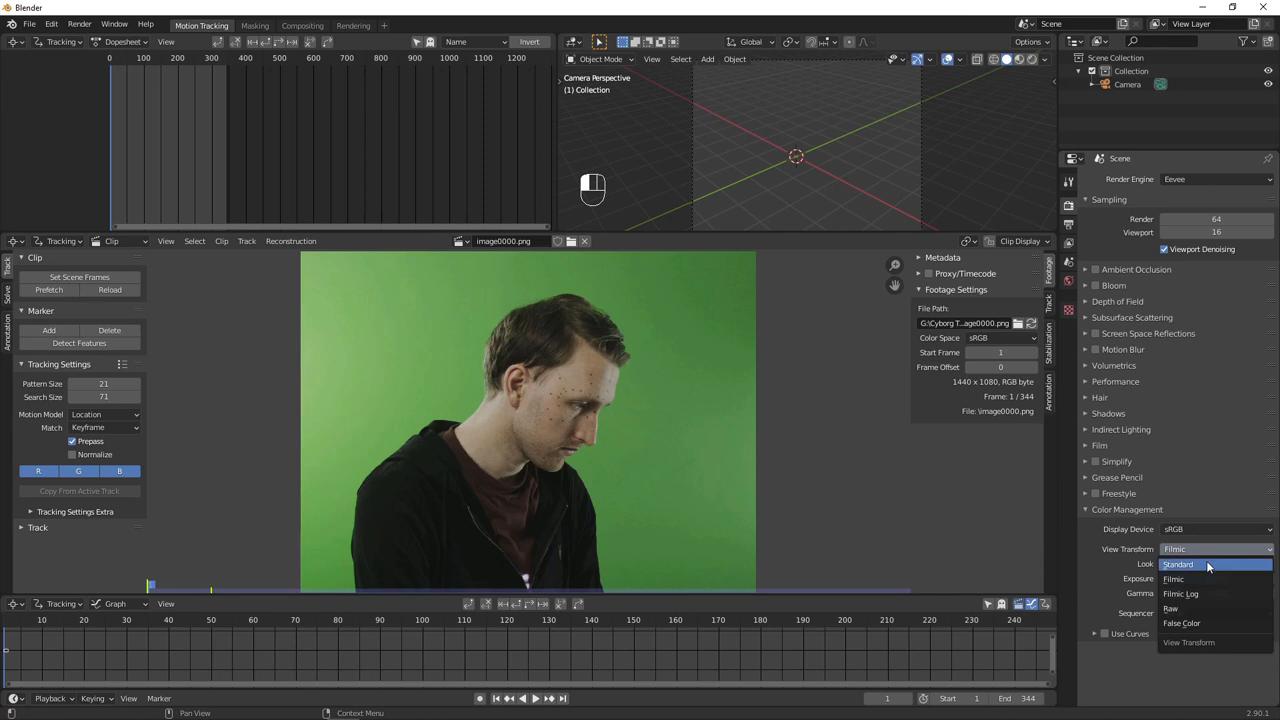
With our image sequence created, we can now start a new Blender project using the VFX workspace. This part of Blender’s interface may be unfamiliar to you if you’ve only used it for modeling. Load in your image sequence, then click “set scene frames” to make the Blender timeline match your video’s length. Match the project resolution and frame rate to your video and set the Color Management Profile to “Standard” so Blender doesn’t alter the colors. Then, click the “prefetch” button to load the frames into RAM.
As we aren’t tracking the camera, create an object. Set the Tracker Type to “Affine” to allow the trackers to follow the movement of Tom’s face better. Enable Normalise so Blender ignores any lighting variations. Change the track Match Type to Previous Frame, to prevent Blender from halting the tracking when the feature appearance changes throughout the shot. Use Ctrl + Click to place a tracker on your video, then press and hold the ‘E’ key, while dragging your mouse to either Track Forward or Track Backward. To better monitor the tracking process, set the speed to double so it doesn’t complete instantly. When you are happy with your tracker, lock it with Ctrl + L, so it isn’t changed.
Track as many identifiable features as you can- you need at least 8 for an object solve. You should also try to spread them out on the object to give Blender more tracking information. Be sure to avoid any details that move differently to the main head motion, such as eyebrows. If a point is incorrectly tracked, you can delete it by pressing ‘X’.
With all of these tracks in place, we can move on to solving the object. Hit the solve button. If you encounter a solve error, set some Keyframes in the Solve settings. Our Keyframes were two frames in our shot that best represent the motion or a large perspective change. We set our A and B keyframes to before and after Tom turns his head. Once done, hit the solve button again, and the solve error should be removed. Before we move on, ensure that you enter the focal length of the lens used, then hit solve again.
Now that we have tracked the head motion, we need to reposition our camera to ensure that it is facing the correct direction. Add a new Layout workspace, then center the camera and move it into roughly the right position. With our camera in place, we can click 3D Markers to Mesh (Found under Geometry) to create a 3D mesh representing our trackers. Click the Set as Background button (under Scene Setup) to see your video footage through your 3D camera.
Add an Object Solver constraint, selecting the camera and object created. Make sure to click the Set Inverse button to realign the object. Then, select the camera and increase the Opacity of the Background Images, so they aren’t transparent. To get a better idea of how good your Track is, go into the Edit Mode of the Tracks object and fill the points with a Convex Hull. In Tracks>Viewport Display> Display As, set the setting to wire, and disable Show in Renders (found under the Visibility settings). Now you should have a track that follows your actor’s face
Matching the Head Model
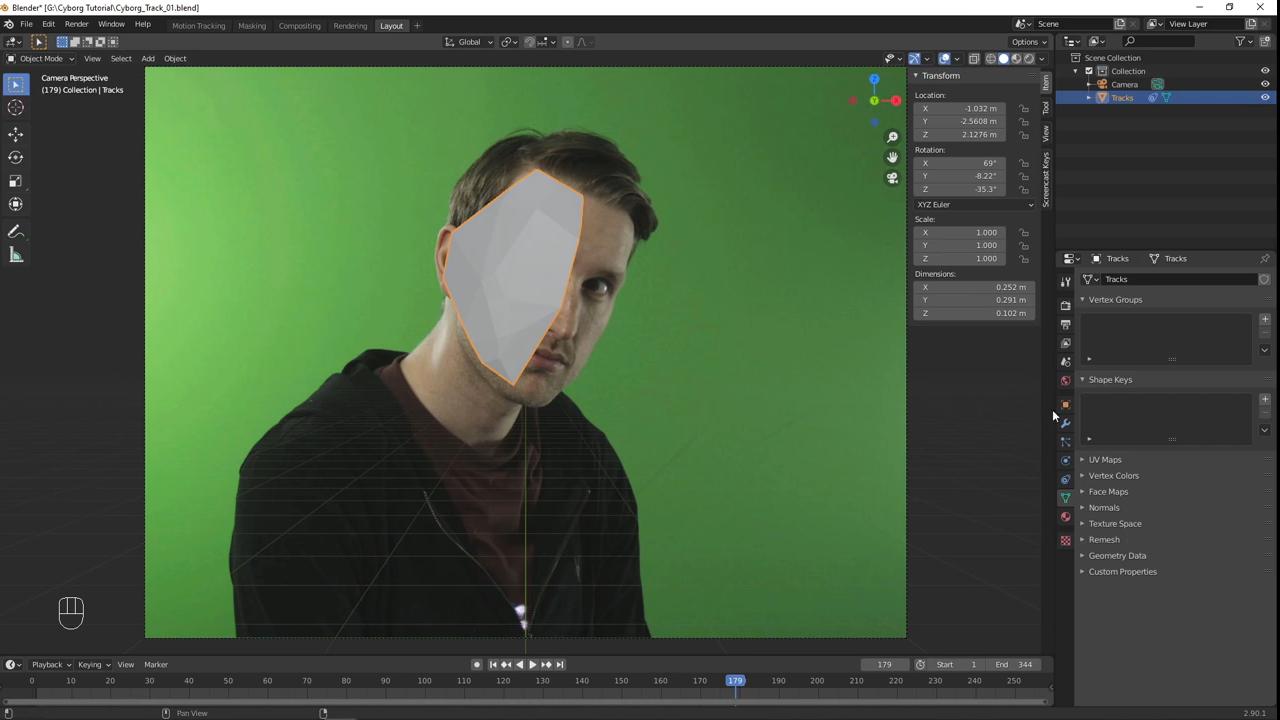
Now it is time to add in a model representing your actor’s head. We used a free model from BlendSwap.com. In the File menu, choose Append and navigate to the 3D Head model, selecting the base object. In Edit mode, select a vertex that is close to where one of your tracking points is. Move the 3D Cursor to that point with Shift + S, then in Object Mode, set the head object’s origin point to the 3D Cursor. Move the 3D Cursor to the corresponding tracking point, then move the head object to the cursor. Now your head model will scale and rotate from this point, making it easier to align with your actor. Parent the head object to the trackers with Ctrl + P so it follows the movement. Then scale, rotate, and position it as close as possible in Wireframe view. To improve the alignment of the model to your actor’s head, go into Edit Mode, select some vertices, and move them with Proportional Editing enabled. You can adjust the radius that your movement affects with your scroll wheel. If some parts of the mesh are distracting to look at, you can hide them with a Mask modifier. Add a new Vertex Group and in Edit mode, select all and hit “assign”. Select the unnecessary geometry, and remove the selection from the Vertex Group. Choose this vertex group in the Mask modifier to see the effect. Make sure to disable this modifier from rendering. Keep selecting and moving things until the model matches your actor’s face. You may want to go to another frame on the timeline to see the scene from a different angle. Add a Subdivision Surface modifier to the head to make it higher resolution, and enable smooth shading. You may want to adjust the mesh some more now that it has been smoothed out.
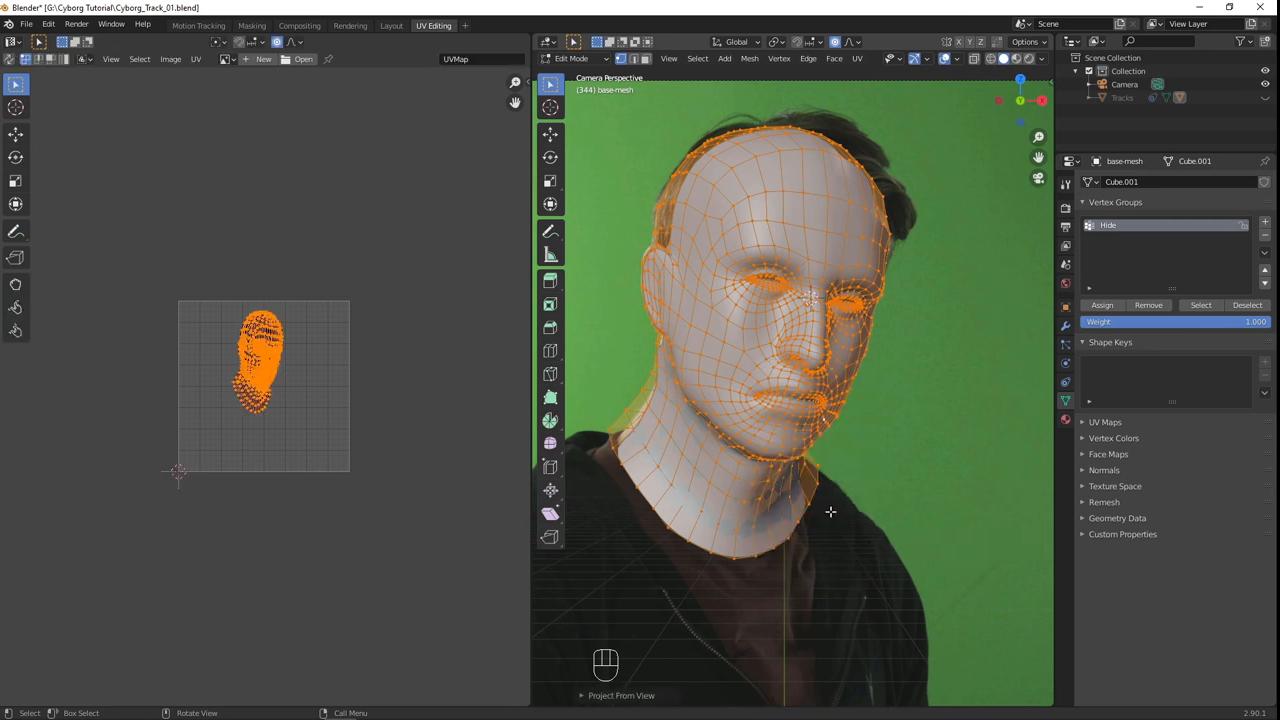
From this point, the 3D model should follow the movement of your actor’s head accurately. This digital head will help us position the Cyborg effect head model and will receive shadows and lighting. It will also cast some reflections onto the Cyborg model. Now, we need to texture the model. A quick and easy way to do this is to UV Unwrap the model using the Project From View method, while looking through our camera. Then in the material settings, load in the current frame as the image texture.
Adding the Cyborg effect head
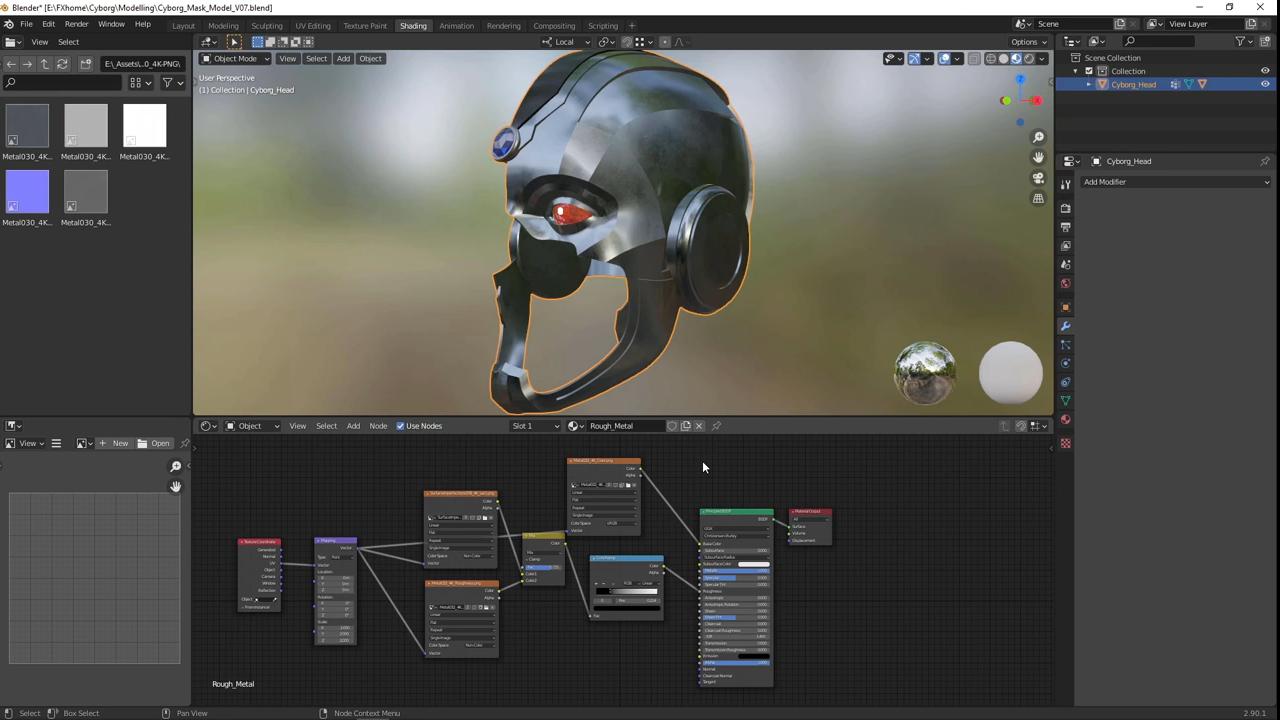
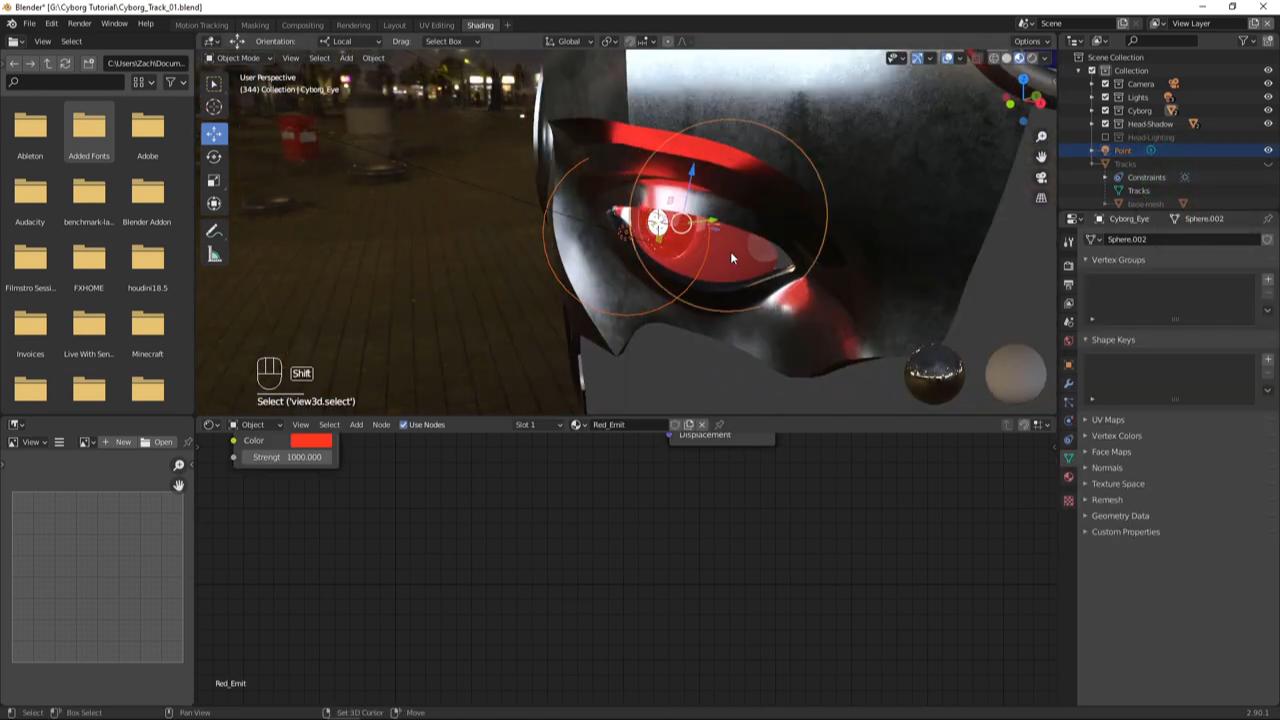
With our base head model in place, we can now move onto adding our Cyborg head. We created this 3D model in Blender by starting with the head model created earlier. Then, we deleted all of the geometry where Tom’s face would show through the metal, then modified the resulting model to match the design of Cyborg from the Justice League more closely. We used some image textures from CC0Textures.com to add more detail to the metal material, making some parts rougher and less reflective than others. The Cyborg eye has a few different materials to make the center glow red, and the outside glow and look like glass.
Similar to before, align the Cyborg model to the head by moving the origin point. Ensure that it is parented to the head as well – You can copy the rotation and scale values from the head to quickly align the model. Then use proportional editing to match the Cyborg head to the tracked head. As Cyborg’s eye is a separate object, it can be animated to match where your actor is looking. To do so, hide the other objects and go into Wireframe view. You can now insert keyframes for the object’s rotation from the right-click menu. You may need to also reposition the eye object after rotating it.
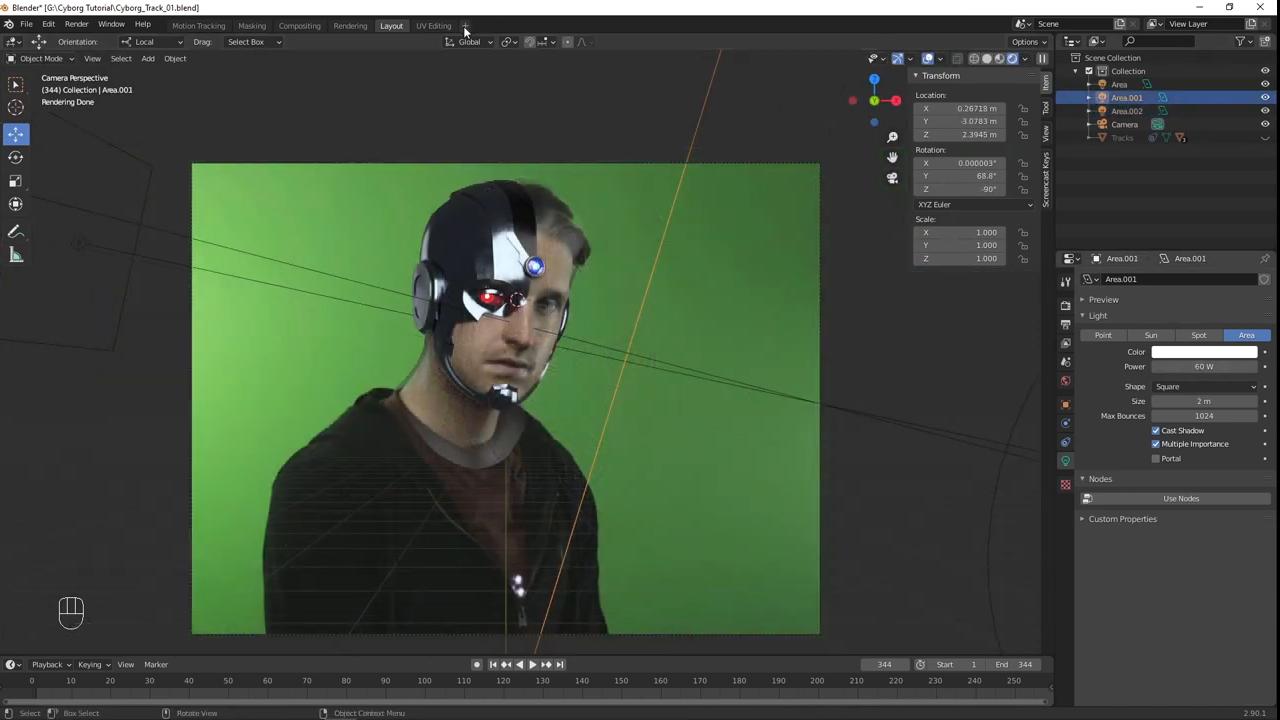
Now that our Cyborg head is tracked in, we need to add some lighting to match our footage; this also adds to the shot’s realism. Set the render engine to Cycles as it is more realistic, and choose GPU Compute, as rendering on your graphics card will be much faster than rendering on your CPU. We used three different Area Lights to approximate the lighting setup seen in our footage. Fine-tune the position and intensity of your lights in rendered view. To add more lighting and reflections to our model, we used an HDRI from HDRI Haven.com. As our greenscreen footage will later be composited into a dark cityscape, we used HDRIs that look similar. We mixed two HDRIs together to get the city lights from one and the cloudy sky from the other. You can adjust the brightness of each background image with the Strength slider on the background node, and can combine them using a Mix Shader node.
Rendering the Cyborg effect model
The final step in Blender before we can composite in HitFilm is to set up the scene for rendering. Start by enabling Transparent in the Film settings. This will give your render a transparent background. As we only want the head model’s shadows to be seen, enable Shadow Catcher in the object’s visibility settings. We kept the Cyborg head and shadows as two separate image sequences so they can be adjusted individually in HitFilm. To do this, we used View Layers:
- First, create new collections for each of your different objects, one for lights, one for the camera, one for our Cyborg, and one for the head.
- Select each object and move them into the appropriate collection.
- At the top of the screen, click the button beside View Layer, then select copy settings to add a new View Layer. A View Layer gives you control over how each object and collection is visible in the render.
- Right-click on the Cyborg collection and choose “Indirect Only”. Now the Cyborg head doesn’t appear, but it still casts shadows.
- Back in our original View Layer, right-click the head collection and choose “Set Holdout”. This will cause the head object to be cut out of the Cyborg head. Now only the parts of the Cyborg head that are not occluded by the actor’s head will be rendered.
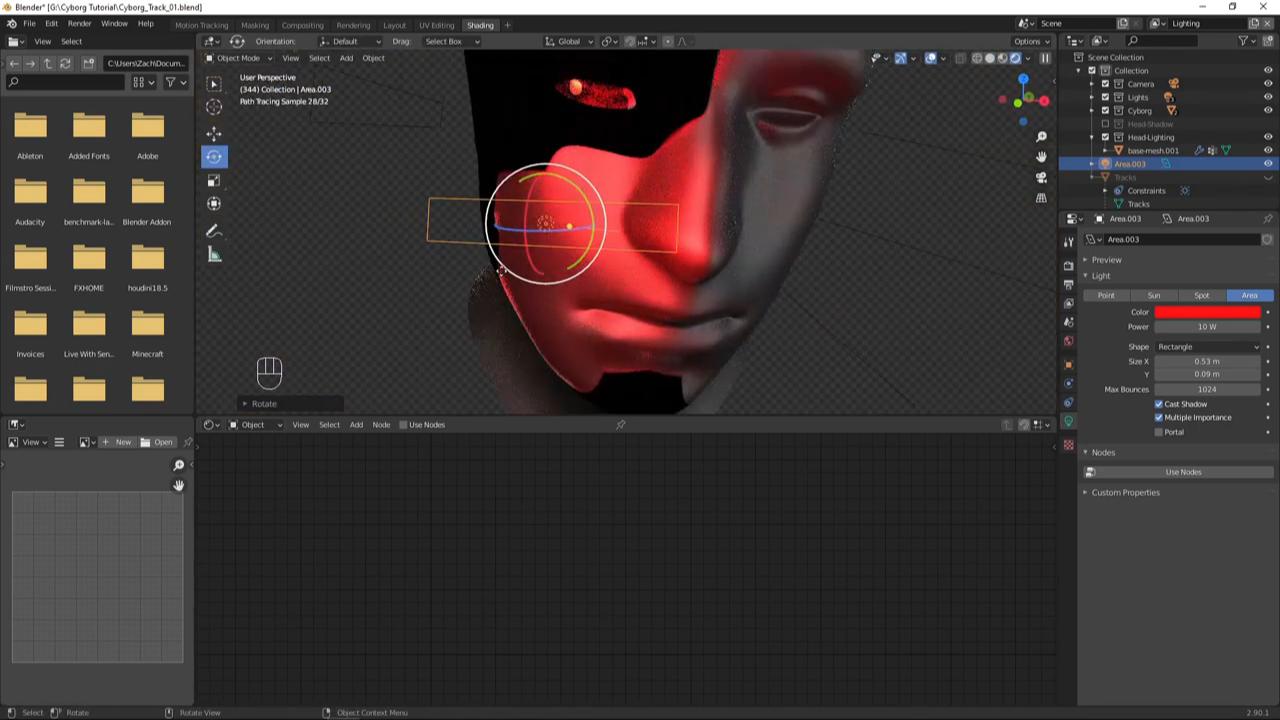
We wanted a separate render of some red lighting being cast onto Tom’s face. To do so:
- Duplicate the head collection and disable it from appearing in both View Layers.
- Create a new View Layer, disabling the shadows and enabling the lighting.
- Give it a new black material with no texture, and make sure to disable Shadow Catcher.
- Add a red area light, then positioned it to create the red glow on your actor’s face.
- Adjust the material roughness until you like how the red reflection looks.
- Disable the main light collection from this View Layer so only the red light will be visible.
- Set the Cyborg collection as a holdout.
- Another detail to add is an additional red light, this time a point light, parented to the Cyborg eye object. Reduce the radius and intensity, so they only add a small red reflection onto the metal Cyborg.
To render all three of these image sequences, first disable Compositing in the Post Processing settings. Then, select your file type and create a folder for each image sequence where you will render each View Layer individually. You can test the render by going to Render> Render Image. You should see each View Layer render separately. In the main View Layer properties, enable Render Single Layer. Before Rendering, set the color management back to Filmic to reduce the contrast and give some more color information to play with in HitFilm. Increasing the render samples will produce a cleaner, less noisy result at the cost of render time. When you are happy with your scene, select the proper output folder and go to Render> Render Animation. Depending on your resolution, shot duration, and sample count, this will take some time. Once that render has completed, disable the main View Layer from rendering and enable rendering for the Shadow View Layer, being sure to select the proper folder. Once that render is done, isolate the Lighting View Layer, disconnect the HDRIs, select its folder, and render again.
Compositing
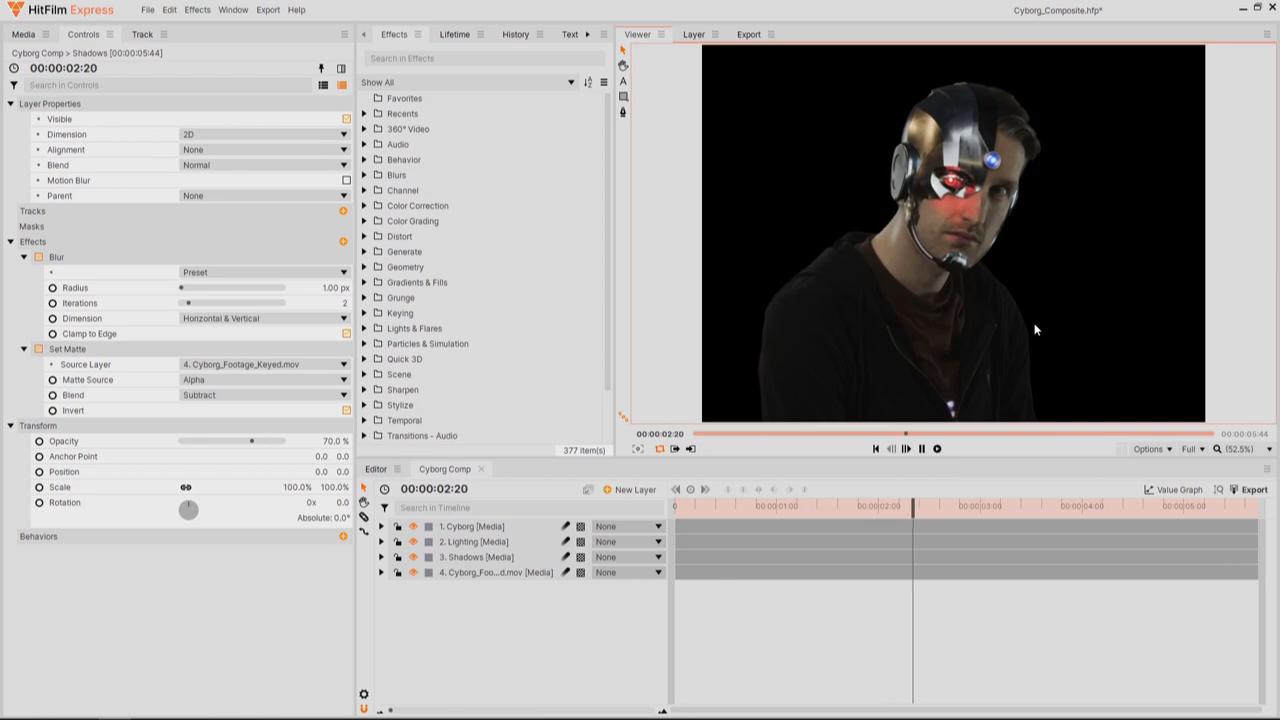
Now it’s time to composite! In HitFilm key out the greenscreen footage. Import the three image sequences and drag them onto the timeline above your video footage – start with the shadows, then place the red lighting with a Blend Mode of Add, then end with the Cyborg effect render. Because our 3D model didn’t line up with Tom perfectly, the lighting and shadows hang off the edge a little – this can be easily fixed with a Set-Matte effect sourcing the Alpha of the keyed video footage.
To make the Cyborg effect head seem like it was actually filmed with the Actor:
- Start by adding a Curves effect.
- If the dark areas of the Cyborg effect are too dark compared to the footage, drag up the bottom point of the Curves effect to make it brighter.
- Add a minimal Blur effect to reduce the sharpness of the Cyborg effect allowing it to match your footage better.
- If your video footage has a slight amount of grain, add a Grain effect.
- Use color correction effects to allow the Cyborg effect to match your footage further.
- Slightly blur the shadows and lower their opacity.
To enhance the shot with a sense of depth, we created a new Composite Shot. In the Composite Shot:
- Drag in the video footage and the background.
- Set the layers to 3D and move the background image far away from the camera and scale it up so it fills the frame.
- Add a subtle camera movement to emulate parallax
- Layer up some Light Wrap effects to blend your Actor into the background.
- Add a new Grade layer with some color correction effects to tie everything together.
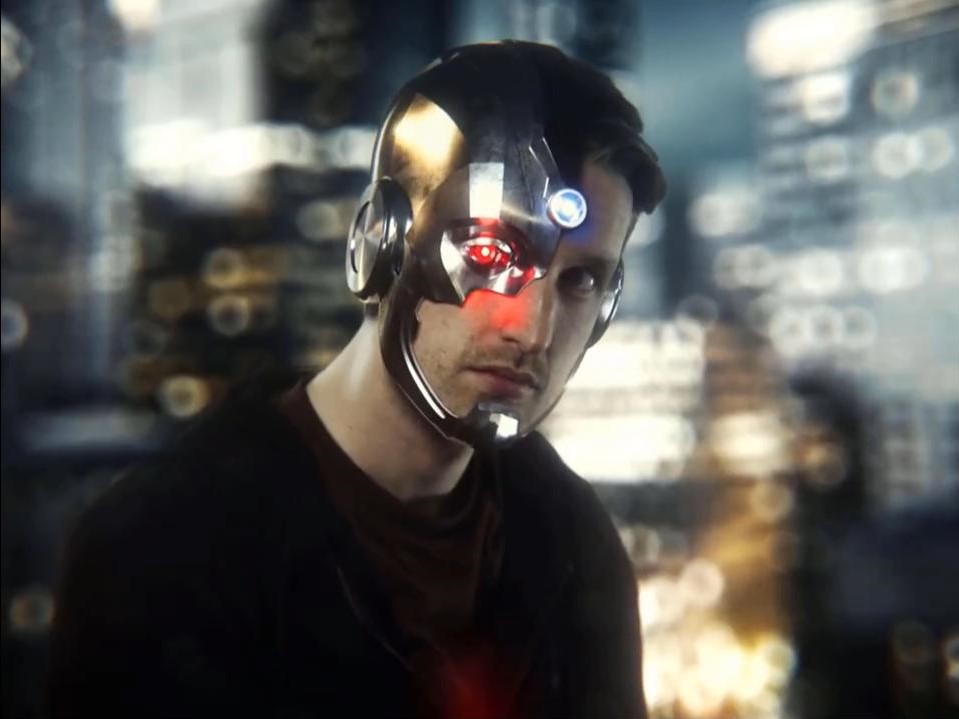
And that’s how you can create your own Justice League Cyborg effect in Blender and HitFilm! See you next time!