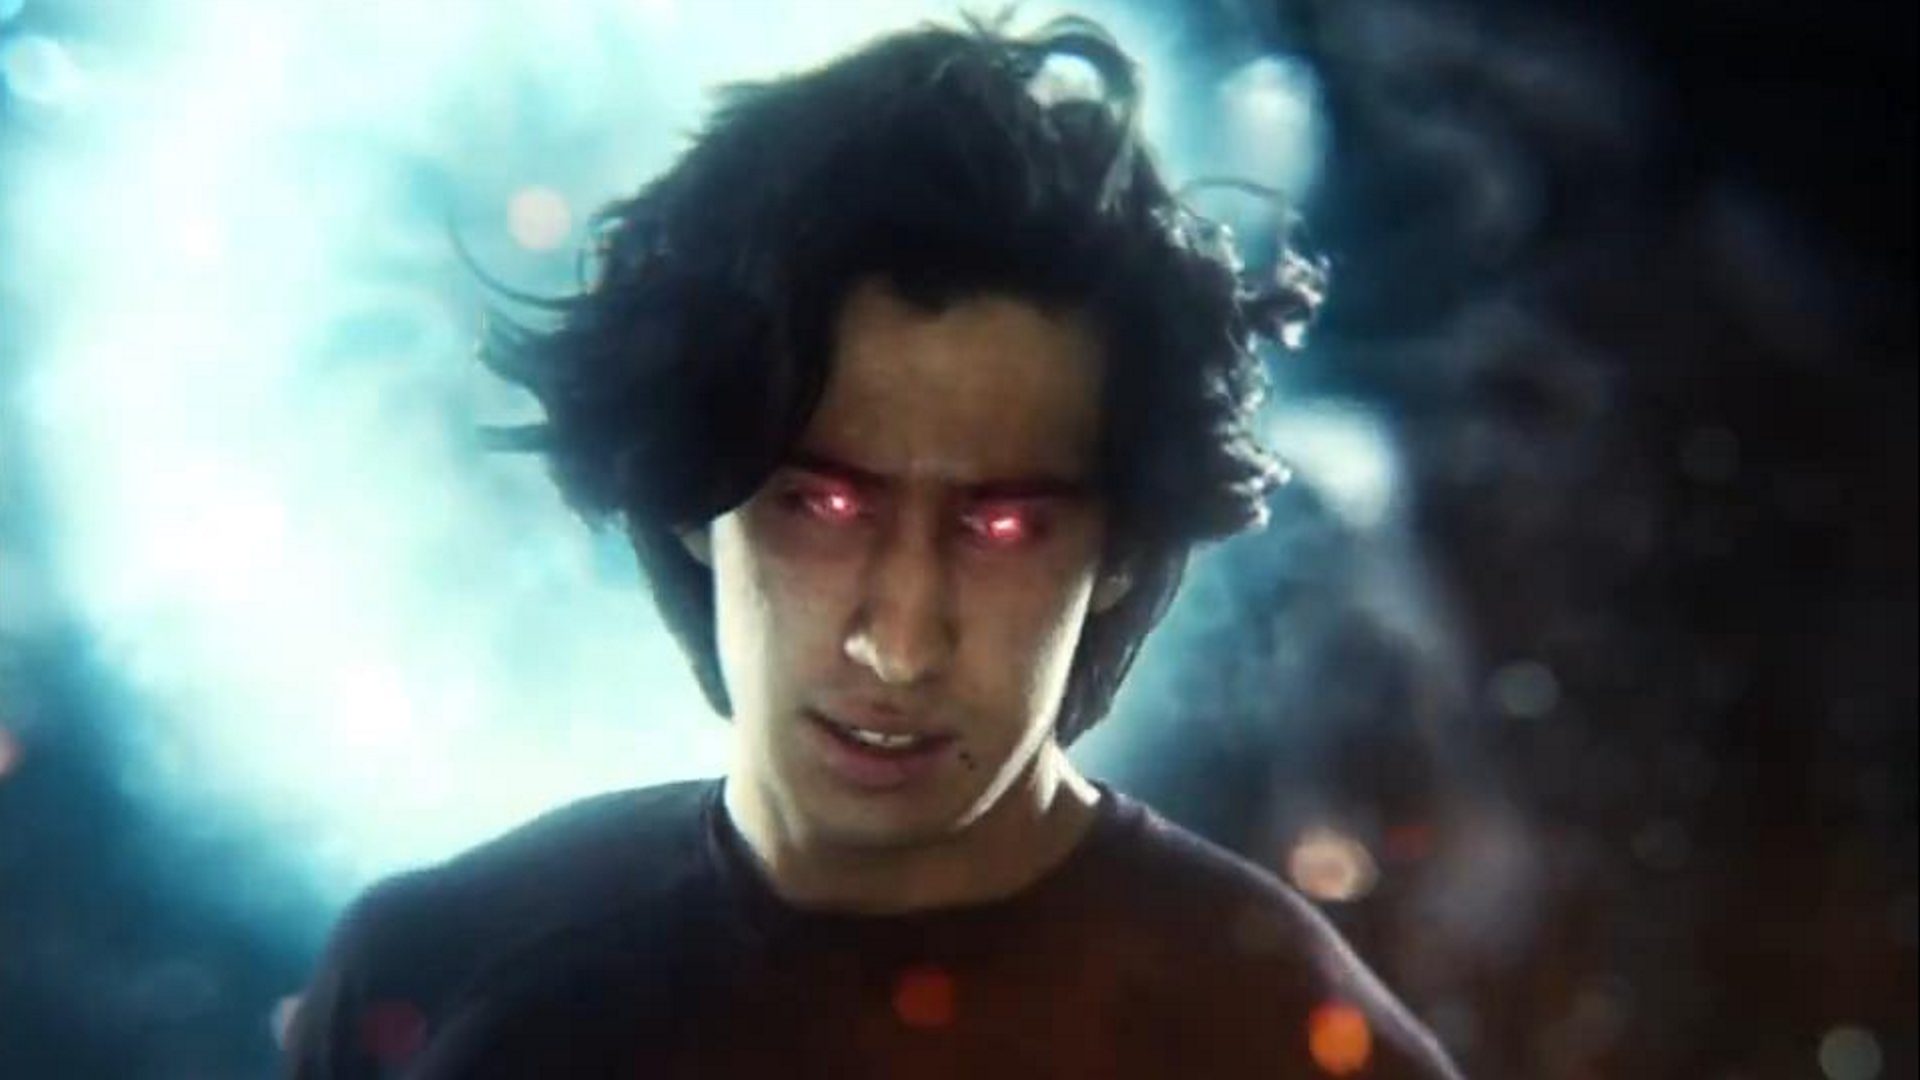
Want to join the Justice League and incinerate your enemies with lasers? Today we’ll guide you through how to create Superman’s supercharged heat vision effect, as seen in Zack Snyder’s Justice League!
Here are the key steps:
- Shoot your footage
Think about your camera angle – low is great hero shots! Pay attention to your lighting, and consider using a red light to simulate the laser glow.
- Key the footage
You’ll need to use the Chroma Key effect, and may also need some masks to get the perfect key.
- Create a moody background
A Snyder-style, dark emotional background sets the mood. Create it with a mix of assets and effects.
- Create the laser beams
The hardest part! You’ll need to use the Lightsword Ultra (2-Point Auto) effect as well as glows, distortion and flicker to get it right (see below for more info!)
- Color grade
Apply the Curves, Bleach Bypass and Film Distortion effects. You may also want Lens Dirt for additional grunge, and Shake for drama.
Step 1: Shoot your footage
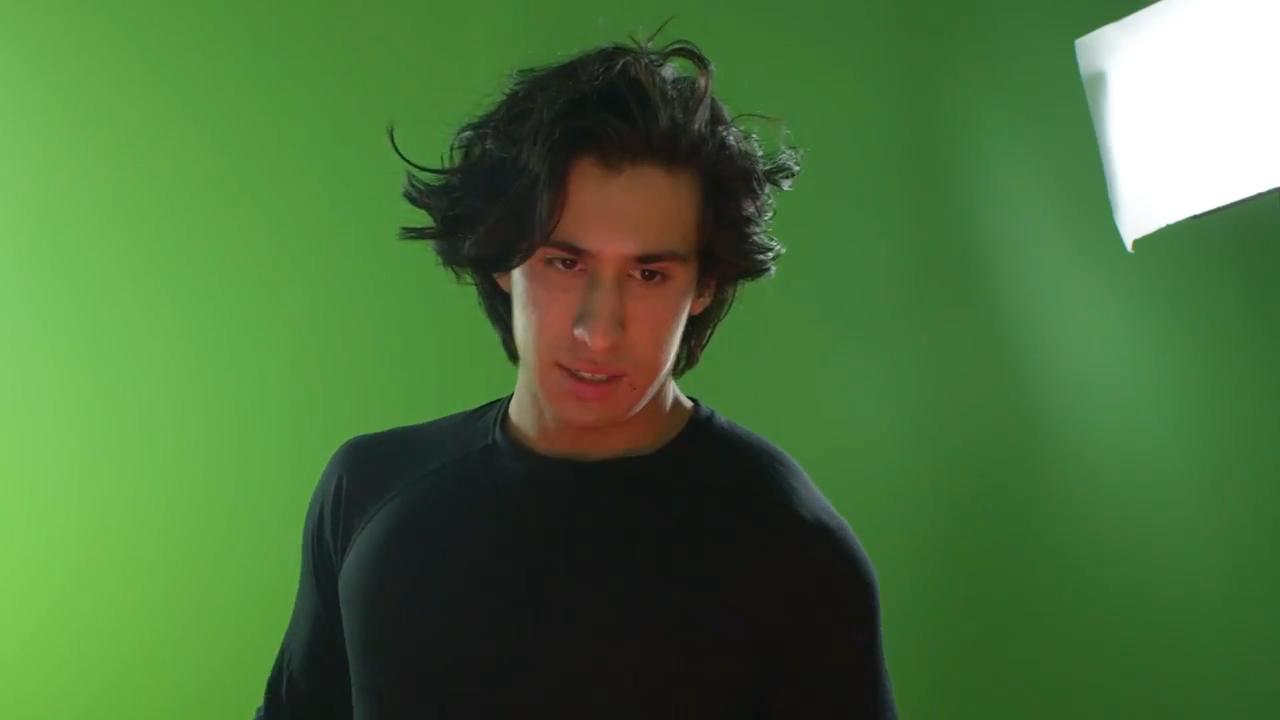
Utilizing various camera angles is an effective way of enhancing the narrative and tone of your film. We recorded our actor, in front of a green screen, at a low angle for our hero shot. This is perfect for making the subject appear strong, powerful, and courageous.
Two point lights were positioned on either side of the actor to help match the shot’s lighting to that of the background plate. We also used some interactive lighting whereby we flashed a red LED in front of the actor’s face to simulate the glows emanating from the firing lasers.
Step 2: Key the footage
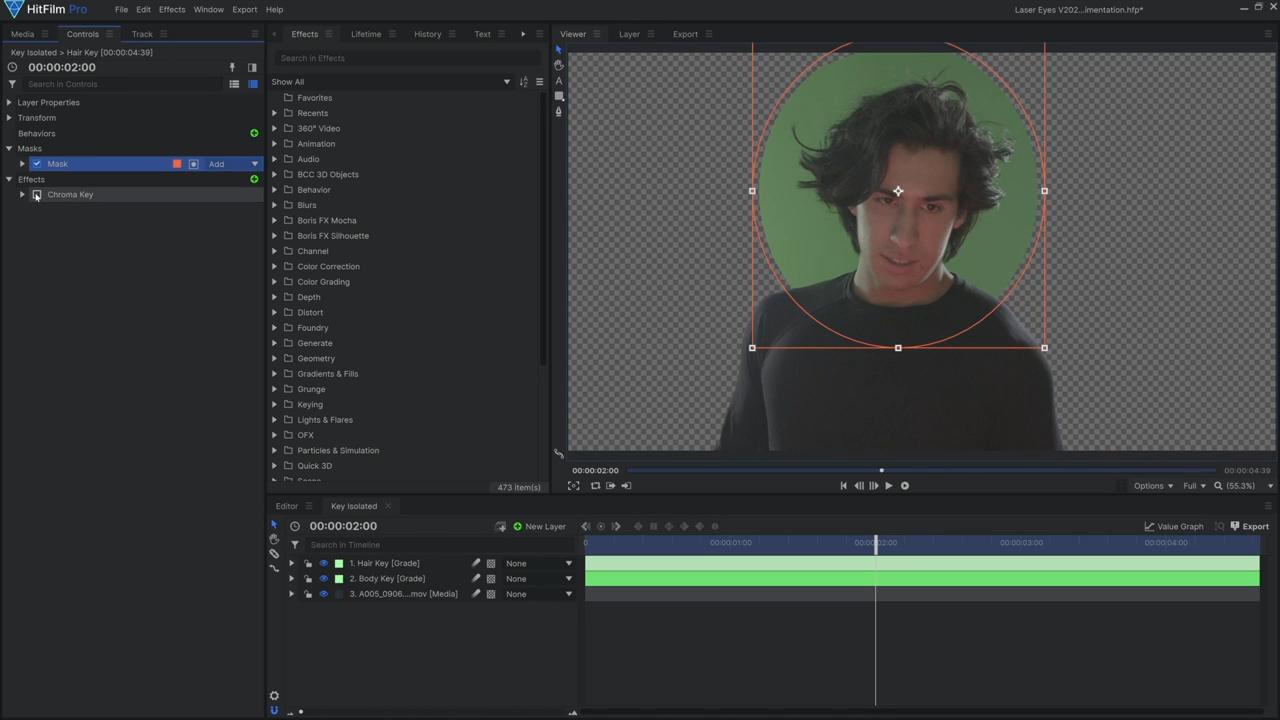
Once you have recorded your footage, you can import it into a composite shot in HitFilm. Once imported, begin to key out the green screen. We did so in two parts, inserting two grade layers above the footage layer; within one, we roughly masked around the actor’s torso; in the other, we masked around their head to allow for more precision to retain the intricate details of their hair. We then applied a Chroma Key effect to both grade layers and amended the effect’s settings to achieve the perfect key.
Step 3: Create a moody background
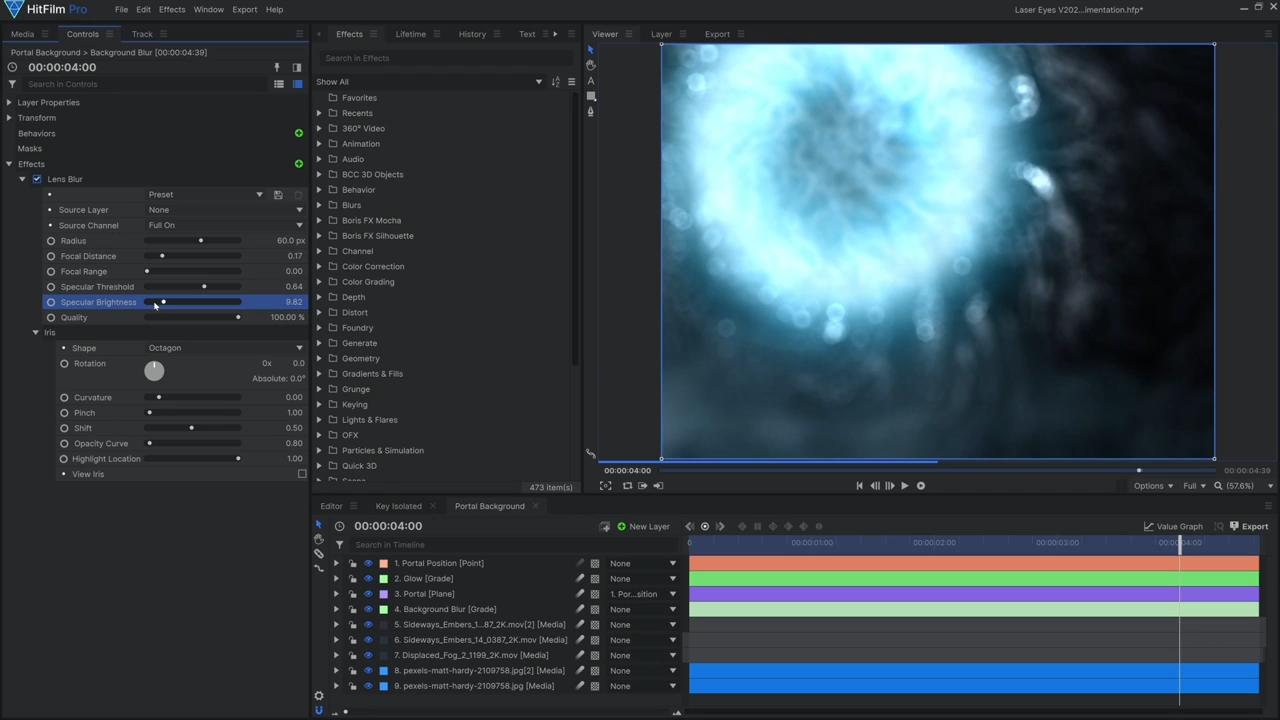
The background was created in a separate composite shot and consists of a simple stock image. The Curves effect and various other color grading effects were used to desaturate the image and increase its darkness. Sparks and smoke were added using some ActionVFX assets, which had their Blend Mode set to Add. A portal was created using the Fractal Noise effect on a plane layer which was then masked into a circle shape. This composite shot was then imported into the first composite shot as a layer. The Lens Blur effect was added to this layer to imitate the appearance of depth of field. We increased the effect’s Specular Threshold and Opacity Curve values to enhance the effect’s realism.
Step 4: Create the laser beams
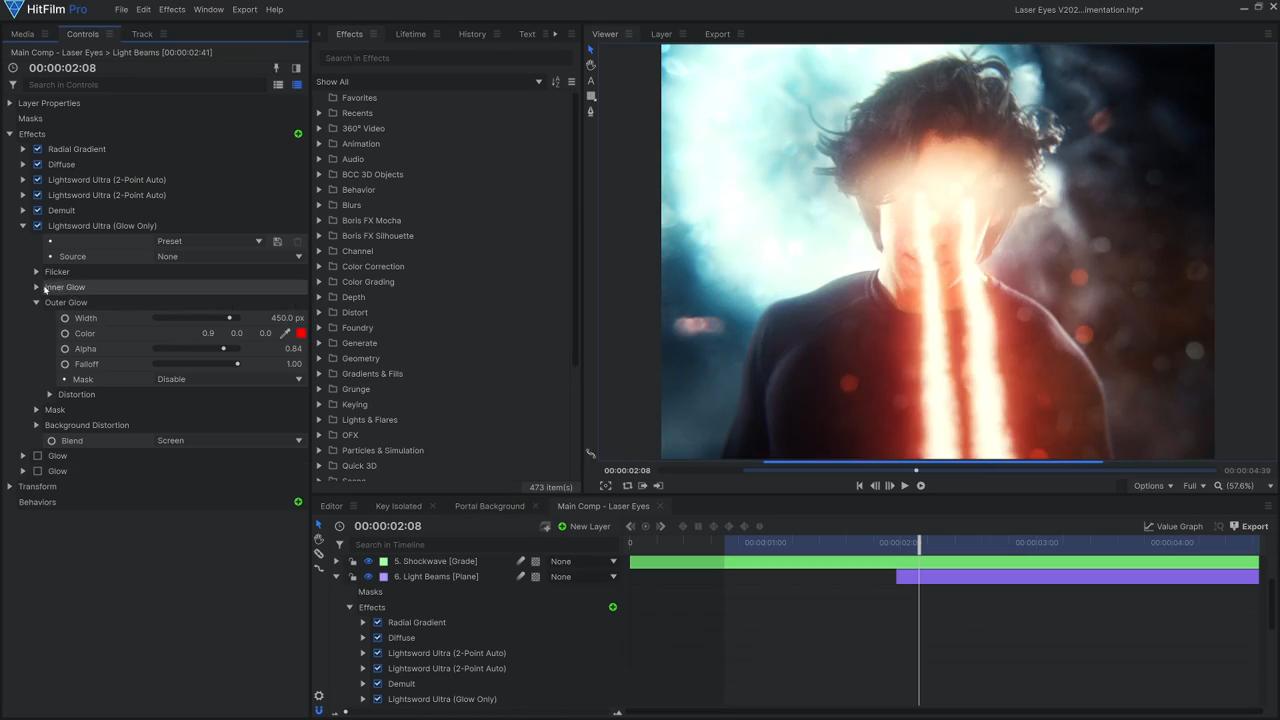
Create a Plane layer and set its Blend Mode to Screen. To this layer, add a Radial Gradient effect and set the Blend mode to Add. Position the effect over the actor’s eyes and scale up the Elliptical Deformation value to 1.00. Be sure to set the color of the Outer Radius to orange and the Inner Radius to white. Then, apply a Diffuse effect to the layer to soften the gradient.
To create the actual laser beams, you can use the Lightsword Ultra (2-Point Auto) effect found in HitFilm. You can also use the free Lightsword (2-Point Auto) effect in free versions of HitFilm to achieve a similar look. In the Lightsword Ultra settings, set the Position to Left Eye Track and position the laser to point in the firing direction. Under the Distortion settings, increase the Distortion value to your preference and change the Type to Energy. Lastly, turn off the glow effects (as we’ll use other effects to better achieve the desired look).
To the Plane layer, apply a Demult effect and a Lightsword Ultra (Glow Only) effect. Change the Lightsword Ultra (Glow Only)’s Inner Glow color to pale orange and the Outer Glow to red. Adjust the Width to your preference and increase the Flicker settings to introduce variation. Add two Glow effects with their Blend mode set to Screen and adjust their settings to emit an intense bright light.
Step 5: Color grade
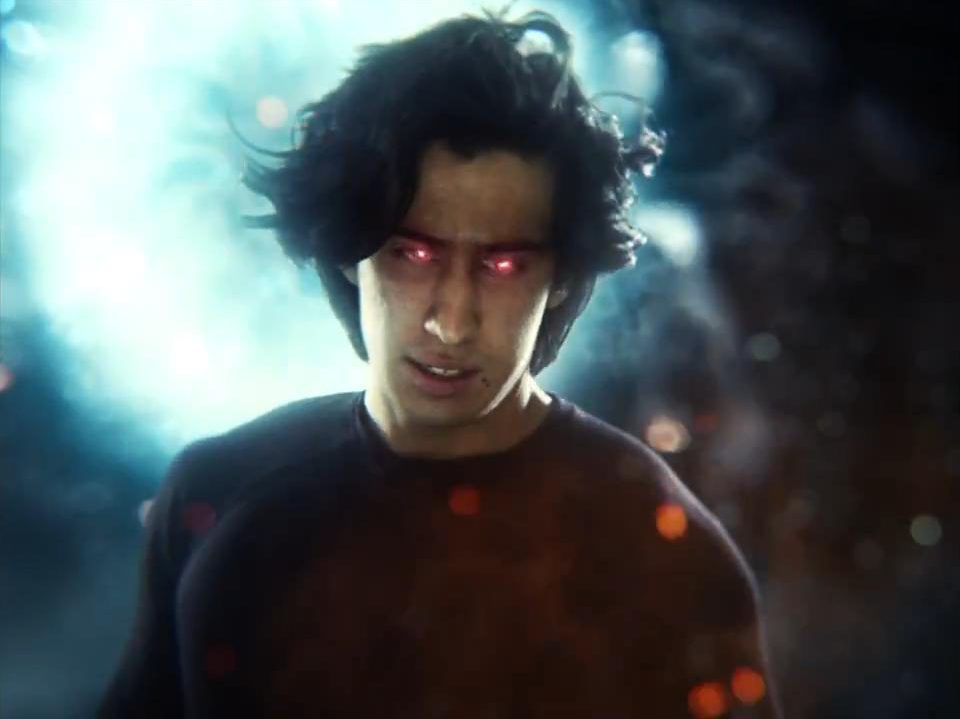
For the final color grade, apply the Curves, Bleach Bypass, and Film Grain effects to the Composite shot. The Lens Dirt effect (with a custom texture) can also be applied for a grungier aesthetic. To heighten the drama, add a Shake effect which is keyframed to trigger upon the actor punching – this intensifies the appearance of punch, giving it a larger impact.