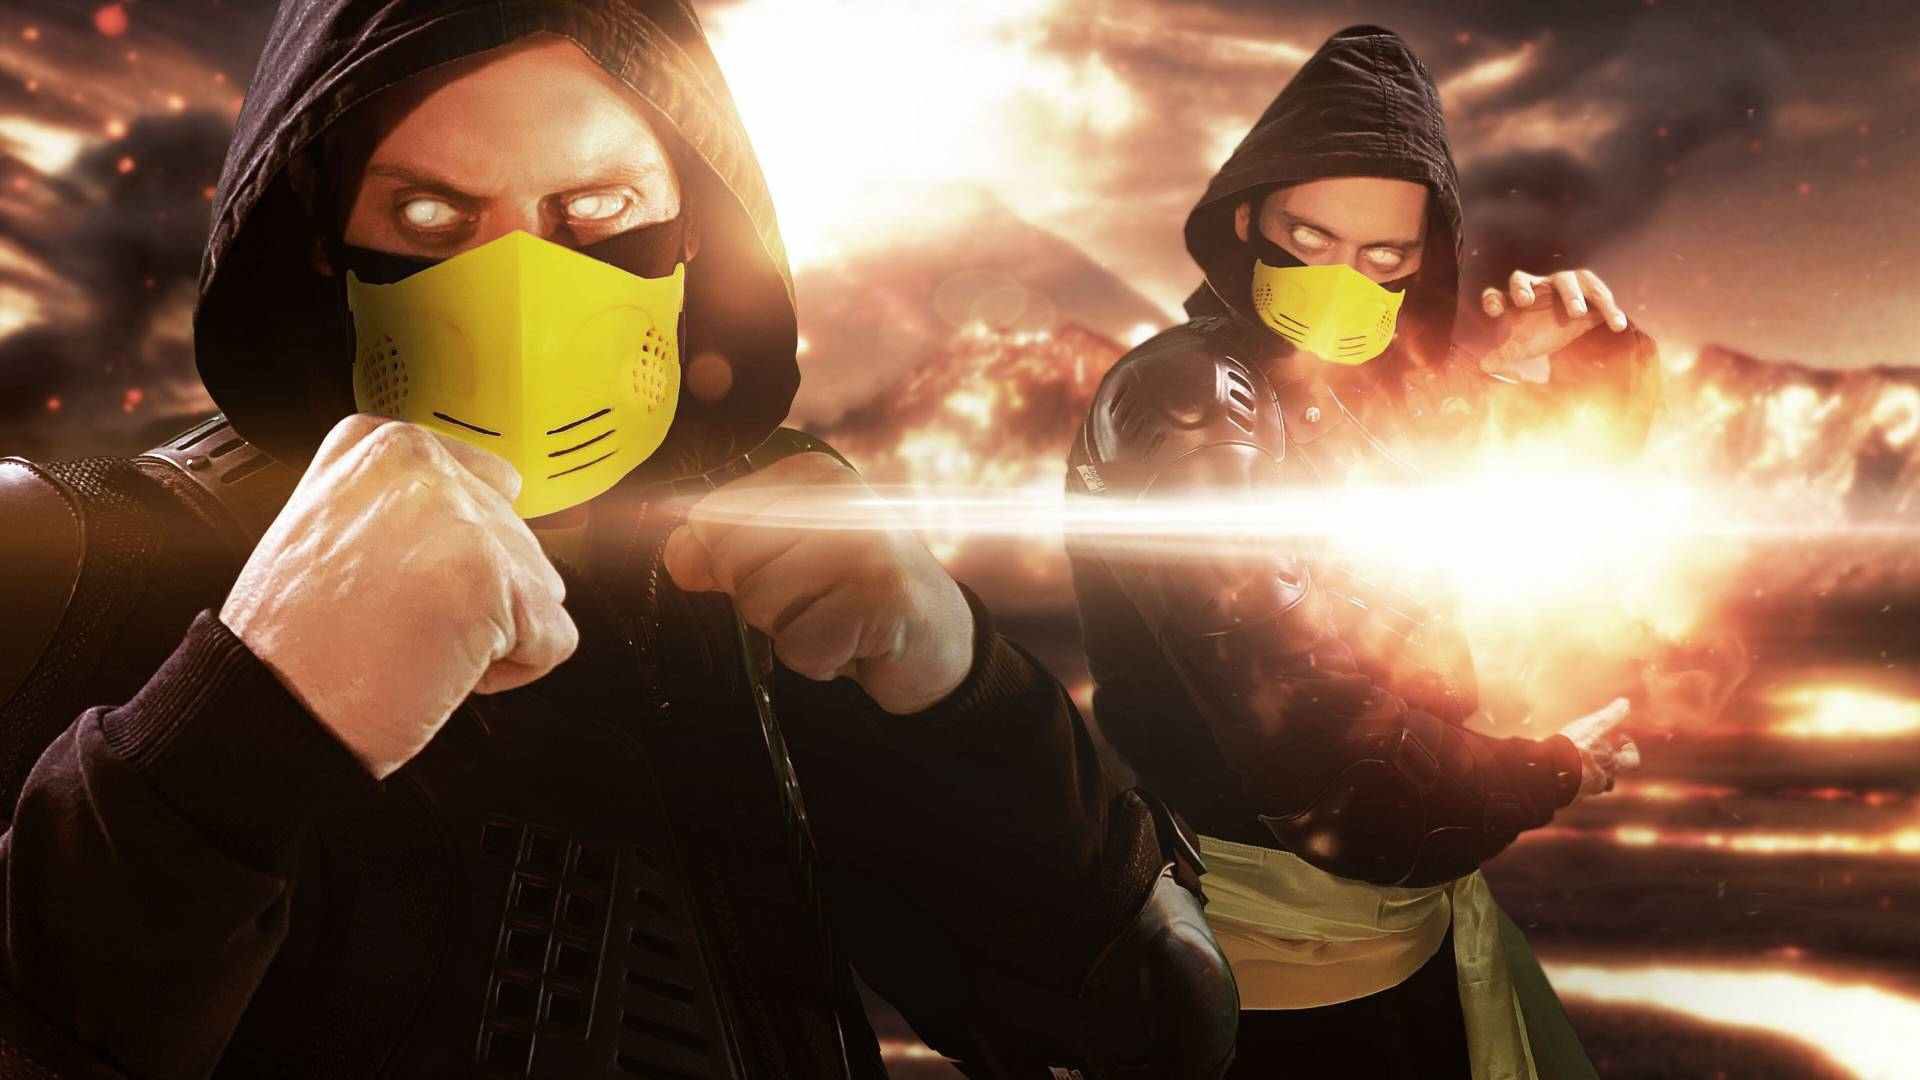
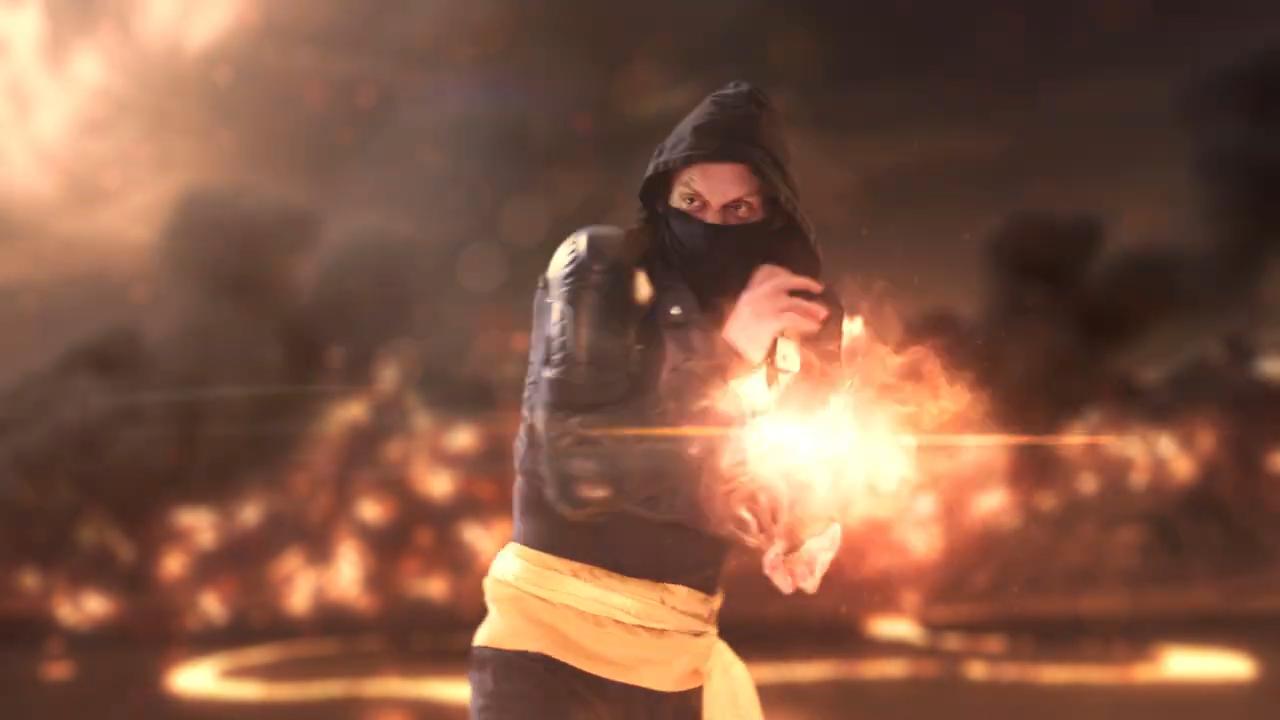
This tutorial will take you through how to create an explosive fireball effect inspired by Scorpion from Mortal Kombat. We’ll be using the Particle Simulator, which is included in HitFilm Pro, and is in the 3D: Particles add-on pack for Express.
Step 1: Pre production
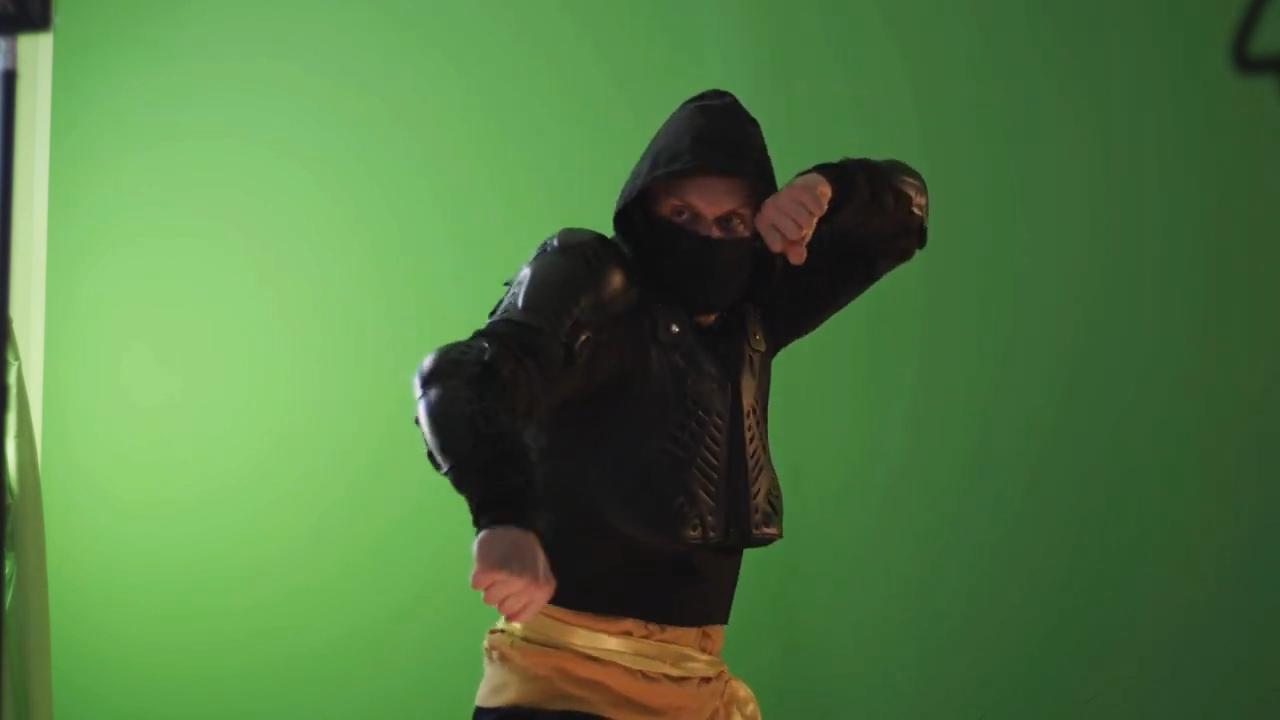
When recording your footage, be sure to take note of your lighting setup so you can easily replicate it digitally later on. We filmed our footage against a green screen as this allowed us to place a digital matte painting behind the actors. If you want to pre-visualize your 3D environment while recording your video, you should check out our iOS* app CamTrackAR, which was recently featured in Apple’s keynote event. To learn more about digital environments using CamTrackAR and Unreal Engine in Javert’s tutorial here.
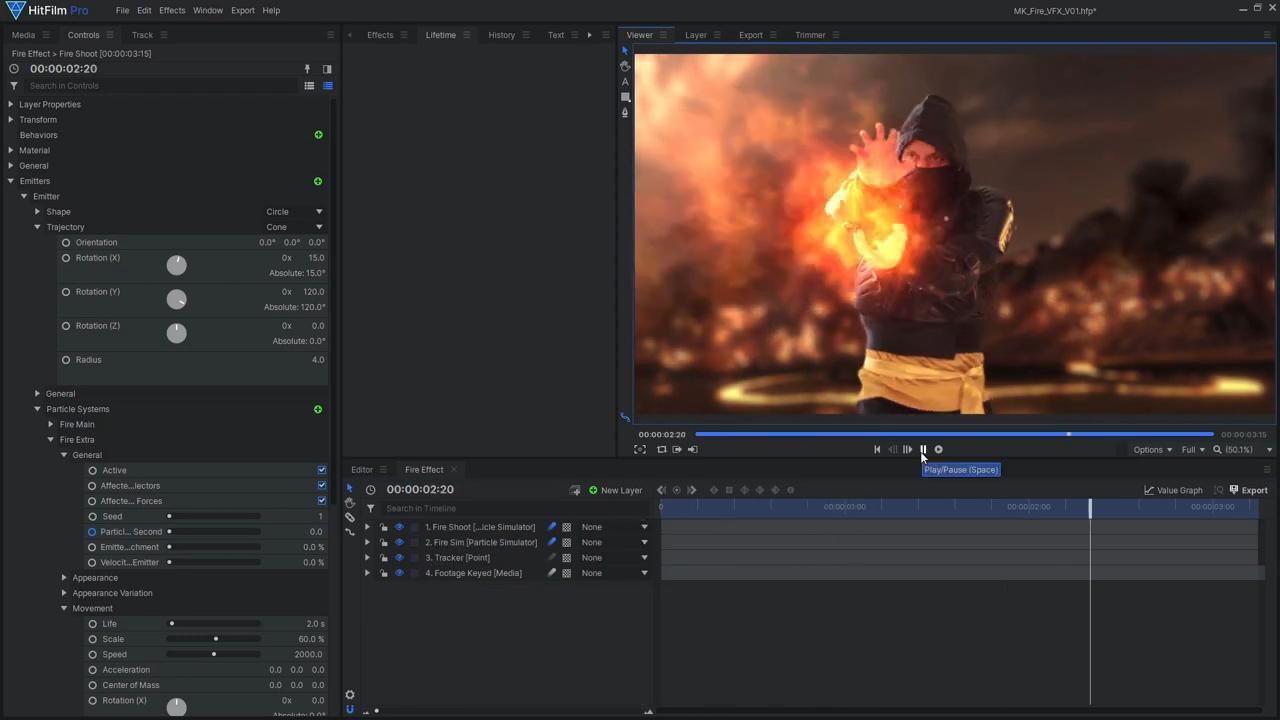
Step 2: Set up the Particle Simulator
In order to get the fire effect to follow the movement of your actor’s hand, you’ll need to motion track their hand:
- Begin by adding a new Point layer to your Composite Shot and position it between your actor’s hands.
- Enable keyframing for the position, then skip ahead a few frames and move the point into place.
With your actor’s hands motion-tracked, you can start setting up the Particle Simulator:
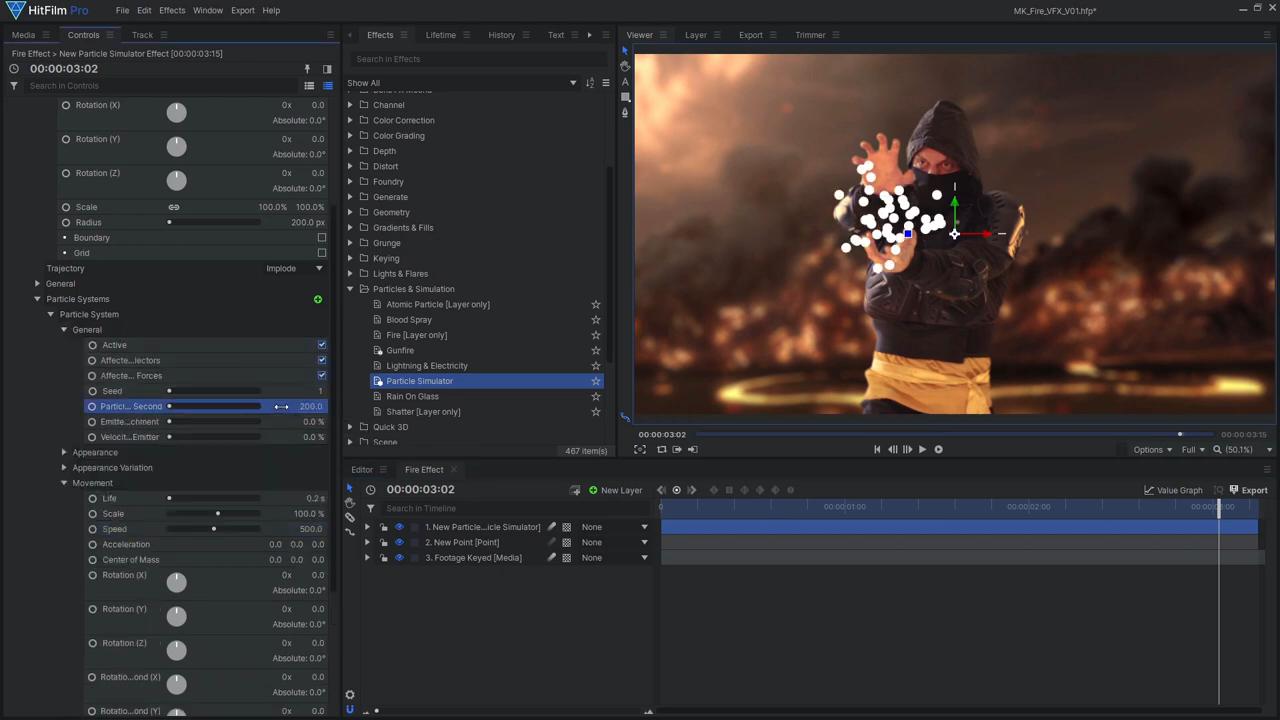
- Drag a new Particle Simulator onto the timeline.
- Set the shape to Circle and increase the radius, making it appear more like a fireball.
- Attach the Emitter to your tracked Point – this ensures that the particles are created at the Point’s location.
- Set the Trajectory to Implode – this causes the particles to move towards the center of the circle.
- To decrease the duration that the particles appear for and allow them to move more rapidly, in the Particle System Movement settings, decrease the Life, and increase the Speed.
- Then, raise the Particles Per Second. Animating this value up from zero makes the fireball activate at a particular time.
Now that the movement of the particles has been set up, you can begin to alter their appearance to look more fire-like:
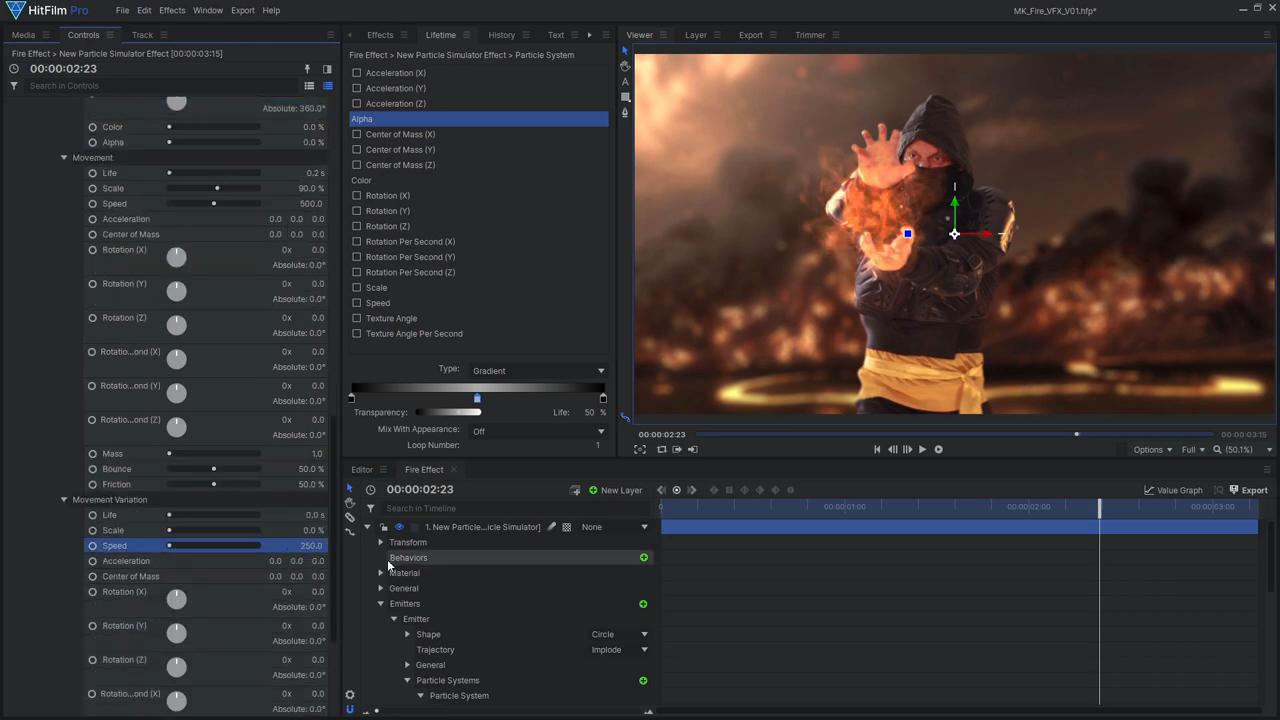
- In the Appearance controls, set the Texture Source to Built-In and choose one of the fire textures.
- Set the color to a dull orange (based on the selected texture, you may want to adjust the particles’ Scale).
- Set the particle Blend to Add, then set the layer’s Blend Mode to Add.
- Open up the Lifetime panel and add a gradient to the Alpha, so the particles fade in and out. The middle controller can also be used to control how opaque the particles appear; scaling this down reduces the brightness of the effect.
- Introduce some variation to the particles’ movement by increasing the Texture Angle variation controls to randomize each particle’s rotation and add some spinning action.
- Increase the particle Speed.
Step 3: Add detail to the particle simulation
With this base particle simulation set up, you can now duplicate the Particle System and adjust the settings to add more detail and interest to the effect. You can select a different texture, vary the Scale, and adjust the Color and Alpha. Once you are happy with the result, duplicate the Particle System once more, using one of the ember textures. Reduce the scale, then increase the Speed, Life, and Particles Per Second to add some fast-moving sparks emitting from your fireball. Ensure that you enable Motion Blur for this layer and slightly increase the Alpha on the sparks to enhance their appearance.
When you have achieved the desired result, you can begin to enhance the fireball’s appearance with some additional effects:
- Use the Diffuse effect to soften the particles’ appearance.
- Next, stack a couple of Glow effects to enhance the brightness. You can adjust the Per Channel Intensity controls on the Glows to fine-tune the color of the fire.
- Finally, add a Heat Distortion effect to break up the particles and add more exciting movement.
To create the fire blast effect, you can reuse the Particle Simulator effect that was set up – you just need to adjust a few settings:
- Duplicate the Particle Simulator layer.
- On the duplicate, set the Emitter’s Trajectory to Cone and reduce the Radius. This allows the particles to flow in a uniform direction instead of imploding.
- Change the Movement controls of each Particle System to create the shooting fire.
- Increase the Speed and Life, so the particles don’t fade out before flying off-screen.
- Adjust the Trajectory Rotation so the fire shoots in the right direction.
Step 4: Utilize stock footage assets
Complicated particle effects can be made more realistic by stacking additional effects on top. A straightforward technique to achieve a more natural effect is to incorporate stock footage elements. We sourced our fireball clip from ActionVFX, which is a great resource for high-quality stock footage. Here is a link to the free ActionVFX fireball asset we used: https://www.actionvfx.com/collections/fireballs-stock-footage.

Once you have downloaded the stock footage:
- Drag the clip onto the timeline and set its Blend Mode to Add.
- Adjust the Transform settings to place it into your scene.
- Apply additional Glow effects to the stock footage.
- If there appears to be a harsh edge around the stock footage, move it into its own Composite Shot.
- Increase the composite’s dimensions, so the fireball is no longer near the layer’s edge.
- In the main composite, set the Blend mode of this stock footage composite layer to Add.

To tie this fire effect together and add some interaction with the underlying video footage, you can use a Grade layer with a Heat Distortion effect. Use an animated large feathered Mask around the fire blast, so the distortion is only applied around the fire. Then animate the Heat Distortion effect to fade in with the fireball.
As the fireball would be emitting an immense amount of light, to enhance its brightness, you’ll need to use a light flare. To do so:
- In the main composite, drag in a black Plane with a Blend Mode set to Add
- Apply the Custom Light Flares effect to the plane.
- Select the Golden Artifacts preset
- Attach the Hotspot Position to the tracked Point layer so the flare follows the actor’s hand movement.
- Then animate the Intensity and Scale controls to match the intensity of the fireball.
Step 5: Color grade your footage
Our final Mortal Kombat fight scene has a heavy color grade applied, which greatly impacts the appearance of the fire. A Curves effect was used to adjust the color, and a Bleach Bypass effect added contrast to the shot. We also reduced the brightness of the fireball stock footage with a Curves effect and lowered the saturation of the particles to make them match the background better. Other lighting effects such as Lens Dirt were added to heighten the shot’s appeal, providing some depth and interaction between the fireball and the camera lens. If you find that your effect still doesn’t blend very well into the scene, try adding a Grade layer with a Gradient effect to add some lighting to the underlying footage. Lastly, the final composite used an orange Radial Gradient effect to add an orange glow to the bottom of the frame, adding to the fiery appearance.
*Please note that the reason CamTrackAR can only be used on iOS devices currently is down to the AR camera data we are able to pull from Apple’s hardware technology. We started with ARKit, which is amazingly good, and we are actively talking to Google about the best way forward for Android – so stay tuned!