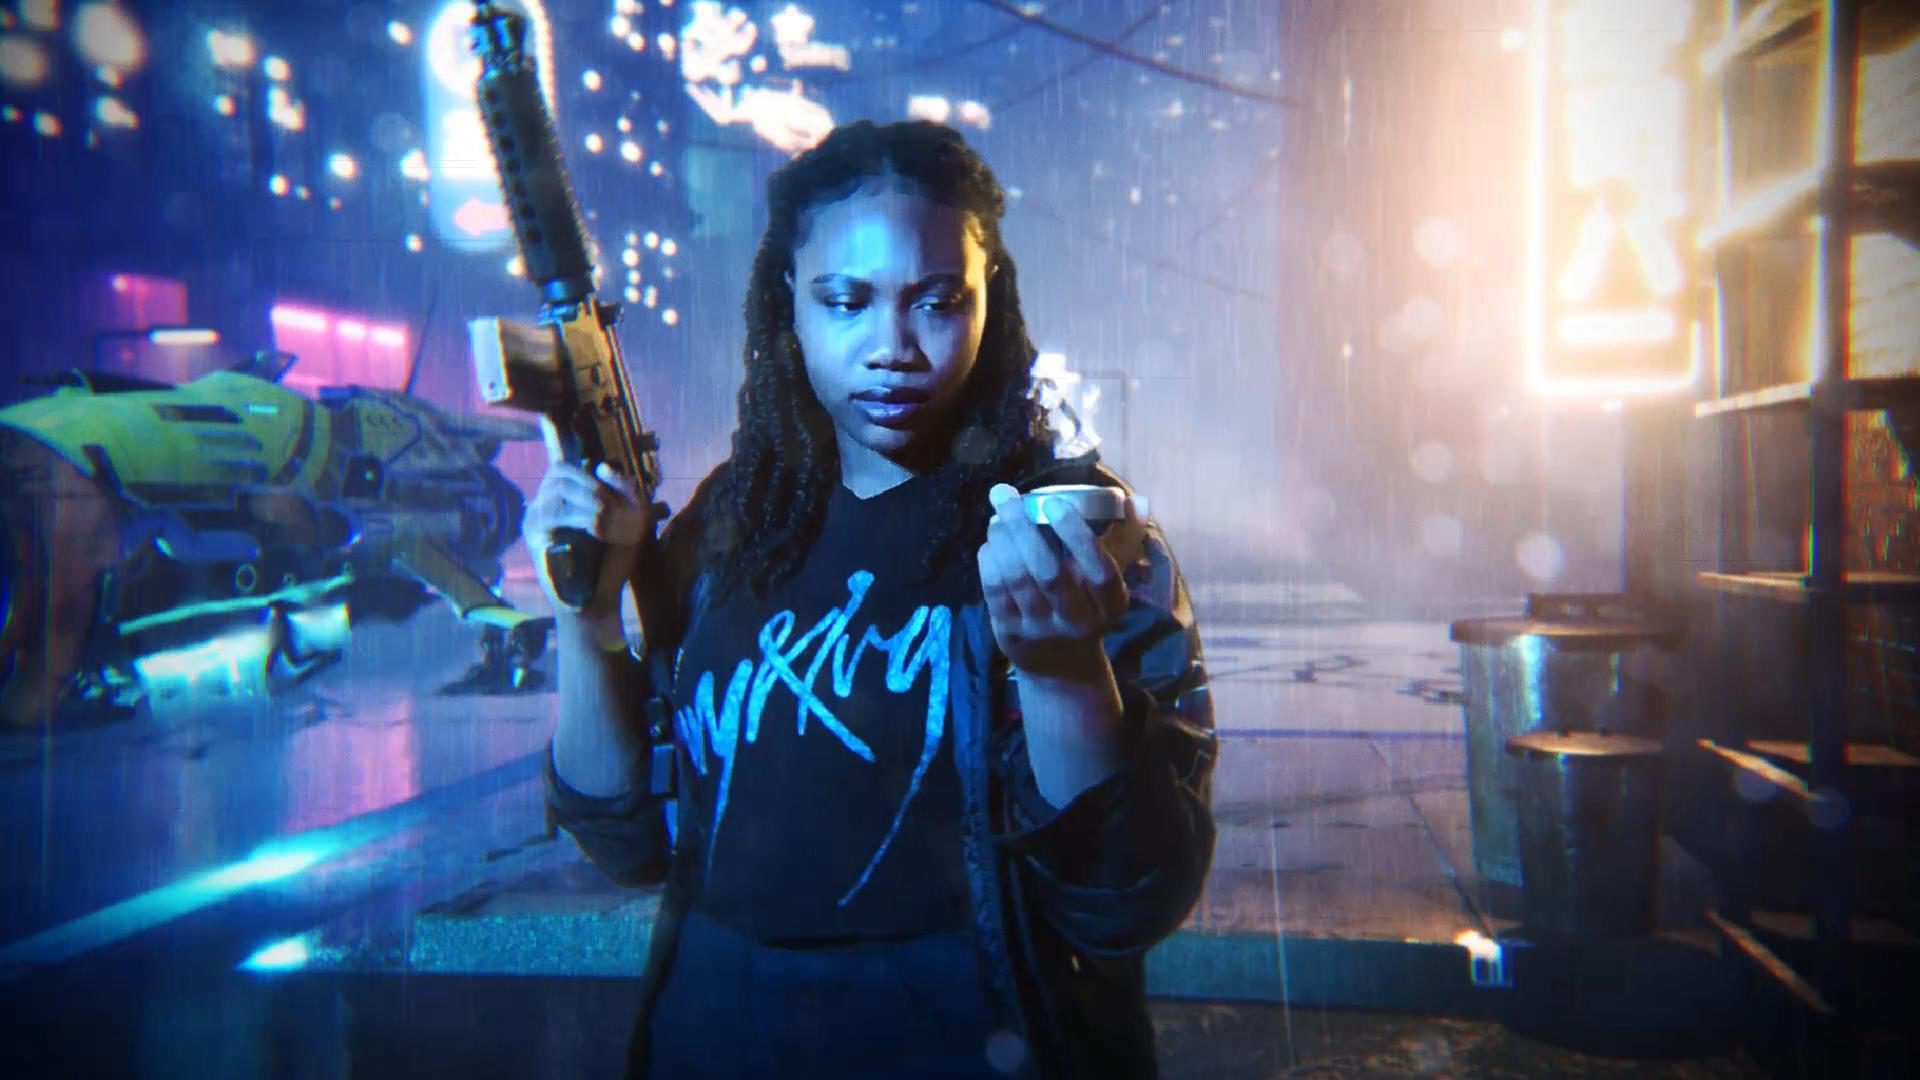
Learn how to transport yourself into the neon-lit, futuristic world of Cyberpunk 2077! Using Unreal Engine 4, HitFilm, and a live-action greenscreen plate filmed using CamTrackAR (our free iOS app), Javert shows us how to create a cyberpunk scene with VFX.
Step 1: Recording your footage with CamTrackAR
We used our free iOS app, CamTrackAR, to capture our scene. CamTrackAR records both video and camera tracking data at the same time using Apple’s ARKit. This means that you can film a subject against a green screen whilst simultaneously retrieving the tracking data. However, it must be noted that any parts of your subject that are not in front of your green screen will need to be rotoscoped.
Step 2: Using Unreal Engine 4 to create your cyberpunk scene
For textures, we used Quixel Bridge for its large library of photo-real Megascans.
Within Unreal Engine 4, to automatically generate the hills and dips on the surface we used a landscape and an alpha brush. Additionally, vertex painting was used for more control for elements such as the street and how the textures looked (as it allows you to directly paint textures onto your mesh).
Vertex painting does not work directly on landscapes, so we had to use an exported plane mesh created using Blender. Once scaled up whilst in the edit mode (activated using the Tab key), we right-clicked on the plane and pressed subdivide; this action was repeated twice for more vertices. Once completed, this plane was exported out of Blender as an FBX and imported into Unreal.
Quixel Bridge was used to create the asphalt street and concrete textures before being imported into the Unreal project. Once the textures were selected in Unreal, you can select Create Material Blend, using the Megascans plugin button, to combine all of the materials into one. Once done, you can go into mode, select Mesh Paint, and adjust the brush size. Using the different channels, you can paint the materials onto the scene. Within master materials, you have further control of how the materials appear, such as how they blend using height maps, resulting in a more realistic blend.
Megascan meshes were also used for the street curbs and sidewalks.
Step 3: Using decals for grungy detail
Decals work like stickers which you can add on top of your meshes, they work best on smoother textures. In this project they were used for the road lines and debris around the trashcans.
Step 4: Using Brushify Urban Buildings Pack for an urban cityscape
Brushify – Urban Buildings pack (found on the Epic Games Market place) was used to create a realistic street setting, ready to import our CamTrackAR footage.
Step 5: Adding 3D Sketchfab models
Sketchfab glTF 3D models were used for the motorbikes, neon signs, and road lights. To import the models, you’ll first need to enable them inside the plugin section. If the model imports itself in multiple pieces, you can drag them all inside your scene or create a blueprint to combine them into one layer.

Step 6: Adding Lighting
A couple of different lights were utilized to bring the scene to life. A keyframed directional light helped create the illusion of lightning in the scene while the neon lights that filled the scene were created using rectangle lights because their height and width can be easily adjusted to help integrate them into the shot.
Step 7: Adding atmosphere with Exponential Height Fog
Exponential Height Fog was utilised to create a haze throughout our cyberpunk scene. Using fog within the scene not only helps create a level of realism but allows you to create a sense of depth.
The Unreal Engine lights interact nicely with the fog too. Checkmark Volumetric Fog to allow them to diffuse realistically in the haze, and use the Volumetric Scattering Intensity slider to customize the defusion to your liking.
Step 8: Importing CamTrackAR data
Import the .hfcs that comes from the CamTrackAR export into Blender and then export the camera data as an FBX following these steps:
- Delete the default camera and cube.
- File > Import HitFilm AR Tracking Data (you’ll need our HitFilm Exporter to do this)
- Export the camera as an FBX (File > Export FBX), and in the Bake Animation dropdown, be sure to set the Simplify to 0. This prevents it from smoothing out the tracking data.
- In Unreal Engine, go up to Cinematics, Add Level Sequence. This will create a timeline inside of Sequencer, which is how you edit the video.
- Go to the Actions dropdown, select Import, then choose your FBX file. On the pop-up menu, ensure that only the Create Cameras tickbox is checked.
- Set the Sequence to 60fps using the dropdown menu above the Sequence timeline, and you’ll notice that the camera now moves as it did in the real world.
- If you’d like to adjust the camera’s position but not mess up the tracking data. Create an Empty Actor within the scene under Place Actors > Basic > Empty Actor and attach the actor to it.
- Move the Empty Actor to get the camera in the correct position.
- Finally, adjust the Camera sensor width and height to be 16×9, matching the shot’s final aspect ratio.
Step 9: Exporting from Unreal to HitFilm
Once you’re happy with how to shot looks in Unreal Engine, you’ll need to export it by clicking Render As Movie, leaving it as a 4k AVI file. Leaving it as 4k (even if your scene in HitFilm will only be 1080p) gives you a lot more detail.
Inside HitFilm, import the greenscreen footage and the background shot we just exported from Unreal Engine.
The final step is to composite the actor into the scene by masking out any props or areas of the shot we don’t want to see, adding the Chroma Key effect to the background, and finally, color-match the two plates using Curves, Hue, Saturation & Lightness, and other stylizing effects like Bleach Bypass, Chromatic Aberration, and a Vignette.
The full tutorial on how to create a cyberpunk scene with VFX can be found below: