In this tutorial, we’re joined by some special guests! The winners of our Make a Tutorial competition, END Productions UK, will be showing you how to create a high-quality product advert. They’ll cover everything from the production process all the way to compositing in HitFilm!
Step 1: Set up your home studio production
Firstly, to ensure maximum control of the lighting of the product, block out as much natural light as possible. For the setup, you’ll require:
- A product.
- A black backdrop.
- A surface to place your product on such as an ironing board.
- Your chosen camera.
- A tripod
- A light with a diffuser.
- The tools necessary, such as skewers and wire, to achieve your desired shots.
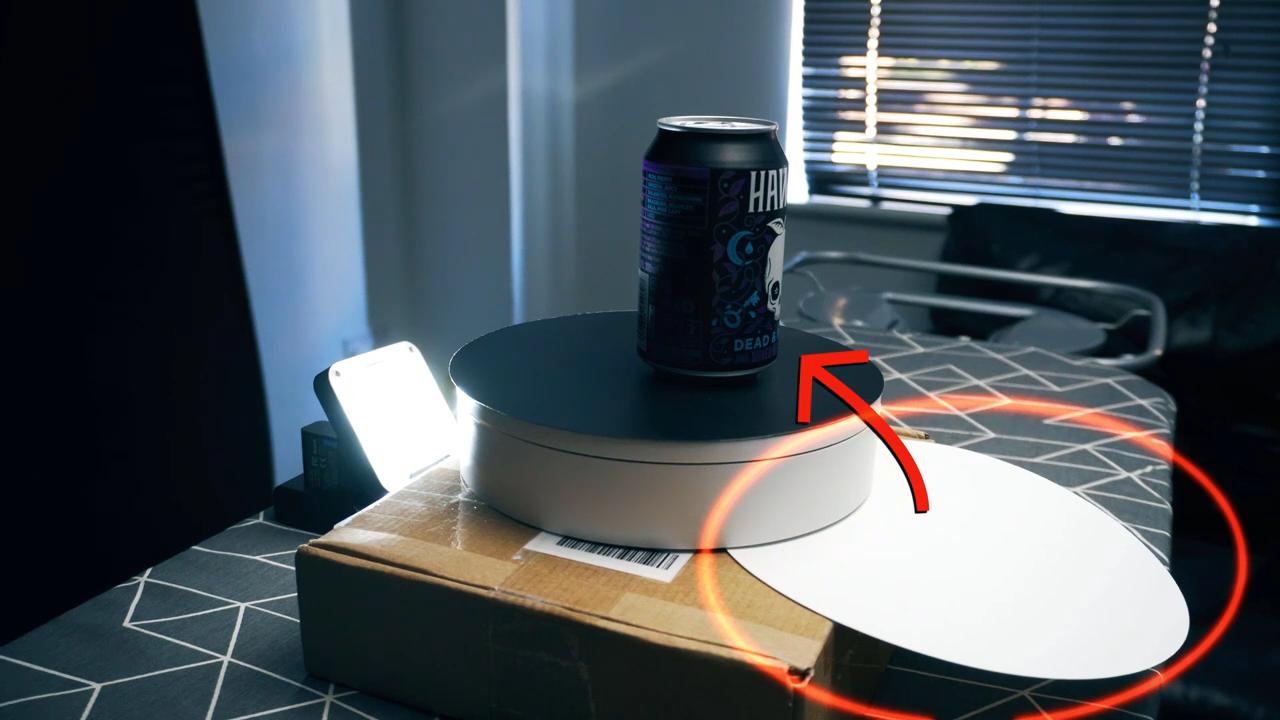
To display the product, we used a cardboard box for height, a turntable as a base, a black base plate, and the product itself (a can). Additionally, we set up a light directly above the product angled away from the backdrop to avoid light spilling onto it whilst keeping the can well lit. We also placed a white base plate beneath the can to reflect the light onto the darker areas at its base – anything white, such as a sheet of paper should suffice. Lastly, we placed a small light behind the can to help separate it from the background.
Step 2: Shoot your product
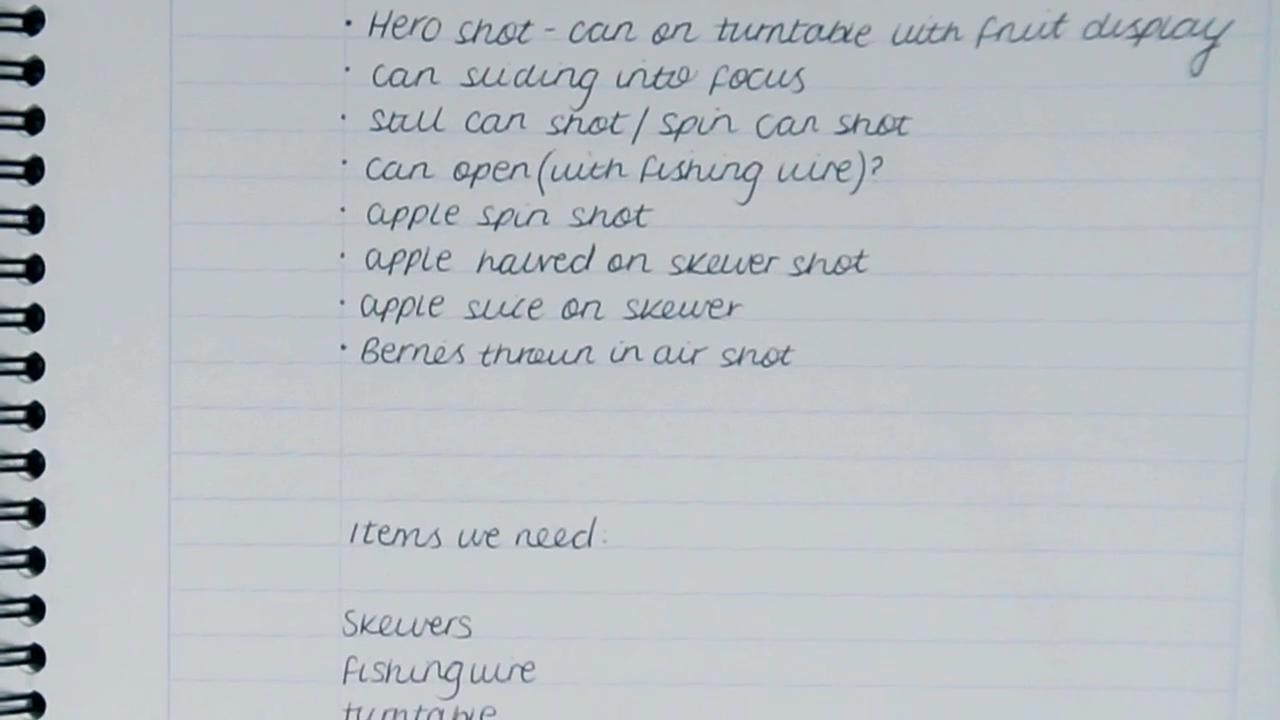
We’d recommend that you create a shot list before you shoot – this guarantees that you know exactly what shots to get and prevents things from being missed.
We mounted a camera on a tripod positioned reasonably close to the subject, adjusting the height and zoom distance to ensure the frame was filled predominantly with black. Regarding the camera settings, we set the aperture as low as possible (f/3.5) to keep the subject in focus and the background blurred. Additionally, we avoided overexposing our shots, as it’ll be difficult to reverse in post. We shot our entire advert at 100 fps for consistency and to give us the option of adjusting the speed in post. A handy tip to keep in mind is always keep your shutter speed at roughly double your frames per second.
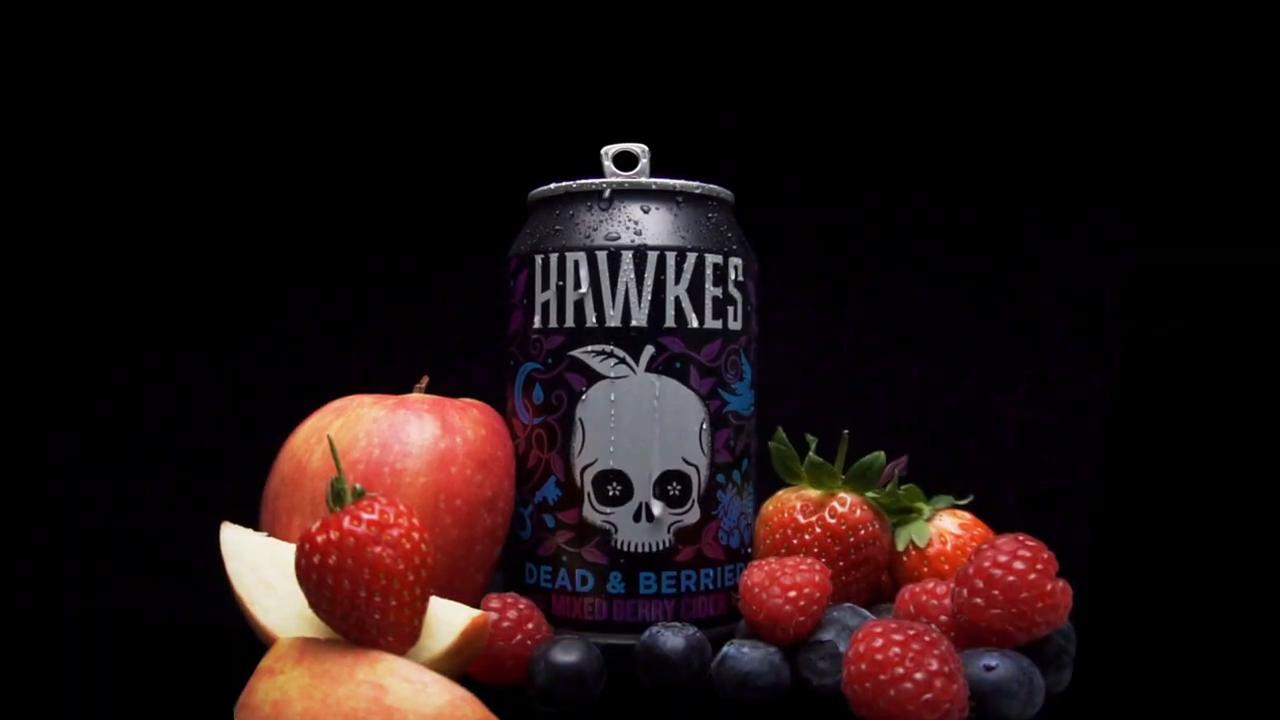
We decided to shoot our hero shot (end shot) first, so the products and props were unopened and unspoiled. To give our can a cool and refreshing appearance, we spritzed it with water before filming. We recorded various creative shots – even if you’re unsure of a concept, shoot it anyway; you may find that it looks great in the edit! The most important thing overall is to get creative and have fun.
Step 3: Edit your footage
Smooth “dolly in”
The first shot edited was of a still can. We wanted to give it the appearance of a smooth “dolly in”.
We began by coloring our shot as with all of our shots to enhance the black void look using the Curves effect. After applying the Curve effect to your footage:
- Reduce the black down to the zero line, and raise the white to roughly 90.
- Then make a shallow s-curve for contrast – the gradient of the curve will depend on your footage.
Next, we applied the “Hue, Saturation & Lightness” effect to raise the master saturation slightly. Additionally, this effect was used to increase the brightness of some of the colors within the shot; the blues and purples present were intensified by increasing the Blue and Magenta Saturation to around 15.
Once you have colored your shot, you can then create a mask that covers the areas you wish to hide for example the turntable and the wall. Once masked, add a black plane underneath your footage and adjust the feather strength and expansion to eliminate any harsh lines and soften the edges of the can.
When you’re satisfied with the shot’s appearance, you can begin to keyframe the product’s Scale value; this imitates the appearance of the camera moving towards it. To do so:
- Move the Playhead to the start of the shot.
- Enable keyframing for the Scale value of the footage layer in the Controls tab.
- Adjust the product’s Scale until you’re happy with the starting size (we liked 58).
- Then, move the Playhead forward by a second and adjusts the product’s scale to achieve the desired end size (we chose 100).
- For more dynamic movement, convert the keyframe type to manual bezier; this allows you to adjust the value graph to get that perfect result.
Lastly, to boost the appeal of the shot, we added a reflection. To do so:
- Duplicate the product shot.
- Convert the duplicate to a 3D plane
- Under the duplicate’s Transform settings in the Controls tab, set the Orientation’s z value to 180° and the x value to 22°.
- Unlink the duplicate’s Scale values and add a minus sign in front of the x Scale value.
- Correctly position the copy in the shot and reduce its Opacity to a suitable level (we went with 27).
- Then, select the duplicate’s second Scale keyframe and place a minus sign before the x value. This prevents the copy from being flipped over.
- Lastly, keyframe the reflection’s Position to stick to the bottom of the product as it grows. Ensure that these keyframes of set to Bezier so it follows the same path as the Scale.
To make the shot more striking, we added rolling smoke stock footage to the composite. We set its Blend mode to Screen and adjusted its Position, Scale, Opacity, and Speed values to achieve the desired look. We then duplicated this stock footage layer and flipped it to come in from the other side of the frame.
Finally, to really sell the shot, we applied a Lens Blur effect to the Footage layer – this gave the product the appearance of coming into focus. We then animated the effect’s Radius value so initially it is 30 px, where the footage’s 2nd Scale keyframe is present, the value was reduced to 1.0 px. These Radius keyframes were then converted to the Bezier type, and the overall Lens Blur effect was copied onto the reflection layer.
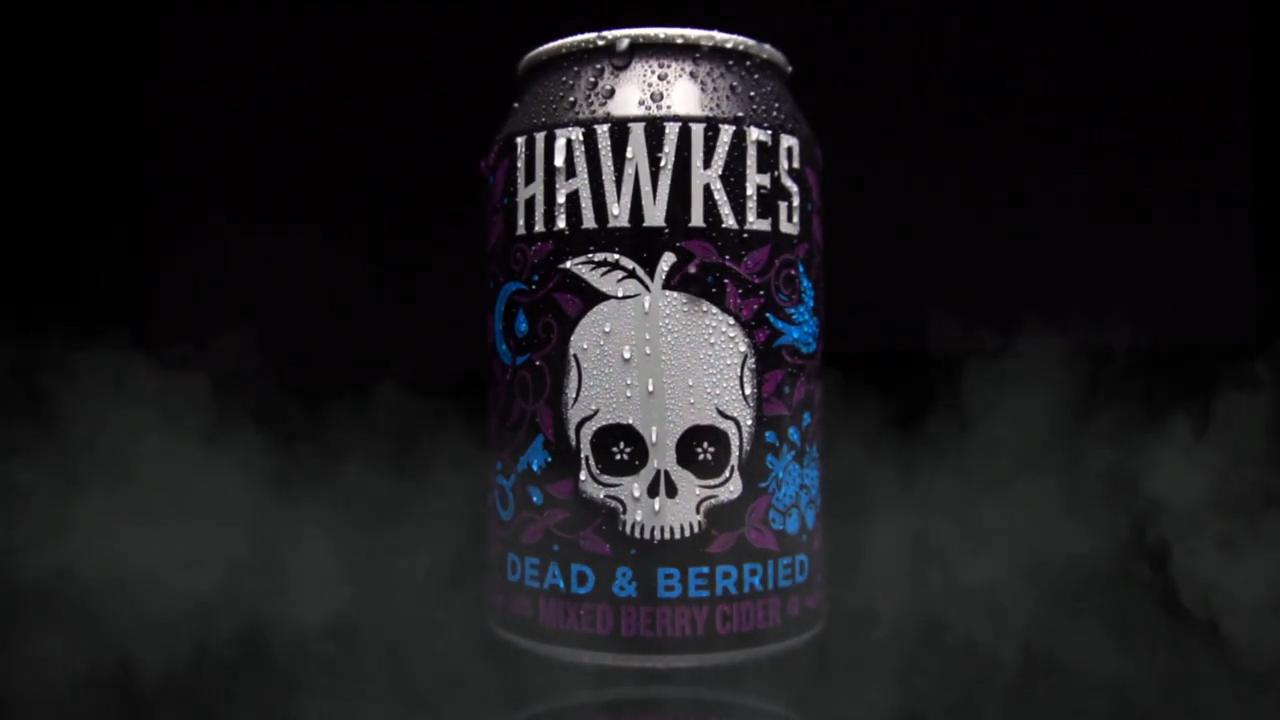
The hero shot
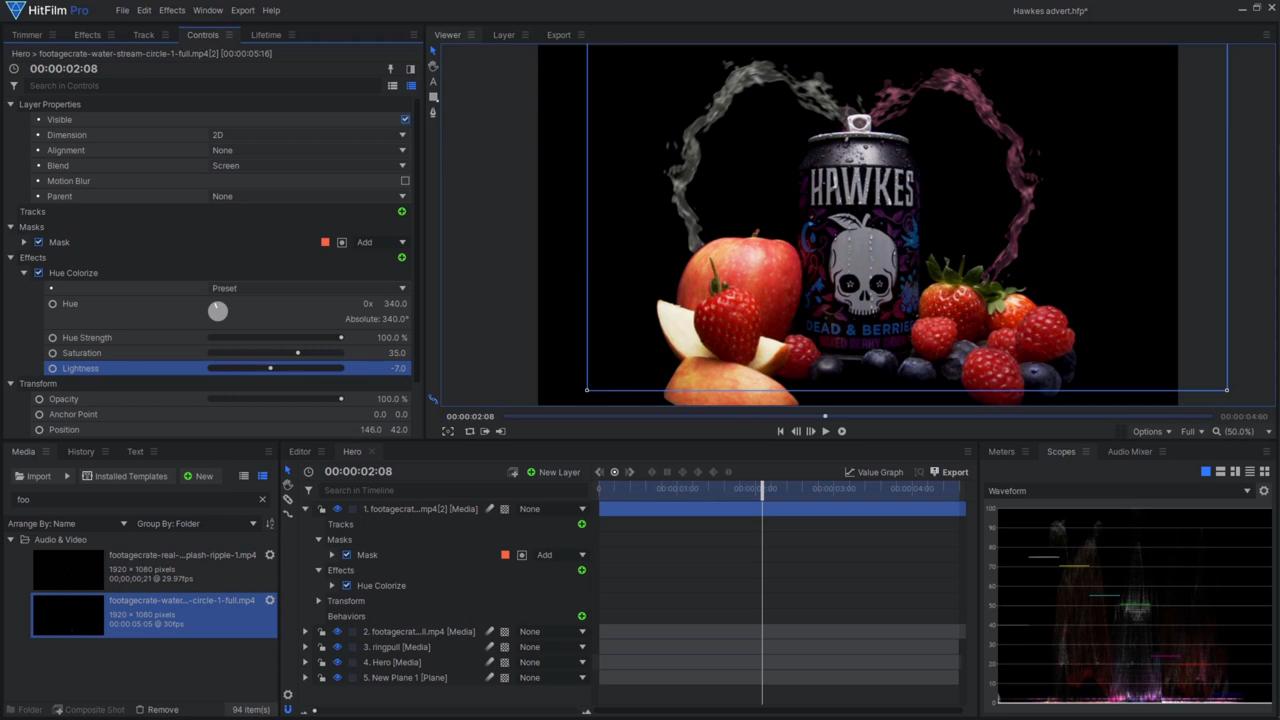
The hero shot is the last thing people will see of your advert – we like to keep ours simple but memorable. As before, we used the Curves and Hue, Saturation & Lightness effects to colorize the shot, masked around the subject, and placed a black Plane behind the masked footage. We also repositioned our shot so that the can was centered in the frame.
To dial up the appeal of the shot, we sourced some cool-looking flowing liquid stock footage – the aim was to give it the appearance of the cider within the can. We set its Blend mode to screen and adjusted its position to make it look like it was shooting into the can. Then, we applied a Hue Colorize effect to the stock footage, setting the Hue to 340°, the Saturation to 35, and the Lightness to -8 to enhance the realism. We then duplicated this stock footage layer and flipped it over to create symmetry.
As the actual can in the shot wasn’t open, we had to get a still shot of the top of the can with the pull tab up, mask around the pull tab, and export the frame as a png. This frame was then imported into the composite shot, colorized in the same way as the can, and positioned above the can behind the stock footage.
Finally, in the editor, we added a scale keyframe to the shot at the beginning and end to create a slow cinematic zoom. Modifying the scale in the editor means that all aspects of the composite move together, and there’s no need to alter individual scales or animate masks.
Self opening can effect
To achieve this shot, we tied fishing wire to the pull tab of an already open emptied can. Holding the base of the can with one hand, we pulled the wire taut to raise the tab.
With the shot opened in a Composite shot, we discovered that it required stabilization. To resolve the issue we used a 2 Point Tracker; here is a tutorial showing you how to stabilize a shot in post.
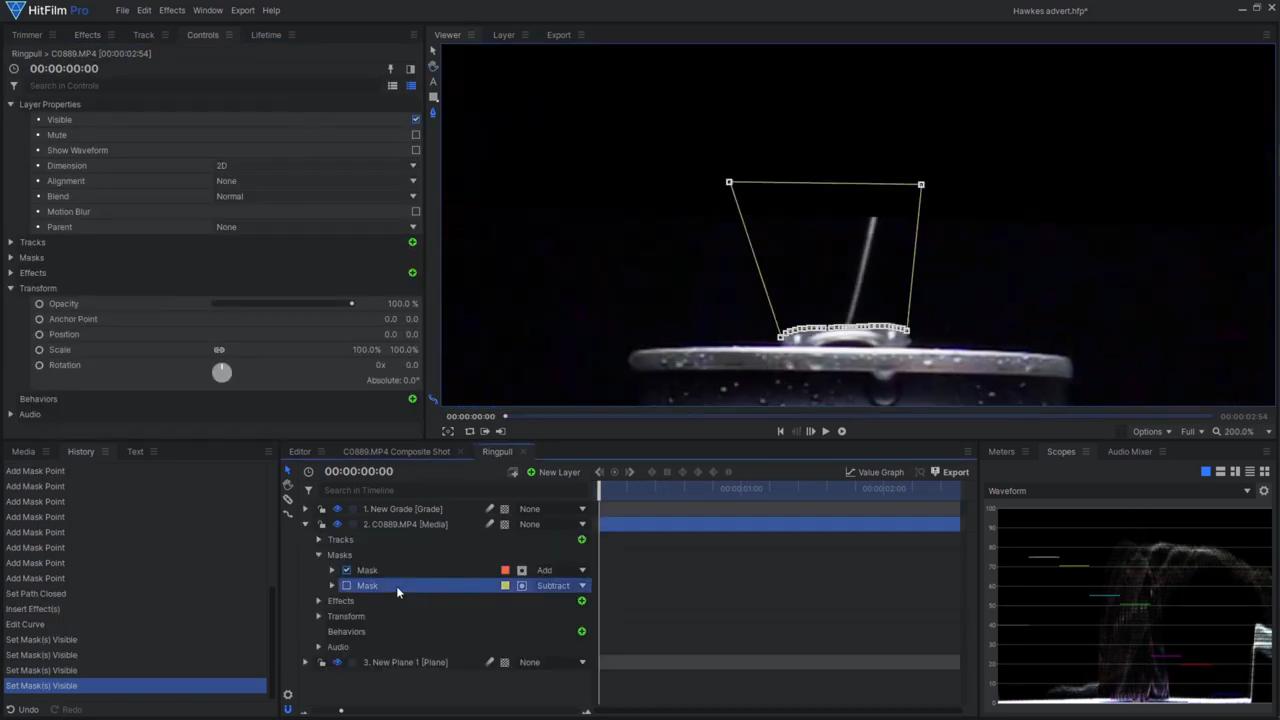
After stabilizing the footage, as before, we colorized the footage and masked around the can. We also animated a separate mask to remove the rest of the wire from the shot by keyframing the layers Path value. To scale up on the drama, we included some more smoke stock footage and a water droplet which we colored using the Hue Colorize effect to give it the appearance of the cider within the can. We then blended them to the screen and scoured and positioned them to make them look like they were coming out of the can as it cracked open. Lastly, in the editor, we scaled and positioned the shot – this was done in the editor as we didn’t want it to interfere with the keyframes created by the tracker.
Text glitch effect
We began with a shot of the can spinning, which we slowed down to 75 and then colored and masked around. Next, we animated the mask to follow the movement of the can. We then adjusted the scale and position of the can so it was slightly larger and positioned in the center of the frame.
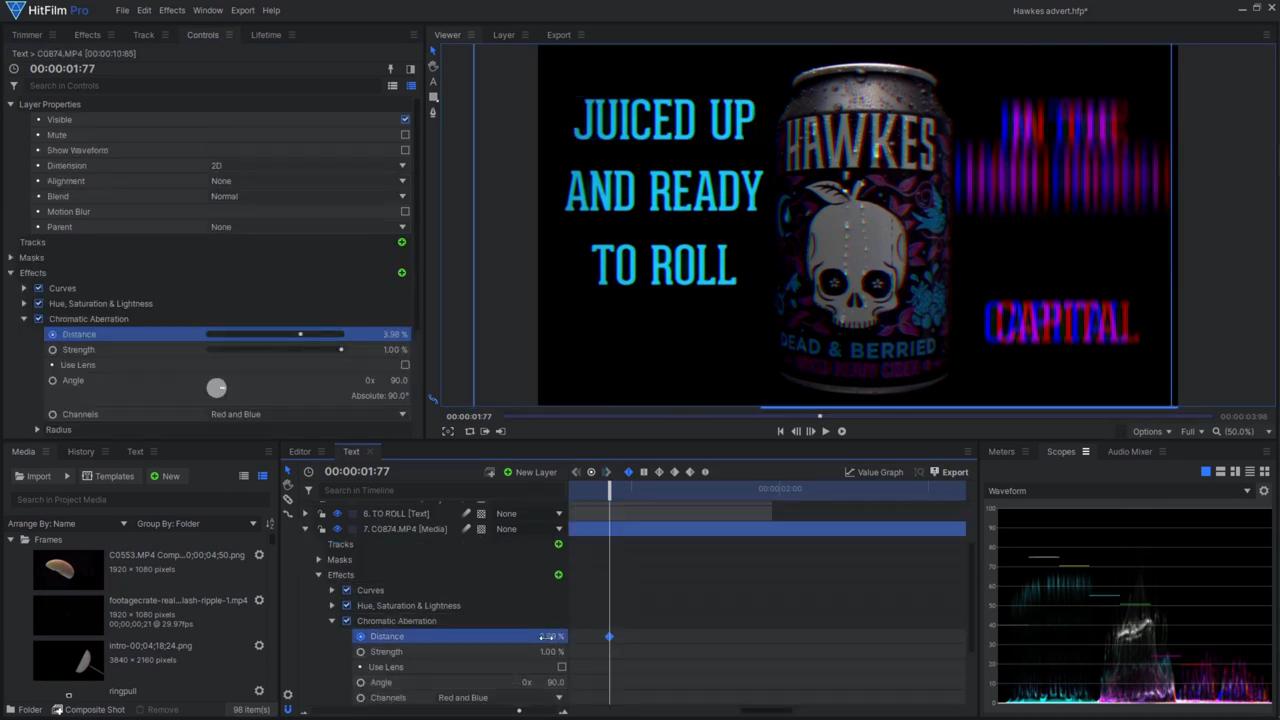
Using the text tool, we added our first line of text. We adjusted its size, color, position and changed the font to one sourced from dafont.com that matched the can’s branding. After adding all of the text, we added keyframes on the opacity values to make each line fade in one after the other. Lastly, we added a body of text on the other side of the can.
We desired to have a glitch transition between the two text bodies – to do this we:
- Added the film damage effect to each line of text.
- On the seed value we added a keyframe of zero where we wanted the glitch to start and then went forward a few frames and upped the seed value to a point where the text distorted in a different direction.
- We then repeated this process with the other lines of text with keyframes in the same place but at different values to add variety and enhance the glitchy look.
- For the purple text we reverse this process starting at high seed value and ending on zero so as the blue text glitches out while the purple text glitches in.
We wanted to give the text a bit more of a gritty feel and make it look less stuck on:
- First, we added a Glow effect and adjusted its Intensity to 0.6, the Threshold to 24, and the Radius to 66 pixels.
- Then, we added a Film Grain effect and increased the Grain Strength to 34%
- To enhance the glitch effect, we applied the Chromatic Aberration effect. We added keyframes for the Distance value and put these in the same place as those for the Film Damage seed so that the effect increased as the glitch occurred.
- Then, we copied the effects onto the purple text and again reversed the keyframes of the chromatic aberration to follow the glitch.
Split apple effect
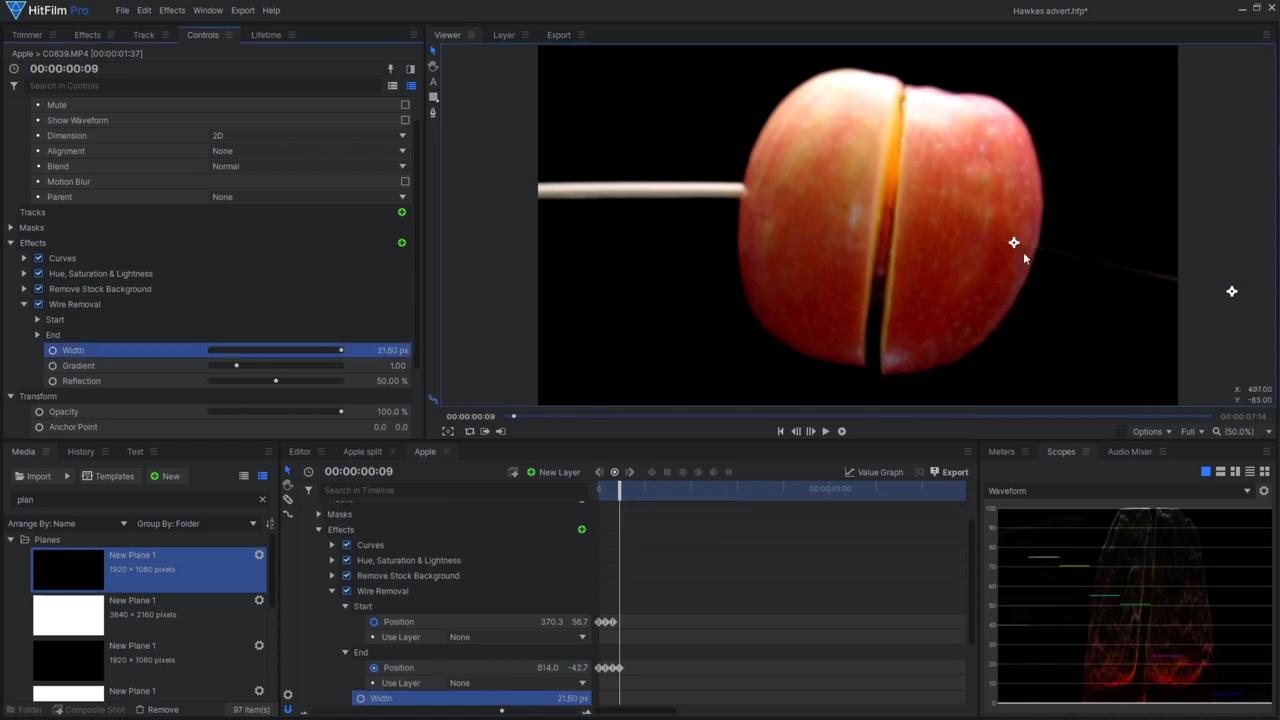
Once we had colored our shot, we wanted the space behind the apple to be transparent. This was achieved using the Remove Stock Background tool. To remove the skewers from the shot we used the Wire Removal tool. When you have applied the effect to your shot, position the effect’s start and end points over the skewer and raise the width until the skewer is invisible. Then, activate the start and end keyframes as you will need to alter their positions as you scrub the timeline. Another method to remove the skewers would be to use masks, adjusting the feather strength and expansion so you get a softer, more natural-looking line along the apple. To allow the mask to follow the apple’s movement, keyframe the Path so the skewers remain hidden.
We then added one more wire removal at the beginning of the shot to hide the split in the apple, which we keyframed off when the apple opened. When we were happy with the apple’s appearance, we added a still can shot to the composite and moved it below the apple layer so it would appear behind the apple as it opened. We then animated the can layer’s Scale so as the apple split, the can grew. To make it look like the apple slices were coming from behind the can. we exported a still frame of an apple slice with the skewer masked out and added this to the composite behind the can, we then animated the slice by keyframing the Scale, Position, and Rotation values so that the apple slices would fly off. Lastly, we duplicated and flipped the layer to create symmetry.
Music and sound design
Music and sound design is a great way to elevate your advert, enhancing the mood, and making the product more memorable to your viewers. Be sure to find some music that matches the brand’s identity; there are tons of great websites out there for music and sound effects such as Artlist. There’s no real rule when it comes to editing with music; it pretty much comes down to what looks and sounds right. We decided to cut most of our shots to the beat having them change on the drum.
Sound effects are the icing on the cake for your advert, They help to emphasize what’s happening on the screen and help connect viewers to what they’re seeing. It’s essential to get the timing and placement of your sound effects right otherwise they could detract from what you see on screen.
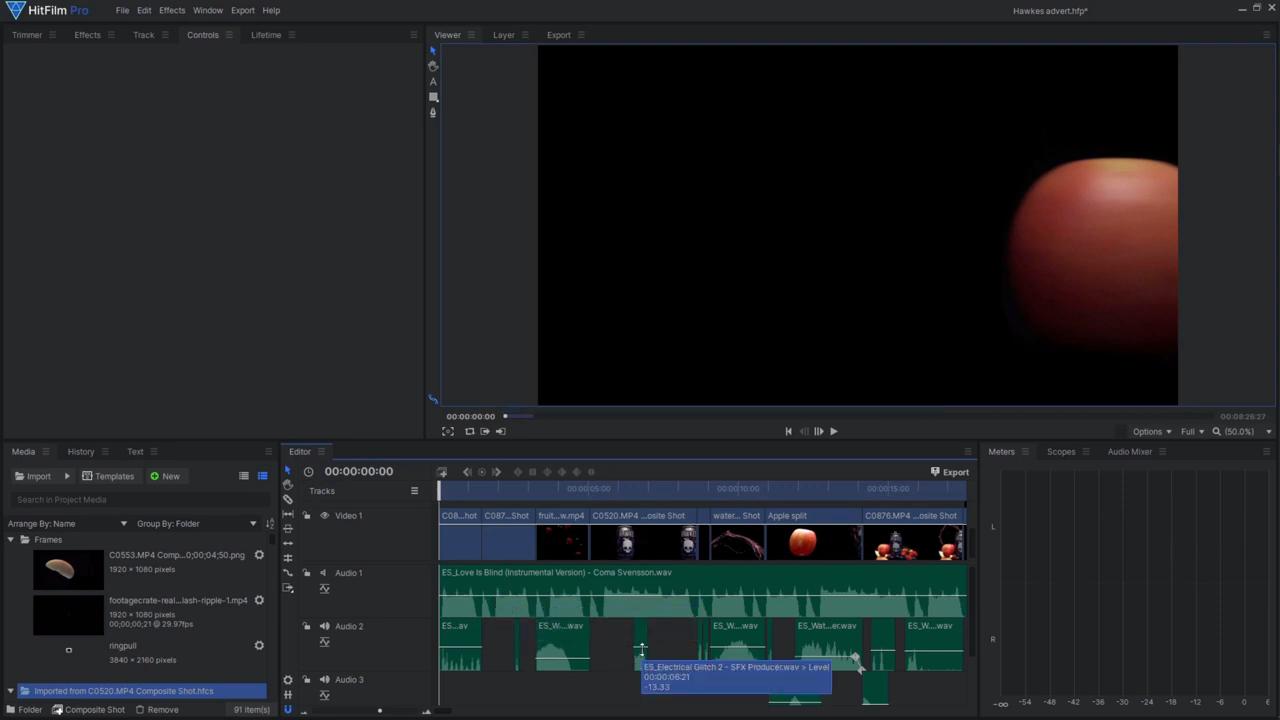
Lastly, ensure that you spend time adjusting your audio levels for the music and sound effects – the effect should always be loud enough that they add to the shot but never overwhelm or ruin the music. Keeping an eye on the meters and audio mixer can help you with this. As a general rule of thumb, your complete sound design should normalize at around -12 decibels, peaking at no more than -6 decibels.
With all of these handy tips, you should be able to create your own epic advert – we hope you enjoyed END Production UK’s tutorial. See you next time for another insightful tutorial!