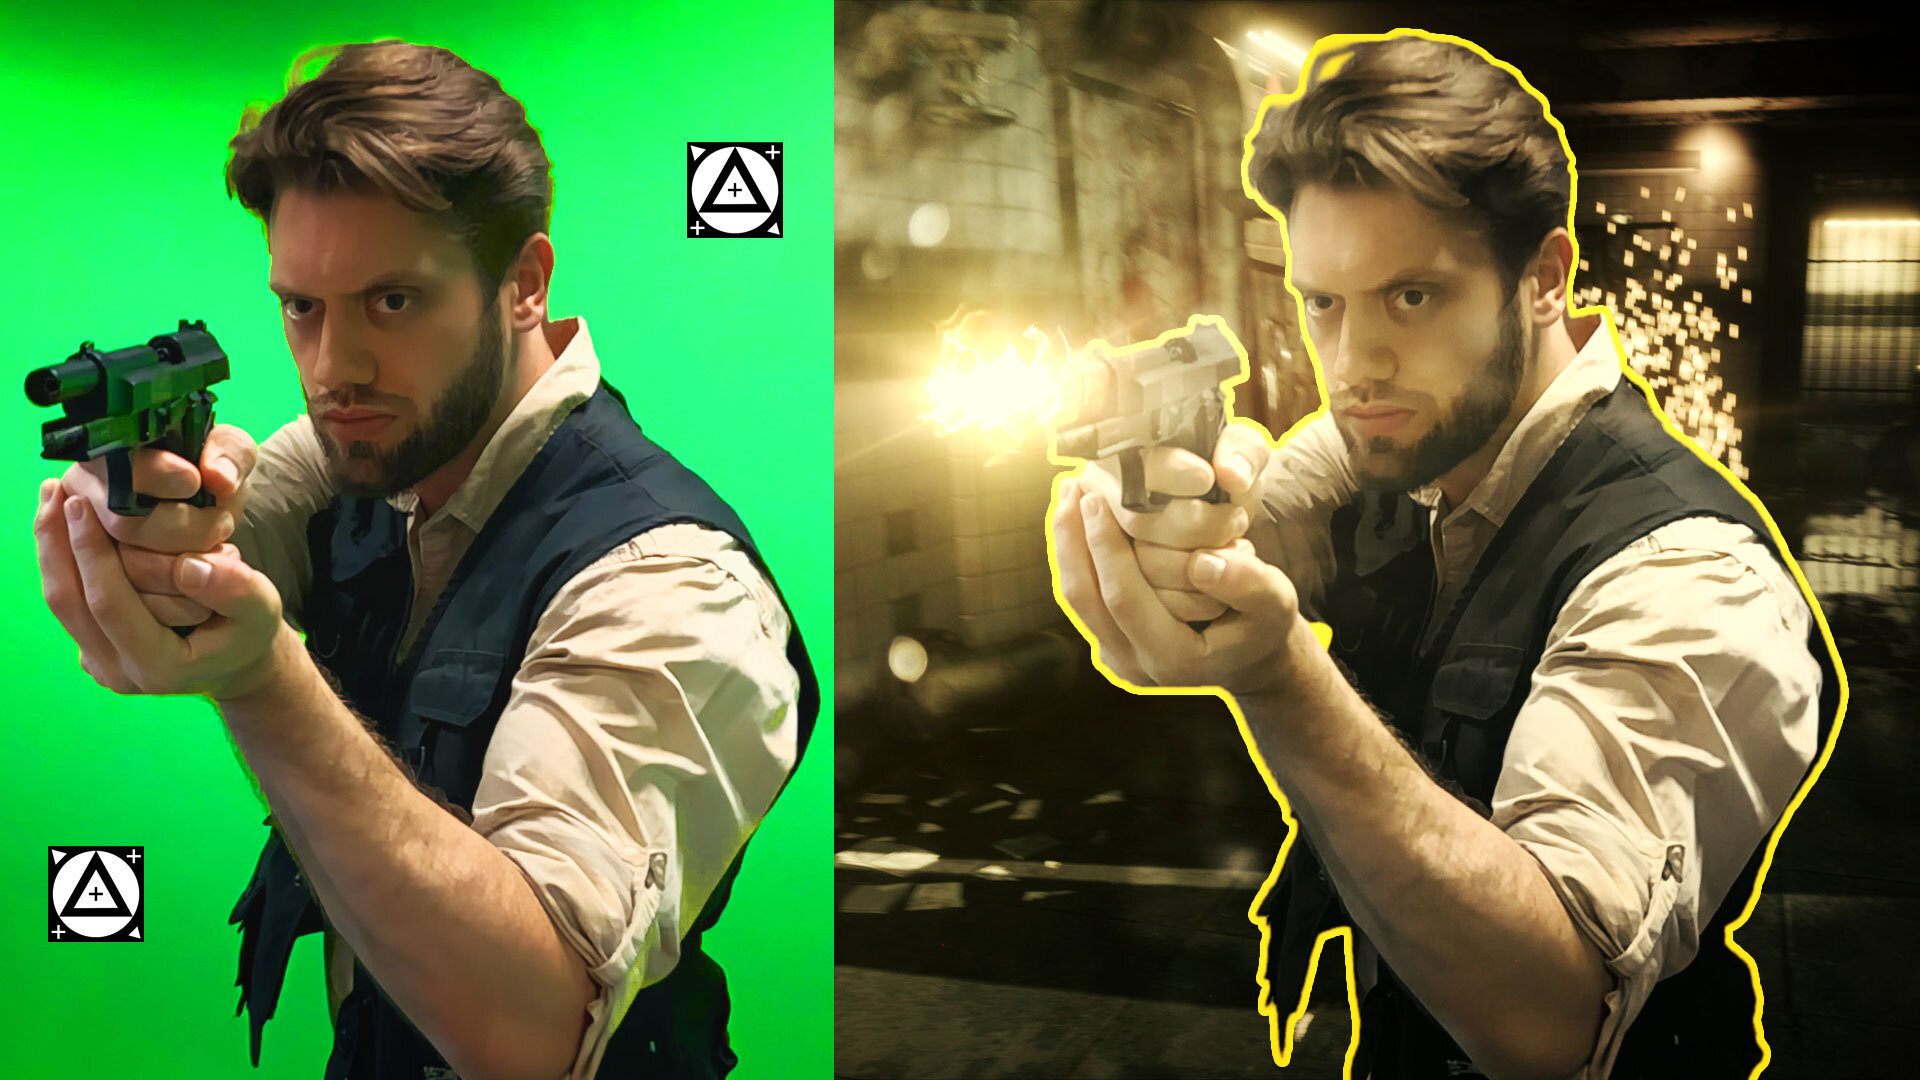
This tutorial will take you through how to create a time freeze effect inspired by the Matrix films. We’ll be using HitFilm as it includes Foundry’s 3D Camera Tracker. If you want to follow along in HitFilm Free you’ll need to get a 3D track, by filming with CamTrackAR.
3D Tracking
The first step in creating this effect is to create a 3D camera track. We filmed our footage on an iPad using our free iOS app CamTrackAR, which records 3D camera data along with the video footage. The tracking data from CamTrackAR worked perfectly for matching the digital environment created in Unreal Engine with the movement of our scene, giving us great flexibility to customize the background. We then opened the resulting Composite Shot in HitFilm and keyed out the green screen (Need to know how to take your CamTrackAR tracked footage from your iOS device and composite it into HitFilm?).
To track the visual effects elements onto the prop gun, we used Foundry’s Camera Tracker in HitFilm. This tracker worked perfectly for these small details as it included the actor’s slight movement in the track, allowing the effects to stick right onto the gun. (Here’s a tutorial showing you how to use Foundry’s 3D Camera Tracker).
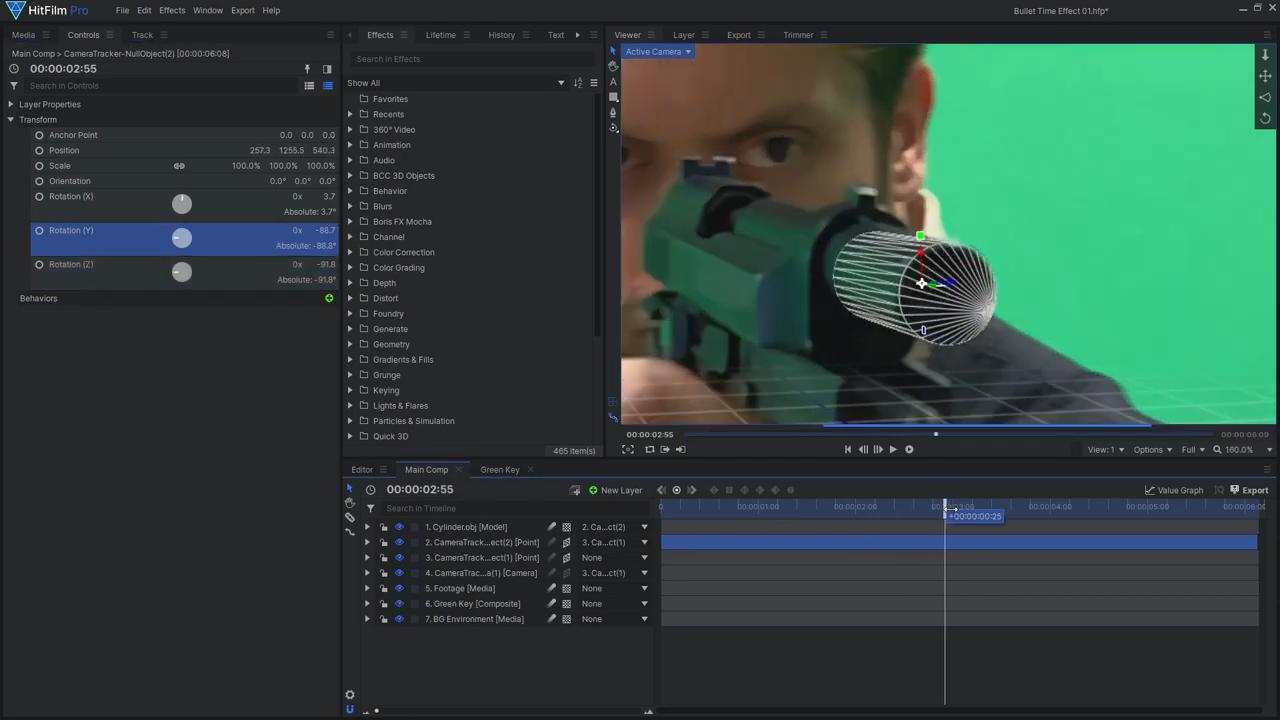
With our points tracked, our camera solved, and our scene created, we can select a tracking feature on the barrel of the prop gun and create a 3D Point layer from it. To check the quality of the track, we imported a cylindrical 3D model that we exported from Blender. This model is included in the downloadable project file. Once imported:
- Uncheck Center Anchor Point, as we’ve already set the Anchor Point where we want it.
- Drag the model onto the timeline, then parent it to our 3D Point layer.
- Reset the model’s transform settings so it snaps to the right position and then scale it to the correct size.
- Add a Wireframe effect to the model so it becomes see-through.
- Now adjust the position and rotation of the tracked Point to align the cylinder with the prop gun barrel.
- Check the alignment on various frames throughout the shot and adjust as needed.
If you play your footage back, the result still may not be perfect, but the cylinder model should stick onto the footage quite well. You can also manually animate the Point layer to improve the track further. Please note that the track doesn’t have to be completely accurate, as none of the objects we’ll be adding will be as precisely aligned as this cylinder.
Muzzle Flash
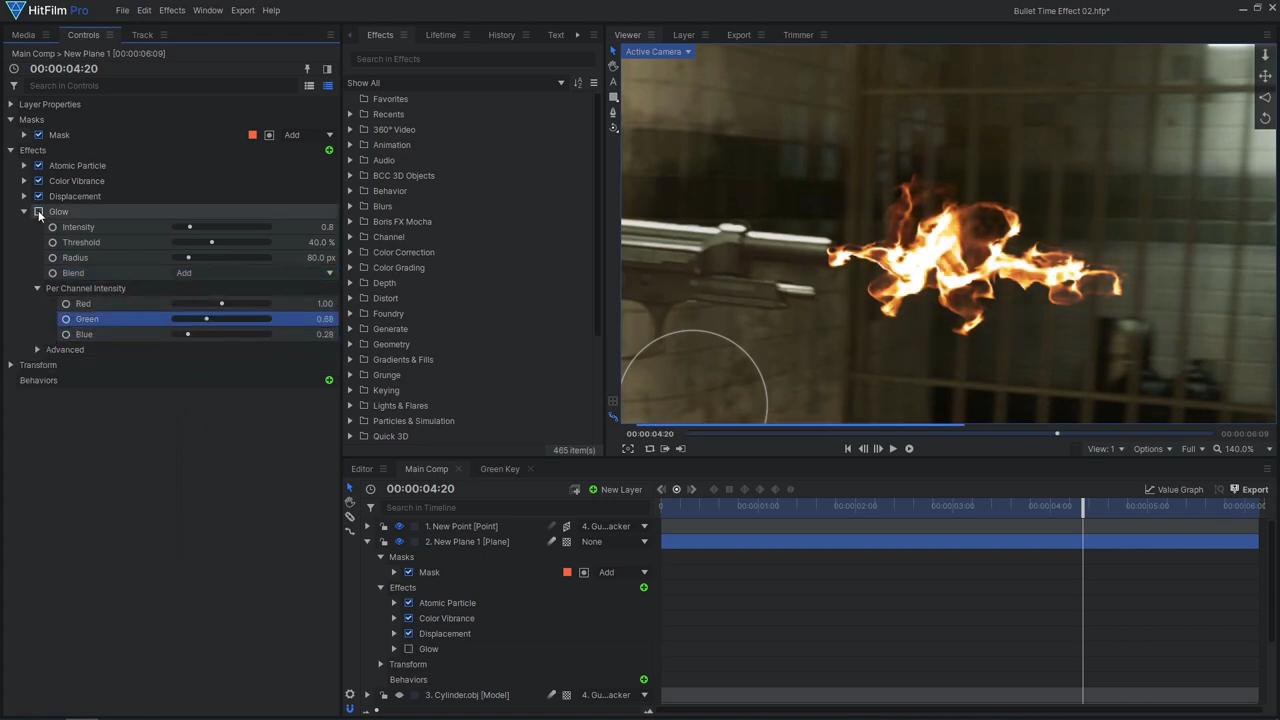
A crucial element of any gunfire effect is a muzzle flash. These usually last for a single frame, but in this case, the flash will require more detail as we’re creating a freeze time effect. For this, we created a custom stylized 3D muzzle flash using the Atomic Particles effect. To do so:
- Start by creating a new white Plane.
- Use the Freehand Mask tool to draw a rough muzzle flash shape.
- Add the Atomic Particles effect, then add a new 3D Point layer.
- Select this new Point in the Transform From property located in the Particle Placement Position settings dropdown. Now this 3D point can be used to transform the particles in 3D.
- Position the muzzle flash by parenting the particle control Point to the tracked Point and resetting its transforms.
- After adjusting the Position, Rotation, and Scale, you may also have to adjust the Atomic Particles Size.
- Increase the Twist value to give the shape some depth.
- Set the Blend Mode to Add.
- Open up the Fractal settings and adjust the Displace Strength and Wavelength to add some flame-like details.
- Then, adjust the Opacity and Size to control the brightness and look of the effect.
- To give the effect some color, add a Color Vibrance effect and choose the Flames preset.
- An additional trick to really make this look like fire is to add a Displacement effect. Increasing the Displacement values pushes the pixels around and pinches the bright spots, making the effect look sharper and more flame-like. You can also use Glow effects to enhance the bright appearance.
- Set the Atomic Particles effect’s Speed to 0 to freeze the effect (but you could leave this at a low value for some slow movement).
- One final effect to enhance this muzzle flash is to use a Custom Light Flare.
- Add the effect to a black Plane and set the Blend mode to Add.
- Then attach the flare to the particle control Point.
- Choose a preset and adjust the color if needed.
- Animate the flare Scale as the subject goes closer and farther from the camera.
3D Bullets
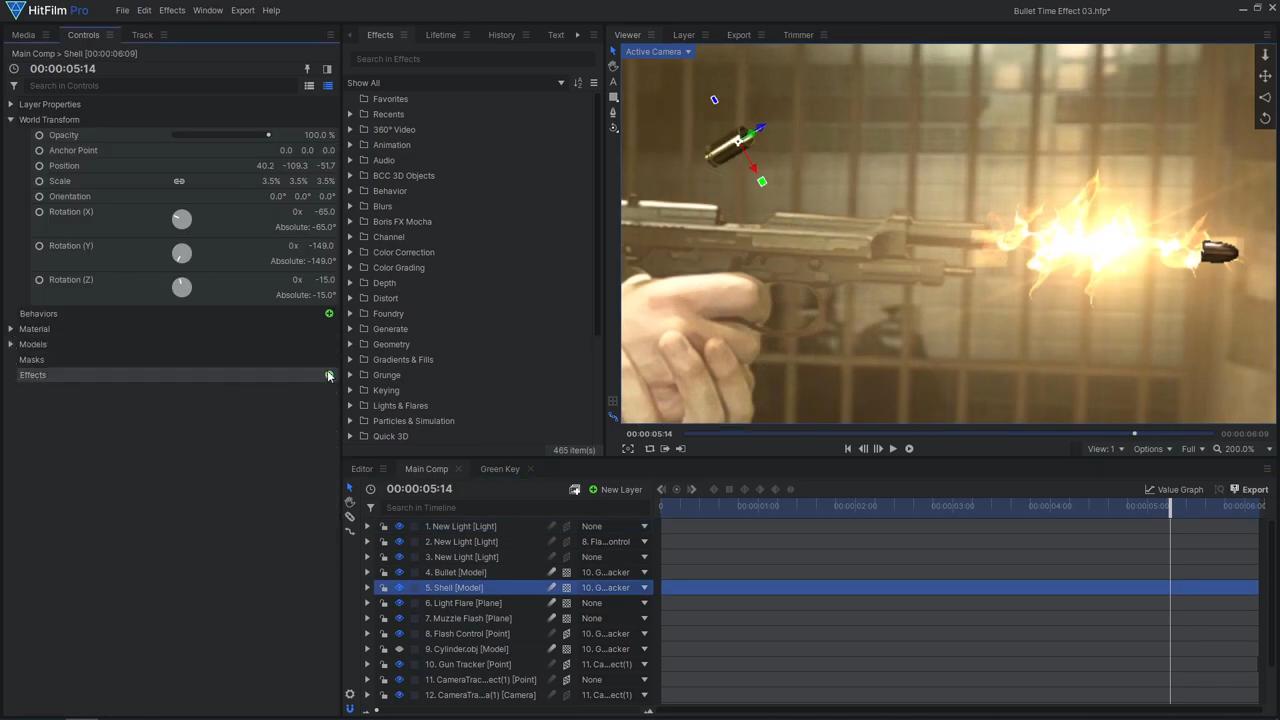
We used 3D models to create the slow-motion bullets. We sourced the free 9mm bullet model from Sketchfab.com. Once you have downloaded the .gltf model file and imported it into HitFilm.:
- Set the shell’s material Opacity to 0 to allow the bullet to be separate from the shell.
- Set the Alpha Mode to Guess and the Illumination Model to Phong to make it fully hidden.
- Hit OK, then duplicate the model in the Media Bin.
- Open up the duplicate’s Properties and make the shell visible and the bullet invisible.
- Drag the bullet model onto the timeline, parent it to the tracked Point, and reset its transforms.
- Scale, Rotate, and Position the model to be firing from the gun.
- Repeat this process for the shell model, placing it to be ejecting out the side of the gun.
- You can animate these objects to slowly move if you don’t want time to appear completely frozen.
- To make the models look more realistic, add 3D Lights and place them to replicate the practical lighting in the footage.
- Then select the background environment layer to be both models’ Environment Map.
Bullet Trails
We created the Matrix-style bullet trails by 3D modeling them in Blender. To create the model we started with a sphere object and flattened it out. We then duplicated the sphere multiple times, changing the scale to create one segment. This segment was then duplicated several times to create the long trail. (You can find the model in the downloadable project file.)
Back in HitFilm:
- Import the bullet trail model.
- Set the shading to Cook Torrance.
- Then adjust the material colors and Roughness to create smooth lighting on the model.
- Drag the model onto the timeline, then duplicate the bullet model and place it at the center of the bullet trail.
- Scale and position the trail to match the bullet, which was already correctly scaled relative to the gun in the footage.
- Parent the bullet model to the trail model.
- Place this bullet trail in 3D space. (It may be helpful to use multiple Views for easier control of the objects)
- Duplicate the two layers, parent the new bullet to the new trail, and move them somewhere else to create additional bullet trails.
- To make one of the trails go behind your actor/subject add a Set Matte effect sourcing the keyed video footage. (You may need to use additional Set Matte effects if other objects cross in front of a bullet trail)
These bullet trails will also be used as a Displacement Map to distort the footage. For this to work properly, we need to add some detail to the trails with some lighting:
- Create a new Light layer, setting the Type to Spot.
- Parent it to the Camera layer, then zero out the Position.
- Move it forward slightly on the Z-axis. (now we have a spotlight attached to the camera, which brings out the details of our model no matter where the camera is.)
- Increase the Cone Angle to make the lighting more even across the frame.
- Add a Directional Light pointing straight down for some variation.
- Enabling Ambient Occlusion to enhance the details.
- You can adjust the Sample Radius and other settings to fine tune the result.
- Place the trail models and lights at the bottom of the layer stack, then add a new Grade layer above them; rename this layer to Displacement Map.
- Add the Displacement effect to another Grade layer above the footage.
- Then select Displacement Map as the Source Layer.
- Increase the Displacement settings to see the effect.
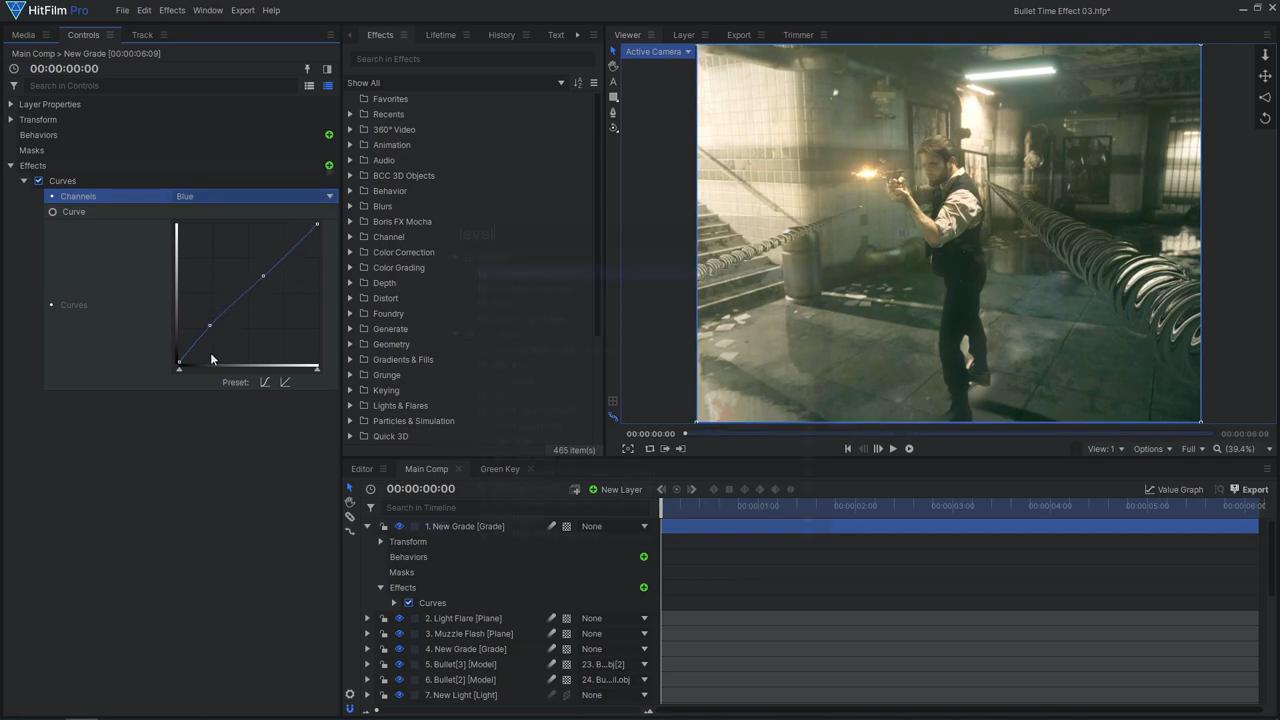
Matrix Color Grade
To finish off the shot, let’s add a green-tinted color grade to match the feel of the Matrix films:
- Add a new Grade layer at the top of the layer stack.
- Then add a Curves effect.
- Drag the bottom point of the Red Channel to make the shadows green.
- Then add a curve in the Blue channel to add more Blue to the shadows.
- Use a Levels Histogram effect to achieve your desired brightness and contrast. You can further tweak the color on the Curves effect, and can also add a Hue, Saturation & Lightness effect to bring out certain colors.
- Increased the Red Saturation to bring back some of the skin tones and fire.
When you’re are happy with your colors, you can add various additional effects to tie the shot together. Lens Dirt, Chromatic Aberration, and Film Grain are all great effects to add some detail and imperfections to the shot. Finally, as our effect was created in a 60 frames per second project to make it play in slow motion:
- First export the final composite as an image sequence.
- Import that exported sequence back into HitFilm.
- Open up its Properties, then select 24 or 30 fps.
- Drag the shot onto the Editor timeline, making sure it matches the new framerate, then export again.
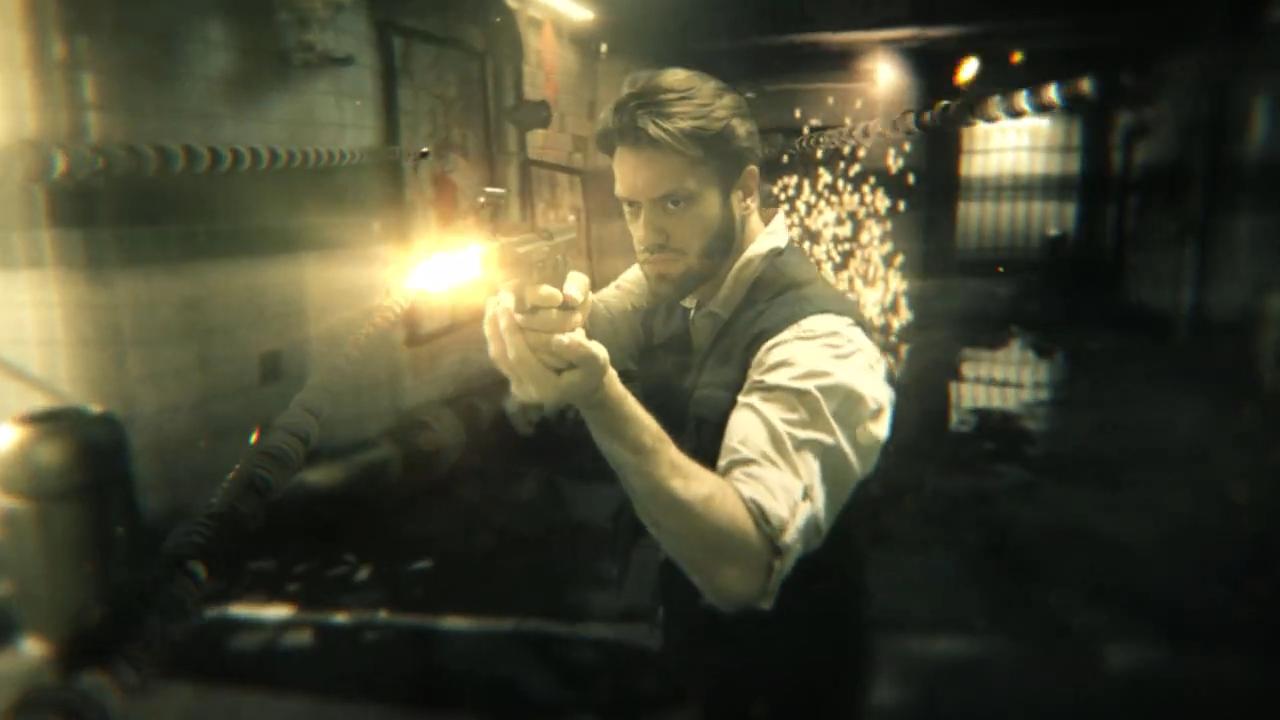
Now you have created your own Matrix-style bullet-time effect in HitFilm! See you next time for another awesome tutorial!