


Using shortcuts is an excellent skill for any editor. It can help you speed up your editing workflow, save time, and prevent repetitive strain issues from overusing a mouse, trackpad, or tablet. HitFilm has hundreds of keyboard shortcuts and Hotkeys that can improve your editing. So in this post, we’re going to look at our favorites.
Cross-Platform Shortcuts
Cross-platform shortcuts are probably already familiar to you. They are the controls you can use across various programs, such as Word and Excel, and are also used in web browsers. Using these shortcuts is a significant first step and can save you time no matter what program or software you use.
| Command | Mac | PC |
| Save | Command + S | Control + S |
| Open | Command + O | Control + O |
| Import | Shift + Command + O | Shift + Control + O |
| New Project | Command + N | Control + N |
| Exit/Quit | Command + Q | Control + Q |
Tool Hotkeys
Tool Hotkeys are the buttons you press to access a specific editing tool. While the tool menu is easily accessible in HitFilm, knowing how to access each using your keyboard can be a massive time-saver.
| Selection/Arrow Tool | V |
| Drag/Hand Tool | H |
| Slice Tool | C |
| Slip Tool | Y |
| Slide Tool | Shift+U |
| Ripple Edit Tool | R |
| Roll Edit Tool | E |
| Rate Stretch Tool | S |
| Track Select Tool | A |
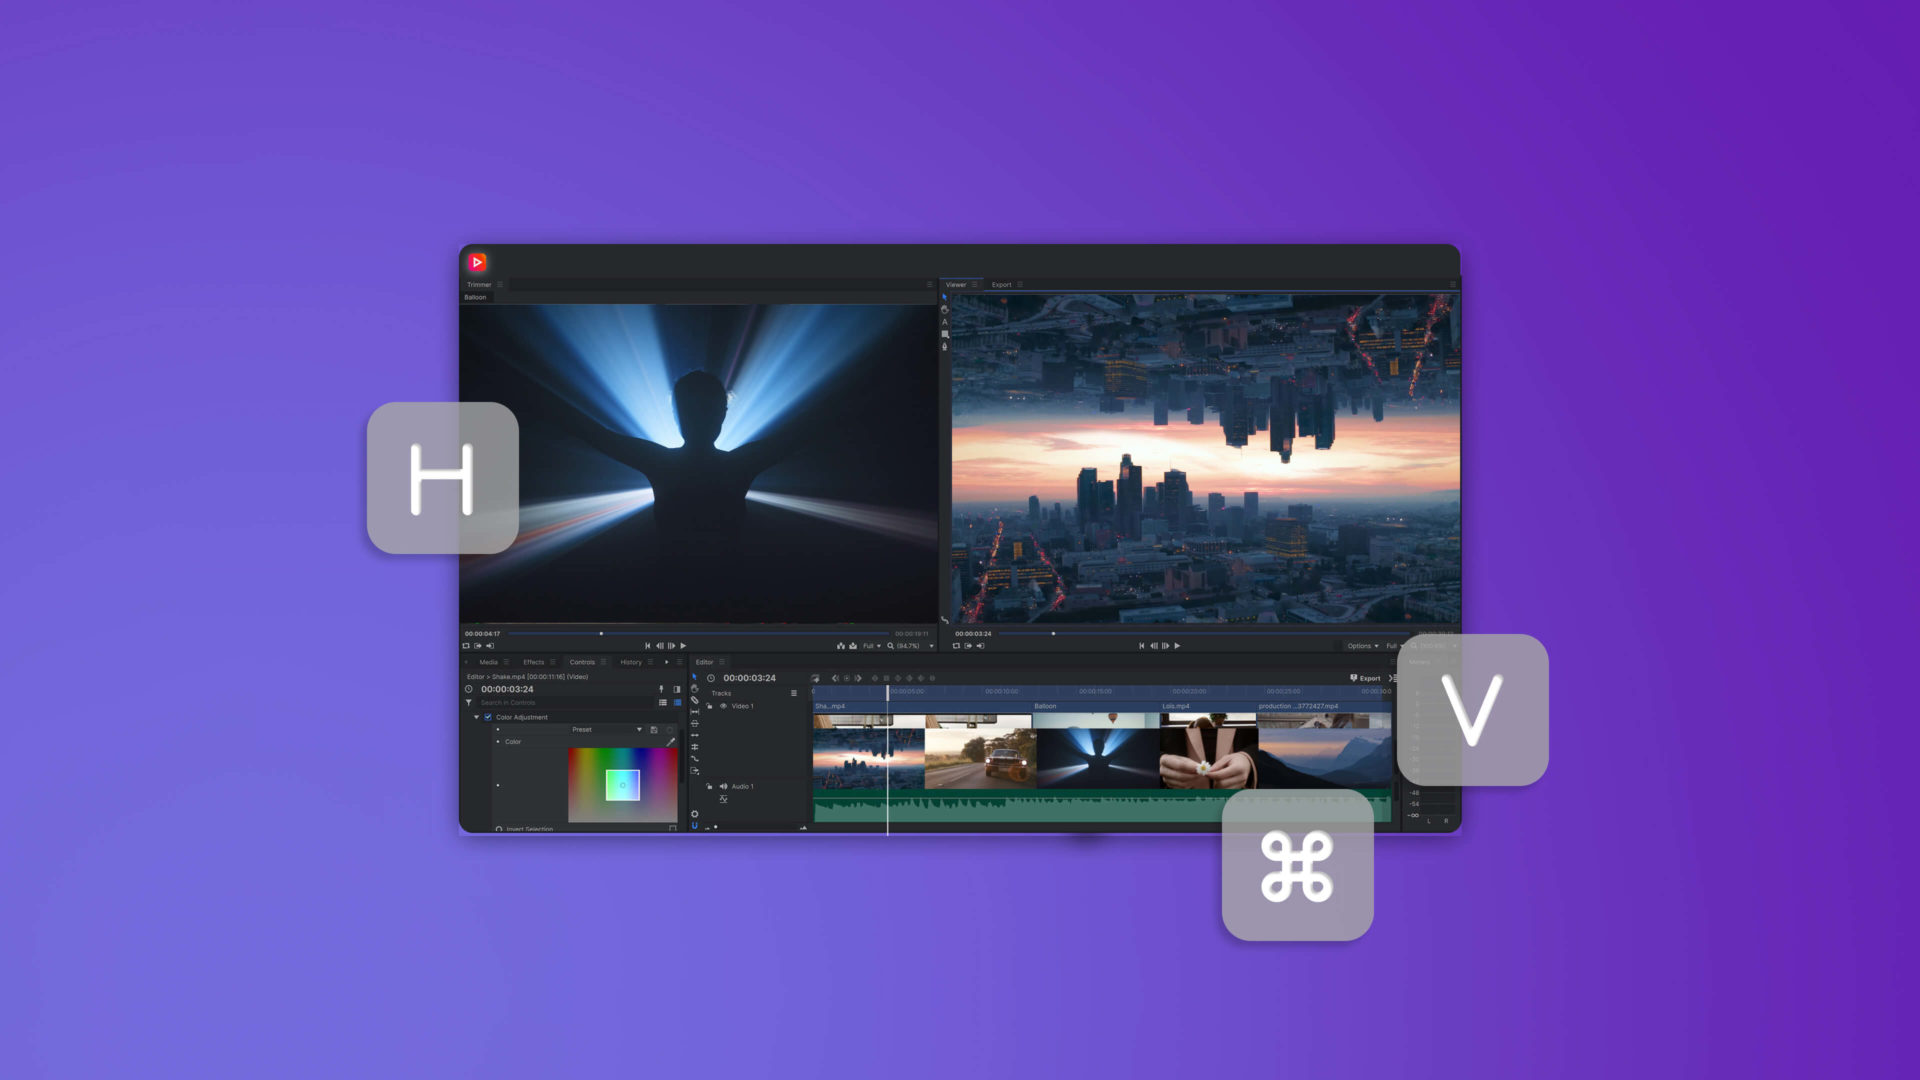
Selection/Arrow – V
The Selection/Arrow tool is probably the most important to remember from the tools shortcuts list; this will return you from any other tool to the standard Selection tool. Sometimes you can accidentally click on a tool and make changes to your sequence without meaning to; regularly hit V on your keyboard to avoid mistakes.
Drag/Hand – H
The Drag tool (also known as the Hand tool) allows you to drag around the viewer and timeline without selecting any content. Just hit H on your keyboard and skim around the timeline as needed.
Slice tool – C
The Slice tool, also called the Blade tool, uses the C key; super easy to remember as C for Cut. Once activated, the Slice tool will turn your cursor to a razor blade; click on any clip to create a cut.
Slip tool – Y
The Slip Tool (Y) lets you adjust the in and out points of a clip from the timeline without changing the duration of it. If you’ve chosen a 3-second section of a 20-second clip, the Slip Tool will allow you to adjust which 3 seconds are played, click on the clip and drag to the left or right.
Slide tool – Shift + U
The Slide tool is fantastic for adjusting cutaways over interview footage or titles over a background. Hit Shift + U on your keyboard, then drag a clip along the timeline; it will shorten or extend the clips on either side to fill in the gap.
Ripple Edit Tool – R
If you want to extend/shorten a mid-sequence clip, you can use the Ripple Edit to keep the rest of your clips in line. First press R on your keyboard, then drag the ends of the clip. The surrounding clips will move to accommodate the changes.
Roll Edit tool – E
The Roll Edit Tool (E) is fantastic for fine-tuning your videos and allows you to adjust the in/out point between clips. Unlike the Ripple Edit tool that moves a clip, Roll Edit works from the join between 2 clips, allowing you to adjust the edit point of both clips simultaneously.
Rate Stretch tool – S
The Rate Stretch tool is super handy for filling in little gaps where your cutaways are not quite long enough or for slowing down footage for creative purposes. Hit S on your keyboard to access the Rate Stretch tool and drag the end of your clips to increase or decrease the footage speed.
Track Select tool – A
The Track Select tool allows you to grab everything from a point on your timeline and move it. Hit A on your keyboard to access it, then select the clip you want to move; everything from this clip onward will be highlighted in every track.
Part 3: Timeline Shortcuts
The timeline shortcuts help you navigate the HitFilm interface and allow you to adjust clips in your assembly edit or your timeline with just the keyboard. You can use many keyboard shortcuts; here are a few of the most popular.
| Command | Mac | PC |
| In/Out Points | I and O | I and O |
| Select All | Command + A | Control + A |
| Split Your Layer at Playhead | Shift + Command + D | Shift + Control + D |
| Label your Clips | 1, 2, 3, 4, 5, 6, 7, 8, 9, 0 | 1, 2, 3, 4, 5, 6, 7, 8, 9, 0 |
| Reset Clip | Command + R | Control + R |
| Unlink Clip from Audio | Shift + Command + \ | Shift + Control + \ |
In/Out Points – I/O
In and out points are fantastic for selecting footage in the browser to add to your timeline. Rather than dragging the whole clip into the sequence, watch it through in the viewer and use I and O on your keyboard to set the start and end of the portion you want to use.
Select All – Command/Control + A
While you can use the cursor to drag and select everything in your timeline, this can occasionally leave something out. So instead, use Command/Control + A to select everything in your project.
Split Your Layer at Playhead – Shift + Command/Control + D
The Slice Tool (C) will allow you to create a cut in your clip, but this handy shortcut allows you to create a split with even more accuracy. Place the playhead in the timeline where you want to make a cut and hit Shift + Command/Control + D.
Label your Clips – Numbers
Some projects can get quite big, with lots of clips and layers to navigate; labeling your Clips can do wonders for your workflow. Instead of searching for a particular clip in your timeline, use the color-coded labels to organize your project. Just select the clip in question and hit a number to change the clip’s timeline color – you can even customize the labels to suit your needs.
Reset Clip – Command/Control + R
The Reset Clip shortcut will be super handy if you like experimenting with your clips and adding effects and Keyframes. Hit Command/Control + R on your keyboard to reset the clip to its raw state.
Unlink Shift + Command/Control + \
Once you’ve selected the video clip you want to bring to your timeline in the media viewer, you can opt just to bring the video without audio. However, if you’ve got audio tracks in your sequence that you don’t need, you can select the clip and hit Shift + Command/Control + \ to unlink the audio from the video clip.
Part 4: How to Customize Shortcuts and Hotkeys for HitFilm
Every editor is different and will have unique preferences over which shortcuts they use. Depending on the type of projects you are working on, you may find that some of the most accessible shortcut commands go unused. Fortunately, HitFIlm allows you to customize the shortcuts and keyboard controls.
- Open HitFilm and go to File > Options.
- In the left-hand menu, select Shortcuts.
- Search for a particular shortcut or scroll through the list until you find what you want.
- Click the Shortcut box alongside the command and type your new shortcut.
- If the shortcut is already being used, a warning sign will show, telling you which you need to adjust first.
- When you are done, hit OK in the bottom right of the panel. You can return to HitFilm Defaults by clicking the Restore defaults in the bottom left.
There is no doubt that shortcuts can save you a lot of time when editing your videos, but they can also make you a better editor. Learning and customizing shortcuts is an excellent way of learning software and can reveal tools and effects you didn’t know were there. Learning to use the hotkeys can take time, so try and remember to use a few HitFilm keyboard shortcuts until they become part of your editing process, then add in more. Remember, all HitFilm tutorials will detail the shortcuts within the step-by-step instructions, a fantastic way to begin using them.