Learn how to create a winter scene from everyday footage with some special techniques used in this snow VFX tutorial. Follow along for free in HitFilm. This tutorial was inspired by Ignace Aleya’s original tutorial on YouTube but follows a slightly different technique to get the end result.
Step 1: Get a hold of some footage
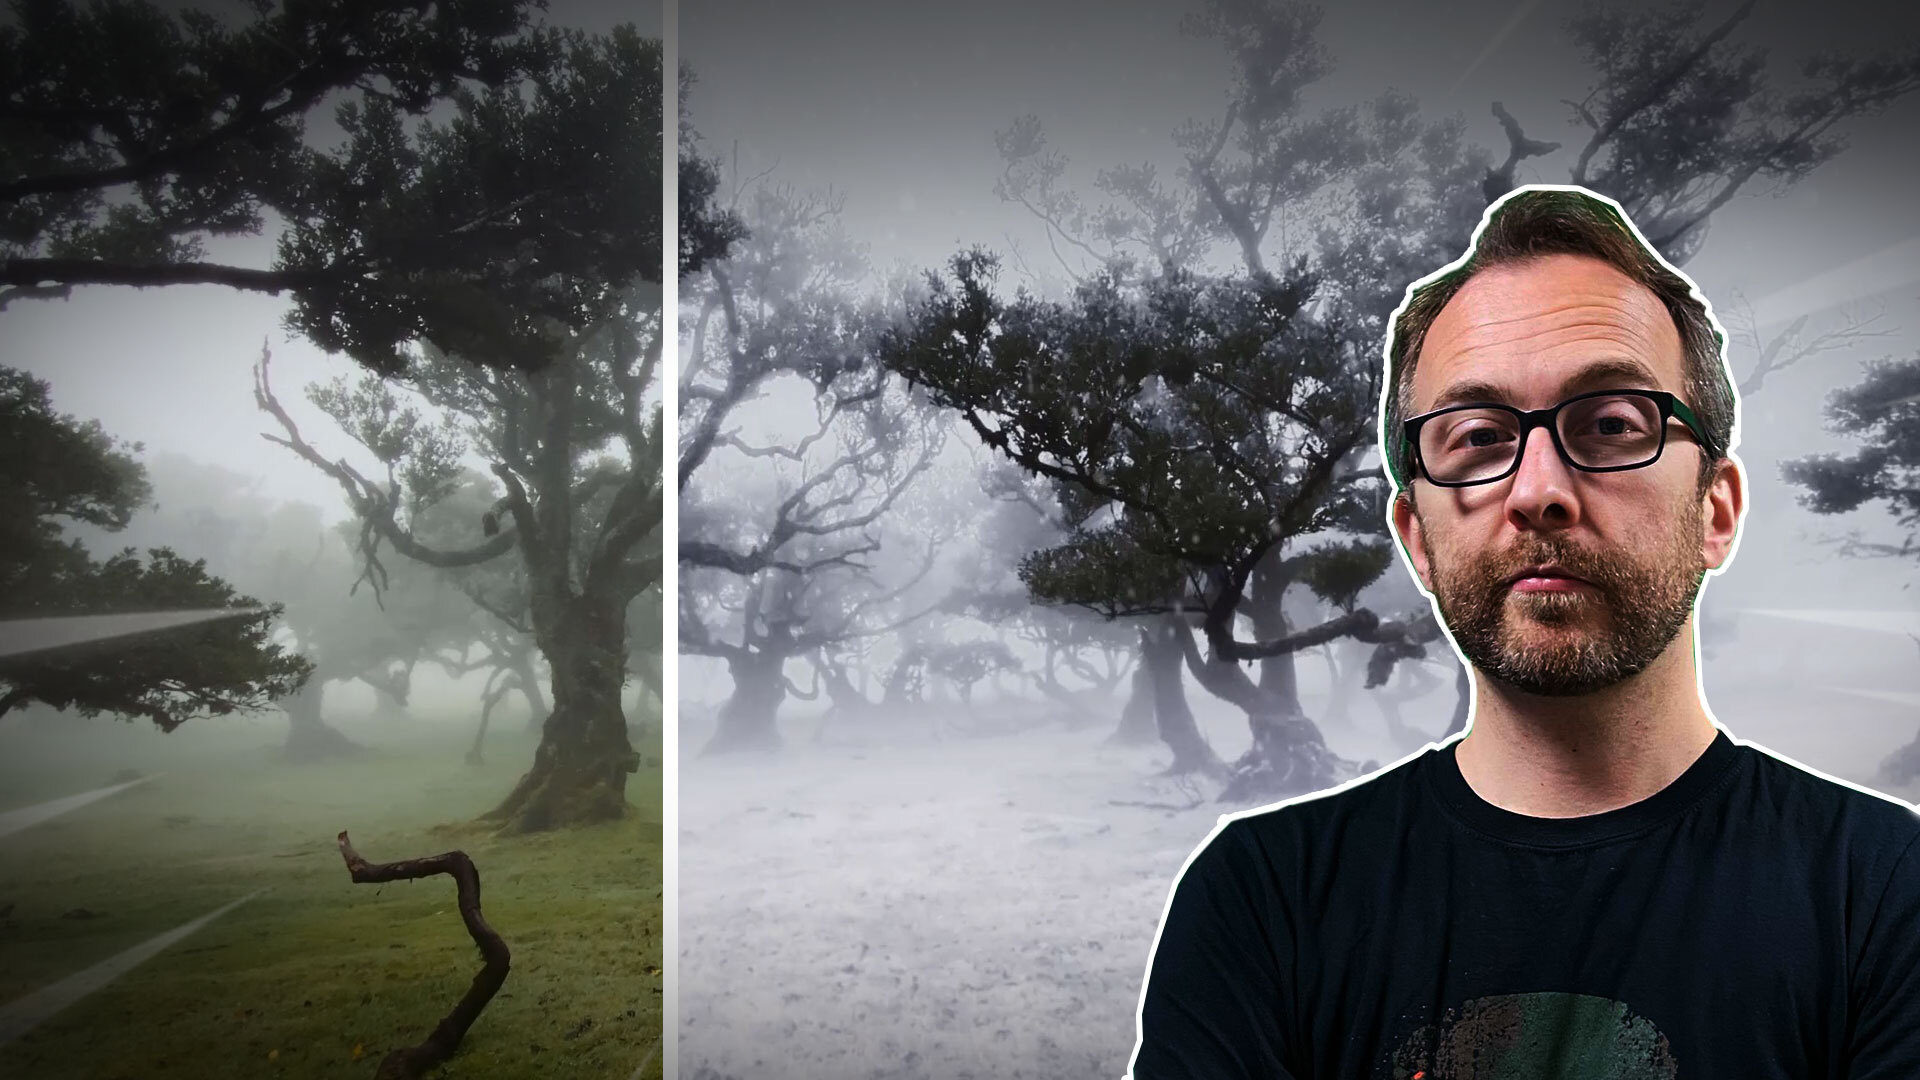
We got hold of some foggy overcast stock footage for this snow VFX tutorial but that doesn’t mean you can’t shoot something yourself. Just make sure there’s a good range of contrast in the shot – highlights and brighter areas will later become the snow and the darker areas will become what the snow sits on, so keep this in mind when you’re filming.
Step 2: Create a HitFilm composite shot

Import the footage into the HitFilm Media panel and use it to create a Composite Shot, then duplicate the layer. The bottom layer in the Composite Shot is going to remain the same, we named ours “Original Ground” to differentiate it. The duplicate layer is what we’re going to turn into the snow – we’ll call it “Main snow”.
Step 3: Isolate the snowy areas
Next, we need to start isolating the areas of the footage where we want the snow to be. Note that how this is achieved may vary depending on the shot you’re working with (but you should usually be able to use most of the same techniques we have).
We’re using the brighter areas of our shot which – fortunately – lines up nicely with how snowfall would naturally rest. This is why mid-day or overcast conditions work best for this effect as the light comes directly from above.
Add the Tint effect to the ‘Main snow’ layer, make sure the effect is set to black and white, and move the strength slider all the way up. This ensures that there is no unwanted color on the layer and that our snow stays white.

Next, we want to make sure that all of our dark areas stay dark. To do this we can set the blending mode of the ‘Main snow’ layer to ‘Lighten’. This allows us to only show pixels that are lighter than the corresponding pixel in the layer underneath. HitFilm has a total of 20 blending modes to achieve different effects when compositing.
Finally, we want to make sure that our effect is only including the areas that we want to appear snowy. For this, we can use a curves effect. The nature of how you achieve this will depend entirely on the footage you’re using. Make broad adjustments first, then tweak to achieve the desired look. This is more art than science, so see what works best for you.
Step 4: Handling the sky

In the footage we’re using for this snow VFX tutorial, the sky is already quite bright. Because we’ve boosted the exposure on our ‘Main snow’ layer this causes our trees in the background to look a bit weird and ‘blown out’. There’s an easy fix however – just mask out the top of the footage and then create an additional layer with this mask inverted to handle the top half of the image separately. Then just tweak your settings on the new layer until it looks right.
Step 5: Tracking the scene
Adding snow to the ground and the trees is one thing, but how about some falling snow? To achieve this part of the effect you will need the Particle Simulator and the 3D Camera Tracker which are both included with paid versions of HitFilm.
Go to your original ground layer and apply the Camera Tracker effect and hit ‘Track Features’ to start tracking the camera movement in your scene. This will tell HitFilm where to place the snow as our camera operator moves around. Once that’s complete, click ‘Solve Scene’ to give you the final track.
Now we want to select a ground plane to tell the tracker where the ground is and how to track the scene. To do this, simply select a few tracking points that are on the ground, and then go to the Camera Tracker menu at the bottom-left of the viewer panel, ‘Ground Plane’ > ‘Set to Selected’.
Step 6: Creating the snow particles

Now we can add our particle simulator effect to the composite to generate our falling snow. We obviously want the snow to look like it’s coming from everywhere (and from above), rather than a single point on the ground, so we’ll go to ‘Emitters’ > ‘Emitter’ and adjust the ‘Width’ and ‘Height’ settings to cover the entire scene and adjust the Y position (the second value in the ‘Position’ settings) so that our emitter is above our entire scene too.
Next we want to change the texture of our particles from a boring white dot to something that looks a bit more like snow. Luckily HitFilm has some built-in snow textures under ‘Particle Systems’ > ‘Particle System’ > ‘Appearance’ > ‘Texture Source’ > ‘Built-In’.
Step 7: Making the snow fall naturally
To make our snow look like actual snow, we want to make sure it moves in the same way that real snow would. To achieve this, the first thing we want to do is set the ‘Speed’ under ‘Particle Systems’ > ‘Particle System’ > ‘Movement’ to zero. This will ensure our snowflakes look like they’re only falling through the air, rather than being launched through it.
Now it’s time to make some gravity! We can do this by going to ‘Forces’ and clicking the green ‘+’ button to add a new force and set the strength to 5% so it looks like our snow is quite light and falling on Earth rather than somewhere like Jupiter (did you know it rains diamonds on Jupiter because of the intense pressure? You’ll definitely need more than an umbrella to protect yourself from that!)

Now our snow is falling, but it still doesn’t look quite right, and that’s because it’s falling directly downwards. Where there’s snow, there’s usually at least a bit of wind that sends it scattering all over the place, so we’ll need to introduce another force to simulate that wind. Add a second force to the particle simulator and change the type from ‘Direction’ to ‘Turbulence’. Tweaking the settings of this force will give different effects, depending on if you’re going for a nice snowy day or a full-on blizzard. You can also add additional directional forces or adjust the direction of your gravity force to simulate wind blowing the snow in a particular direction.
Step 8: Fine-tuning your particle simulation
Once you’ve got your tracking, appearance, and behavior sorted, it’s much easier to make adjustments to your snowfall to fit the scene.
You’ll want to adjust the ‘Life’ of the particles under ‘Particle Systems’ > ‘Particle System’ > ‘Movement’ so that the particles die out once they hit the ground. Rather than just trying to do this by eye, it’s possible to switch to another view mode (top left of the viewer panel) to see where they should disappear in reference to our existing ground plane.
Going into the ‘Lifetime’ panel, we can also set the ‘Alpha’ of the particles (their transparency) to a gradient. This means that the particles will fade out over time so they don’t disappear abruptly at the end.
And there you have it! You’ve successfully changed the weather (and you didn’t even have to do a rain dance). Had fun following along with this snow VFX tutorial? Check out some of the other tutorials over on the FXhome YouTube channel.