Ever wanted to tear between realities with your newfound reality-warping abilities? Well, unfortunately, we can’t help you there. But what we can do is show you how to create a reality glitch effect with VFX, just like we see in the new series of Marvel’s WandaVision.
Step 1: Prepare your plates
Bring the two shots you’re going to be transitioning between into a new composite shot, aligning the second shot to the point we want the transition to take place.
If we were to want to swap the clips out, or perhaps have some alternate effects, it could cause some trouble. To make things easier, we’re going to create individual composite shots for each of the clips. Name one ‘Plate 1’ and the other ‘Plate 2’.
By setting up our plates like this, we can make as many alterations to the plates as needed, without affecting the transition.
Step 2: Making the mattes
We’re going to need three separate mattes for this reality glitch effect so let’s focus on creating those, as they’re the foundation of the whole effect.
Go to + New Layer and create a Plane, set it to white, name it Matte Reveal, and hit OK.
We’re going to be using masks to create the transition reveal. With the layer we just created selected, double-click the Rectangle Mask tool to the left of the Viewer panel. By double-clicking the icon, you automatically mask the whole layer.
Go to Controls > Masks > Transform and head down to Path. We’re going to animate the Path property to create the iconic tear.
Switch to the Pen tool (also found to the left of the Viewer panel), shrink the mask down on the X-axis, and place a keyframe.
Jump to about 2-seconds into the shot and expand the mask once again. Before we move on, we’ll duplicate this layer, naming it Edges, and use the duplicate for our edges later.
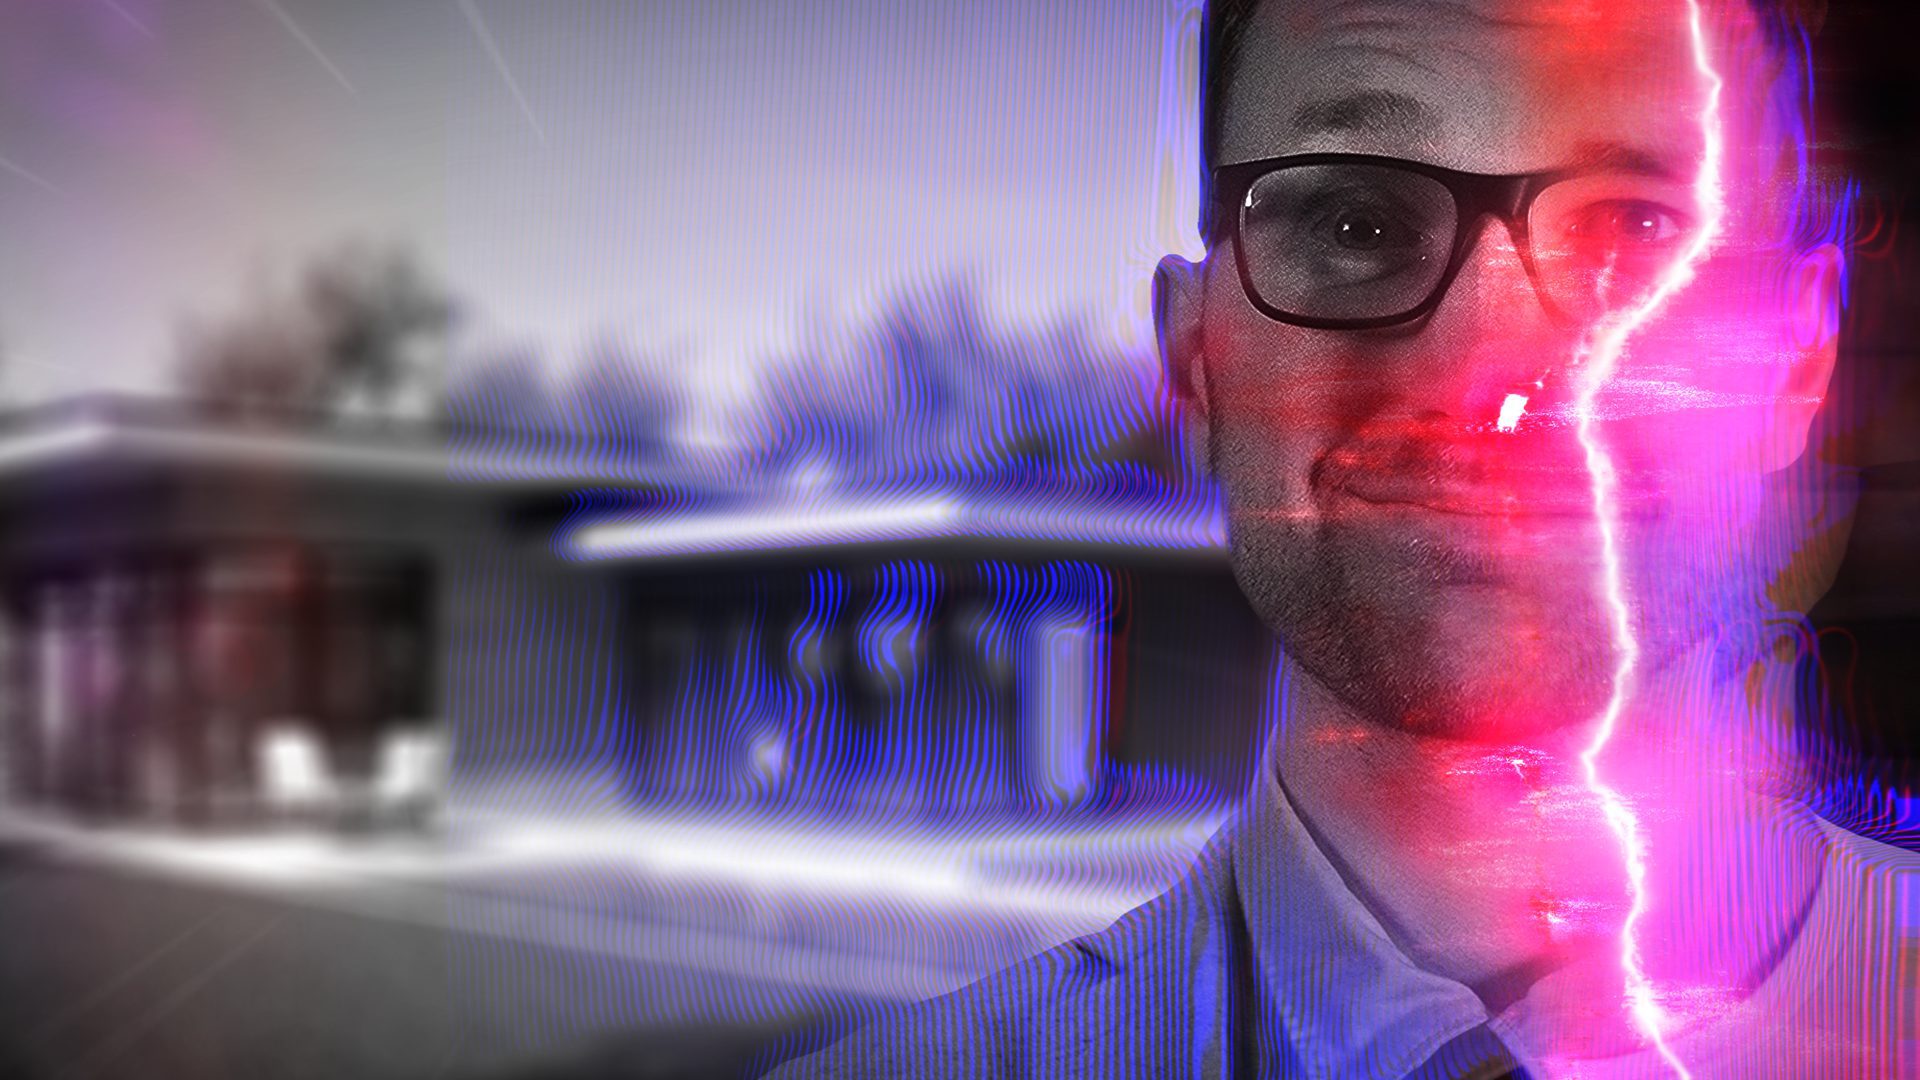
Turn off the visibility of the Matte Reveal and Edges layers and create another white Plane layer. Name it Circle Reveal.
This is going to be a matte reveal, but this time with the Ellipse Mask. Click and hold over the Mask icon to bring up the options, and select Ellipse. Double-click to set the mask.
Go to Controls > Masks > Transform > Path, shrink the mask on the X-axis at the start, and set a keyframe. Skip to 30 frames in and open the mask up, revealing the whole screen. Dial-up the feathering for a smoother transition.
Now we have all the foundational elements of the reality glitch effect in place, we can turn each layer into individual composite shots. Right-click, keep the original name and move the mask properties with your layer before jumping back into the Main Composite shot.
Step 3: Setting up the basic transition
Now it’s time to create the basic transition by connecting the Matte Reveal we’ve created to Plate 1.
First, we’ll move the transition mattes to alight with our second plate and move them under all our footage for now.
Plate 2 is the one revealing itself in this project, so we’re going to be applying the effects to that layer. Select the layer, go to the Effects Panel and search for “Set Matte”. You can also find it under Keying > Matte Enhancements.
In the Set Matte effect, change the Source Layer to our Matte Reveal layer. Then set the Source to Luminance, and make sure the Blend mode is set to Replace. If you play this back on the timeline, you’ll now see the plate being revealed thanks to the animated masks.
Step 4: Matte Distortions
Now it’s time to add some mysterious reality glitch effects to the transition! Jump into the main Matte Reveal and let’s get to work.
We’ll start by warping the edges of the masked area and applying a few different distortion effects to get the look we want.
Go to Effects > Distortion and add Smoke Distortion. You’ll instantly be able to see how it affects the edges of the matte. Adjust the settings as you like, increasing or decreasing the scale and distortion amount. Then add in a few other distortion effects to make it really chaotic! In our example, we used Energy and Block Displacement to get the effect we were looking for.
Once you’ve added Block Displacement, go to Block Displacement > Block Settings and increase the Aspect Ratio.
We want to make the edges really rough but with a bit of a TV, technical problem look so added in a Heat Distortion at this point.
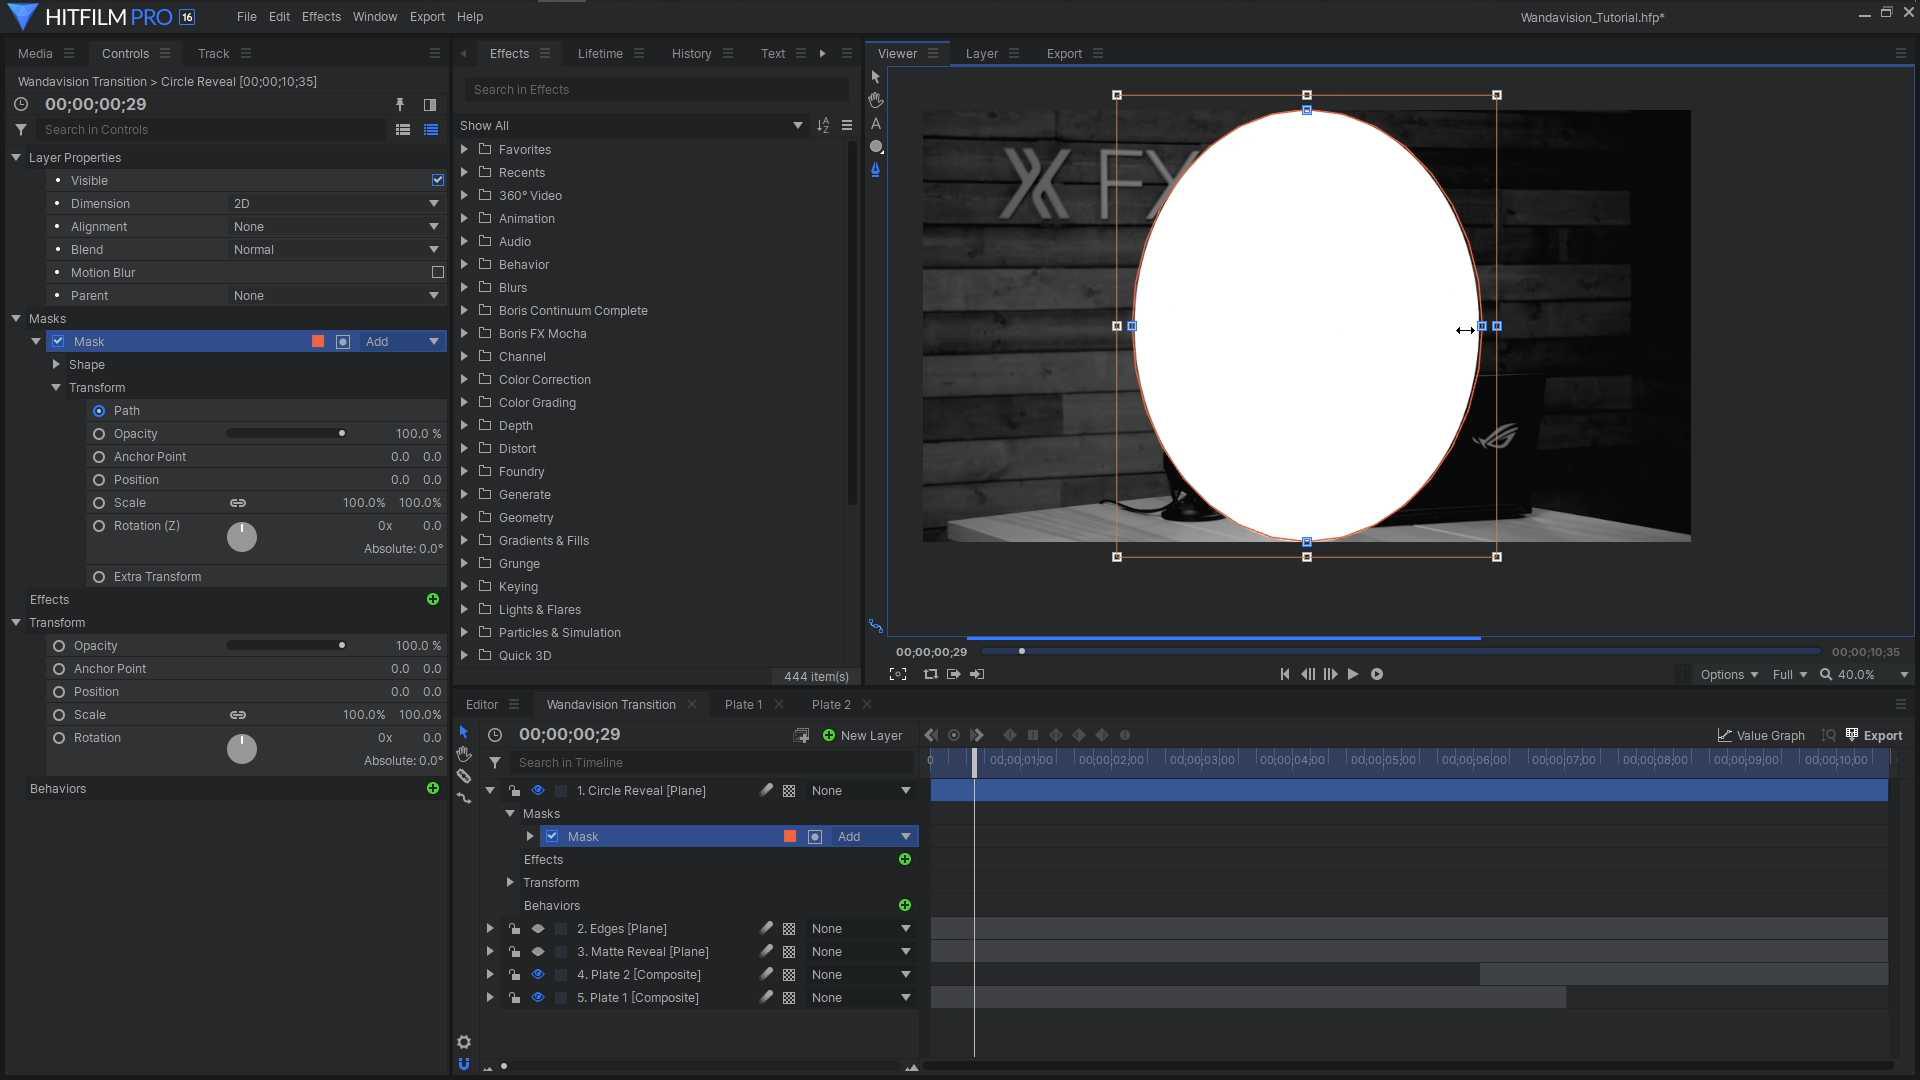
Next, head into the Edges composite. The animation is the same as our other Matte Reveal, but we can make it look really different. For the distortion effects, we added Smoke and Energy. We lowered the Scale and increased the Distortion so that we see a high-frequency ripple effect.
Once we’re happy with the look of the mask, Duplicate it and apply the Fill Color effect from Effects > Gradients & Fills. Set the Fill Color to black. Because we only want this to appear right at the edge of the tear, select the layer, rename it to Inner Edge, and position it back just a few frames on the timeline.
Head to Options and switch to the checkerboard background. This allows you to see that our white areas are revealed but the center is solid. Next, we need to remove the black, to do this, go to + New Layer > Grade Layer and add the Demult effect from your Effects panel.
Taking a look our reality glitch effect now, it would be good to make the edges even more subtle. We could readjust the timing, but there’s not too much room to play when it comes to frames per second. Instead, go to the Matte Enhancement folder and apply the Erode White effect.
To add more distortion and glitchiness to the edges, add another Block Displacement effect and, as we’ve done before, scale down the properties, and increase the aspect ratio width. You can even throw on another Heat Distortion effect to make it less uniform.
Step 5: TV Distortions
The matte distortions are now in place. Jump back into the Main Composite to bring everything together.
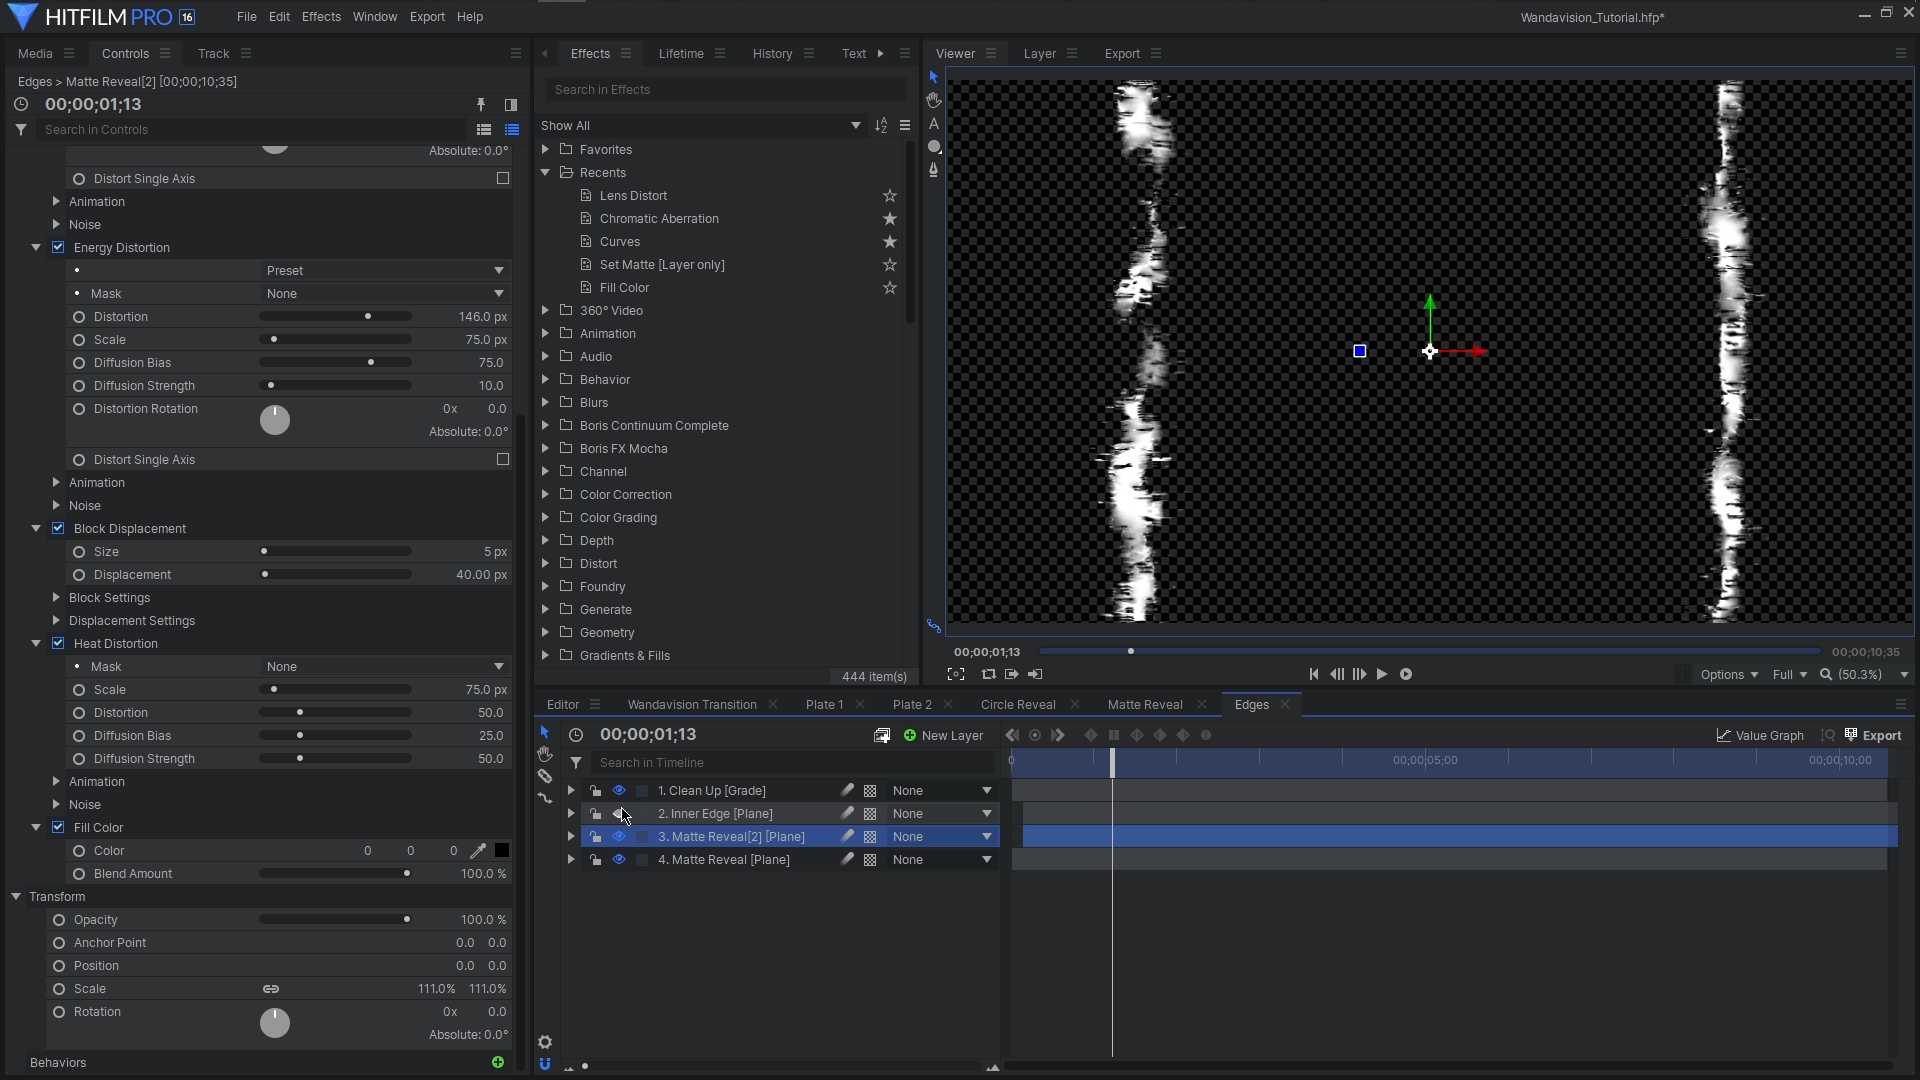
To create the TV signal effect that’s seen in the show, we’re going to use the VGHS DeRez effect. Create a new Grade Layer (+ New Layer > Grade Layer) and position it beneath the 2nd plate. Go to Effects > Distort Effects > DeRez and add this to the layer.
In our example, we just wanted to keep the Wavy Lines from this effect, so switch the View property to Wavy Lines and set the Mask to our Circle Reveal. By doing it this way, the DeRez effect will be seen followed by the glitching tear.
Go to the Line dropdown menu and play with the settings to get something unique. Go into the Color settings to match the reference, moving the mid-tones and shadows towards blue and the highlight towards red. Then change the layer’s Blend mode to Add or Screen. You can add a Curves effect and bring down the mid-tones if it comes across as too intense. We also added the Chromatic Aberration effect in HitFilm Pro.
Now we want to match it to our Matte Reveals by adding the Set Matte effect to the top of the Effect list. Set the Source Layer to Matte Reveal, the Source to Luminance, and the Blend mode to Replace with ‘Invert’ enabled.
To make our reality glitch effect stand out, we’ll create a larger displacement when the transition happens.
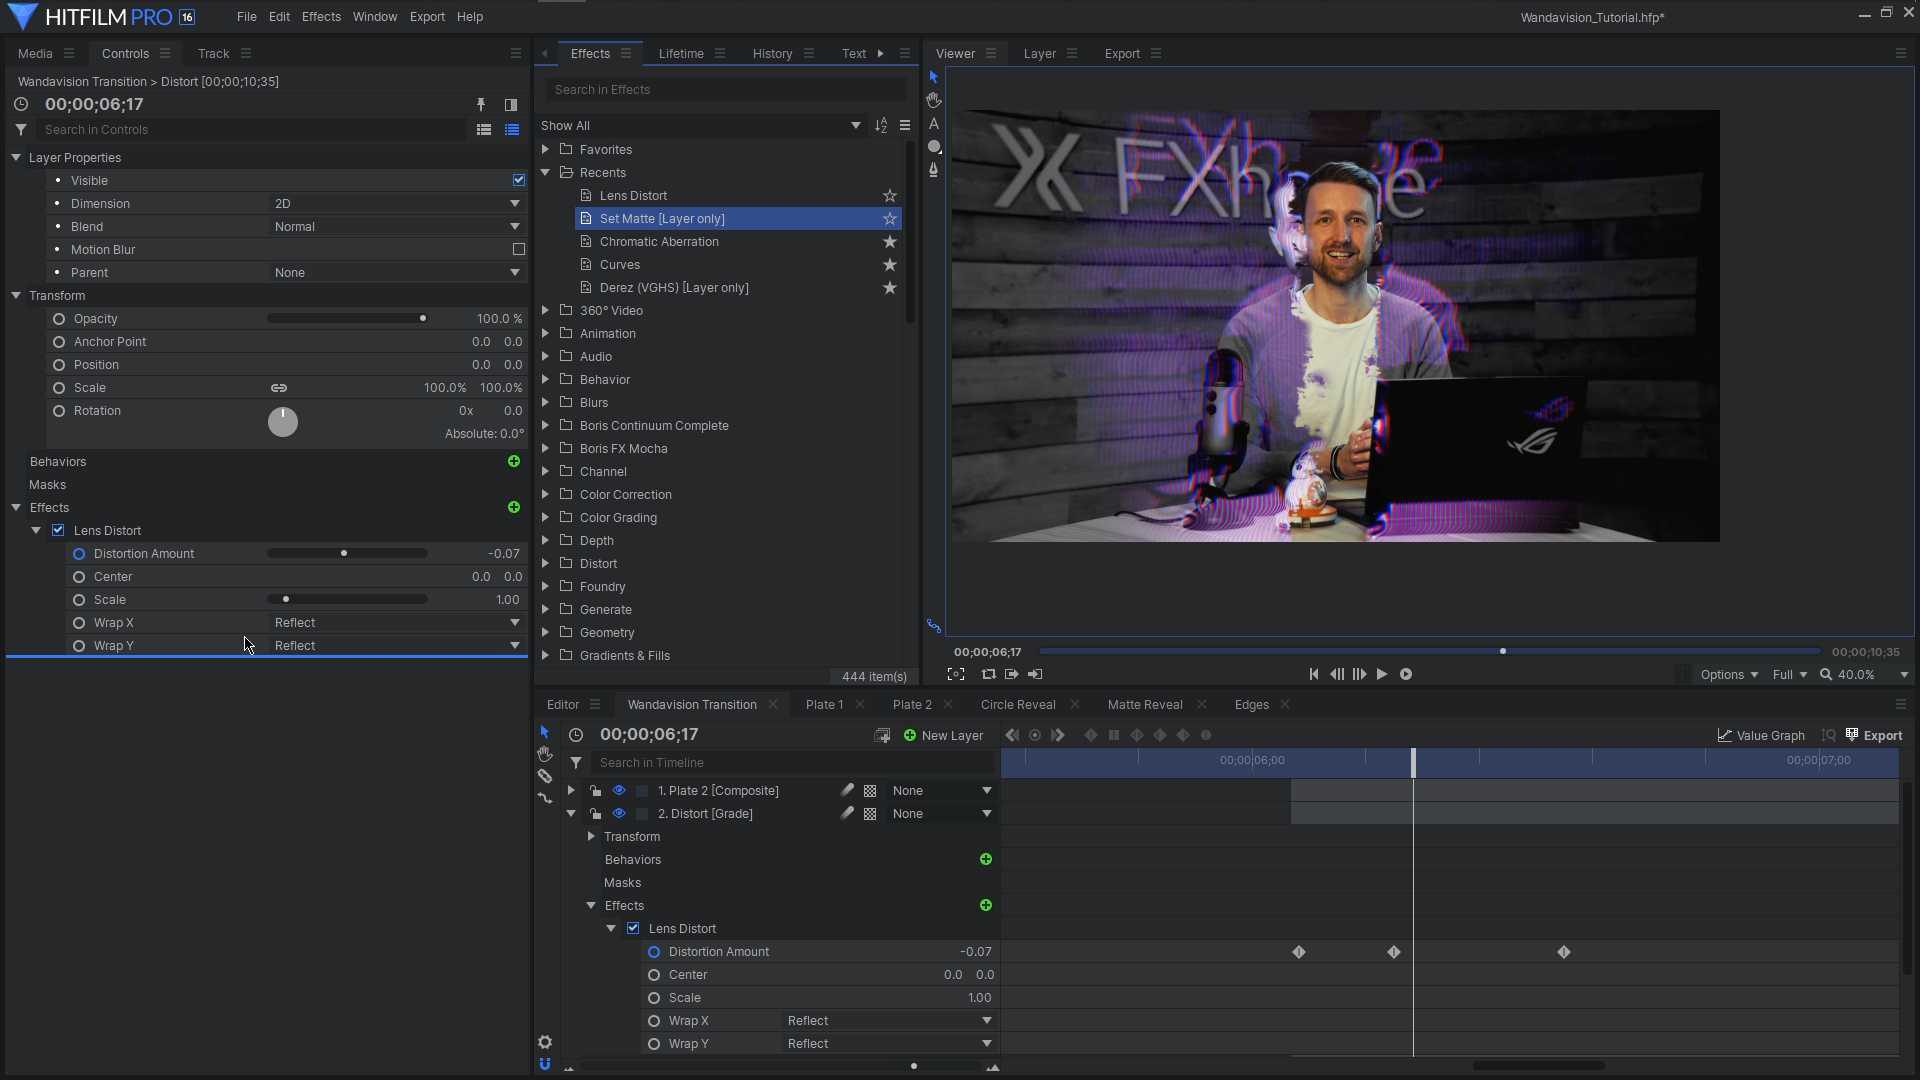
Create a new Grade Layer and place it above the wavy lines we’ve just created. Search for Lens Distort in the Effects panel and apply it to the new Grade layer. We’re going to keyframe this effect over a few seconds to help highlight the tearing effect. Start with the Distortion Amount at 0, setting a keyframe, and decrease it to around -0.8 after a few frames. Apply another Set Matte effect, setting the Source Layer to the Circle Reveal, the Source set to Luminance, the Blend set to Subtract, and ‘Invert’ enabled. You’ll only be able to see the area within the mask, so set the Blend mode of this Grade Layer to something subtle like Screen or Lighten.
Step 6: Adding the glow and finishing touches
We’ve been using our Matte Layers with the visibility off, but now we’re going to be using our Edges as an actual layer. Enable visibility on the Edges layer and position it at the top of all the other layers. We ended up applying another Energy Distortion to break up some of the blocks.
In order to have the tearing and glitching happen outside of the area, we’re going to use the Pixel Sort effect. This effect allows you to take color information from one image and use another image to offset and distort it.
Apply the Pixel Sort effect and begin by setting the Order From property to Plate 1 and the Grouping to Plate 2. The way this effect appears will depend on the footage you’re using but to see what we’re doing, rotate the Direction 90 degrees. Go to the Reveal Mode and switch it to Flow Over (Bright), then enable Sort Transparent. To sort the chaos we’ve created, alter the Brightness and Thresholds settings.
To change this into red energy, we’ll use the Lightsword Ultra Glow effect, and use the Red preset, lowering the inner and outer glow until we find something that works.
Soften all the effects with a Diffuse and change the Edges layer’s Blend mode to Add. For more glow and detail, duplicate the layer, go to the Pixel Sort effect, and change the direction to the opposite side. This will add a little more chaos.
And that’s how you alter reality without the infinity stone.