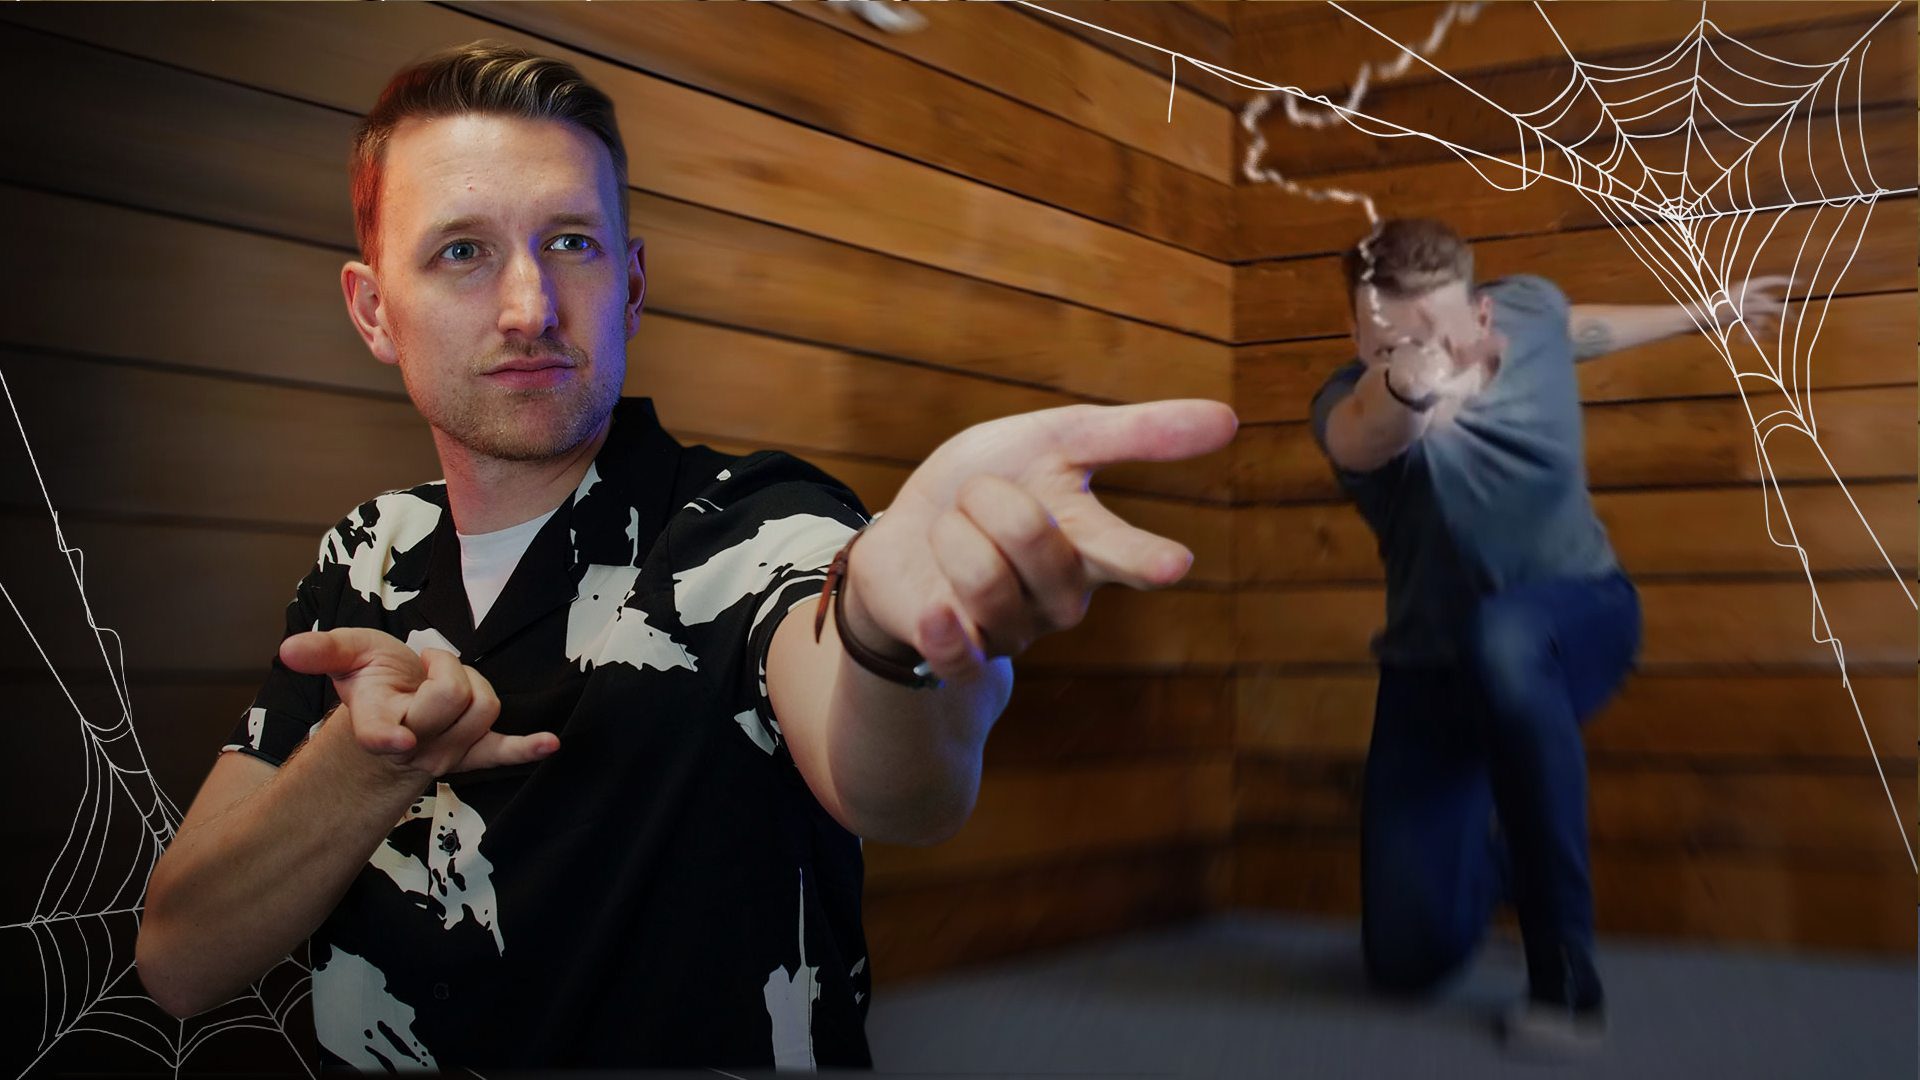
In this HitFilm tutorial, we’ll show you how to create Spider-Man web shooter effects by modifying the Lighting Effect in HitFilm.
Step 1: Record your footage
You’ll need two shots to create the seamless transition effect: a wide shot and a handheld shot. You must keep the shots aligned to achieve a smooth transition. You can accomplish this by using key features in your footage, such as a corner as a reference for what you will match later.
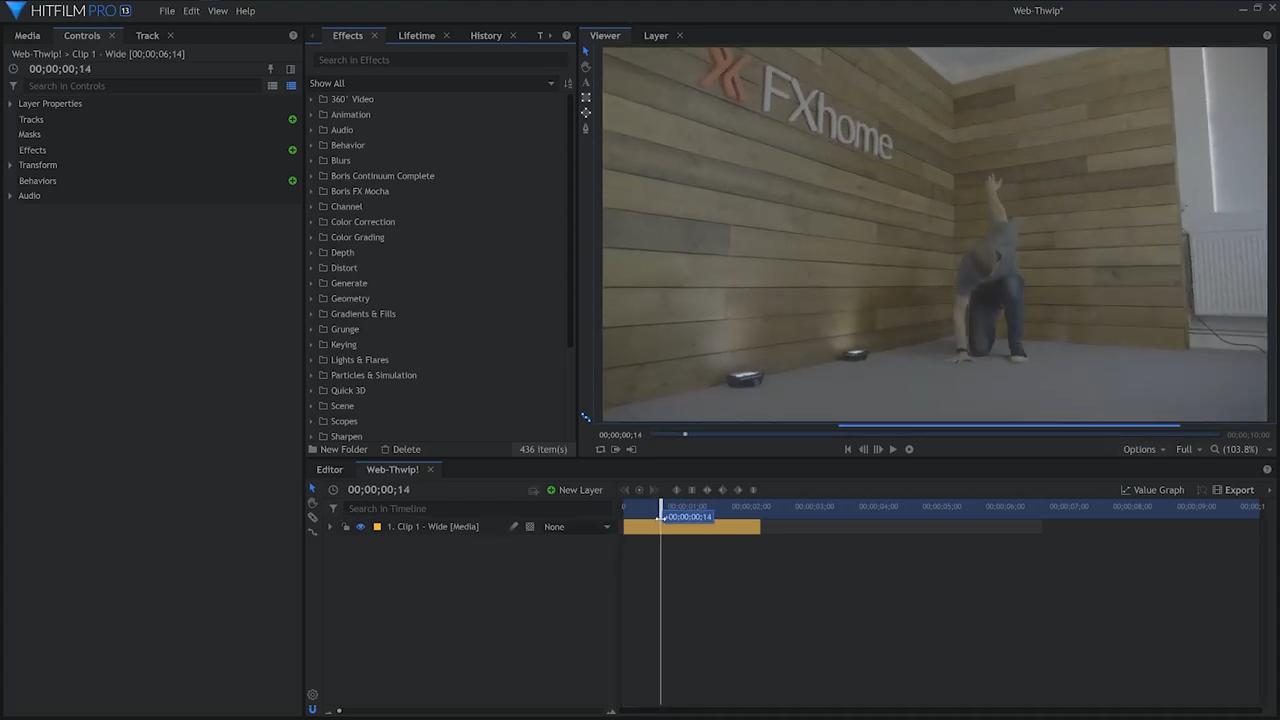
Step 2: Motion track the actor’s hand
In a HitFilm Composite Shot, move your wide footage onto the timeline and skim the footage for an appropriate moment to begin to track the point for the web-shooters entry. Once found, create a new Point layer, rename it Hand Track, and position it over the actor’s palm – this point layer will contain the tracking data. Next, in the footage layer controls under Tracks, press the plus icon; HitFilm will then open the tracker. Position the resulting box in the viewer around the actor’s hand, then track. Due to the minimal movement and presence of motion blur in our shot, we decided to track frame by frame, manually adjusting the boxes when needed. With this type of shot, we didn’t need to alter the Rotation or Scale values but bear this in mind if your shot requires you to alter the properties. Once you are happy with the track, in the Layer dropdown menu in the Track panel, select Hand Track and hit Apply.
Step 3: Create a puff of smoke
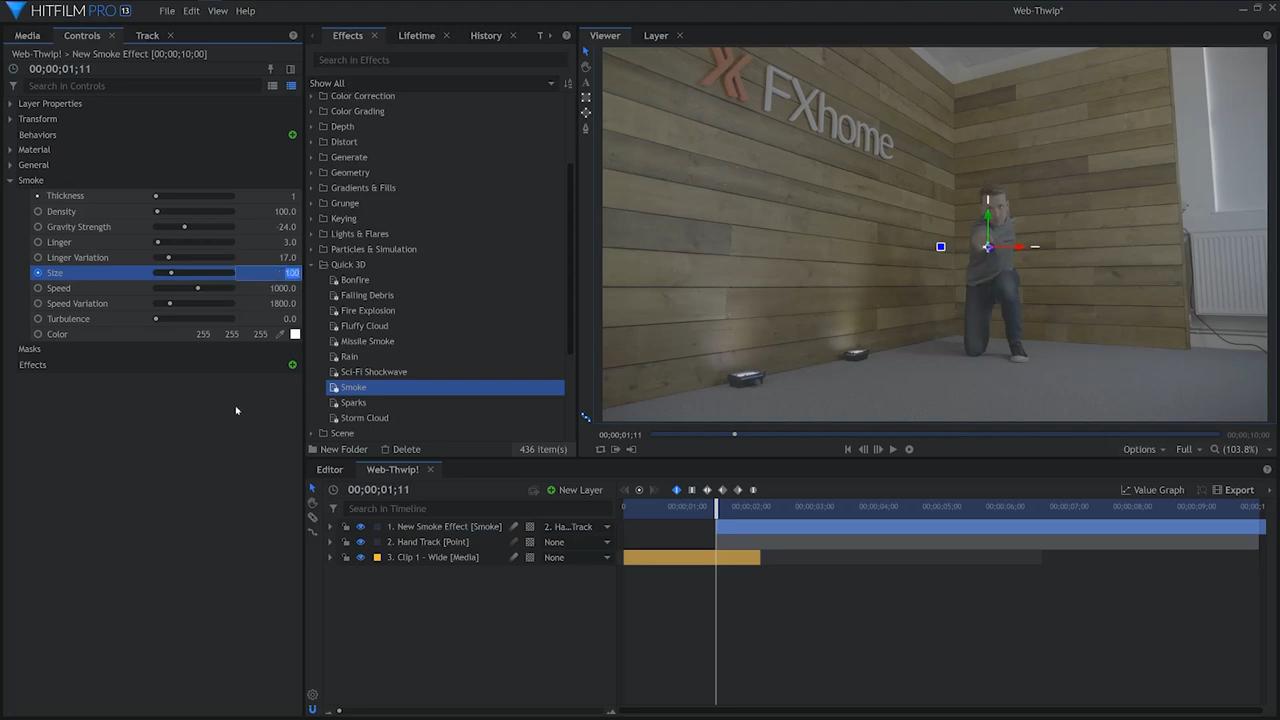
In the effects menu, navigate to the Quick 3D folder, then select and drag the Smoke effect straight onto the timeline – this will create a new Smoke layer. Alter the layer in position and scale to cover the actor’s hand. Then, parent the layer to Hand Track. By going into the Controls tab and opening up the smoke drop-down, we can alter the smoke to create a small puff. To do so, raise the Density, lower the Gravity Strength and Linger and introduce some variation by increasing the Linger Variation. Additionally, we raised the Speed to 1000 and the Speed Variation to 1800. A significant part of the effect, however, is the Size value:
- On the timeline, drag the Smoke layer to come in when you want the effect to be activated.
- Then keyframe the Size to have a rapid Spike setting its beginning value to 200 and after five frames placing another keyframe by setting the value to 0
Step 4: Create the webbing effect

Create a new black Plane layer and rename it Webbing. Apply the “Lightning & Electricity” effect and a Demult effect to the plane layer. Under the Lightning & Electricity effect settings, go into Glow and set the Opacity down to 0. Additionally, under Branches, reduce the Quantity to 2.
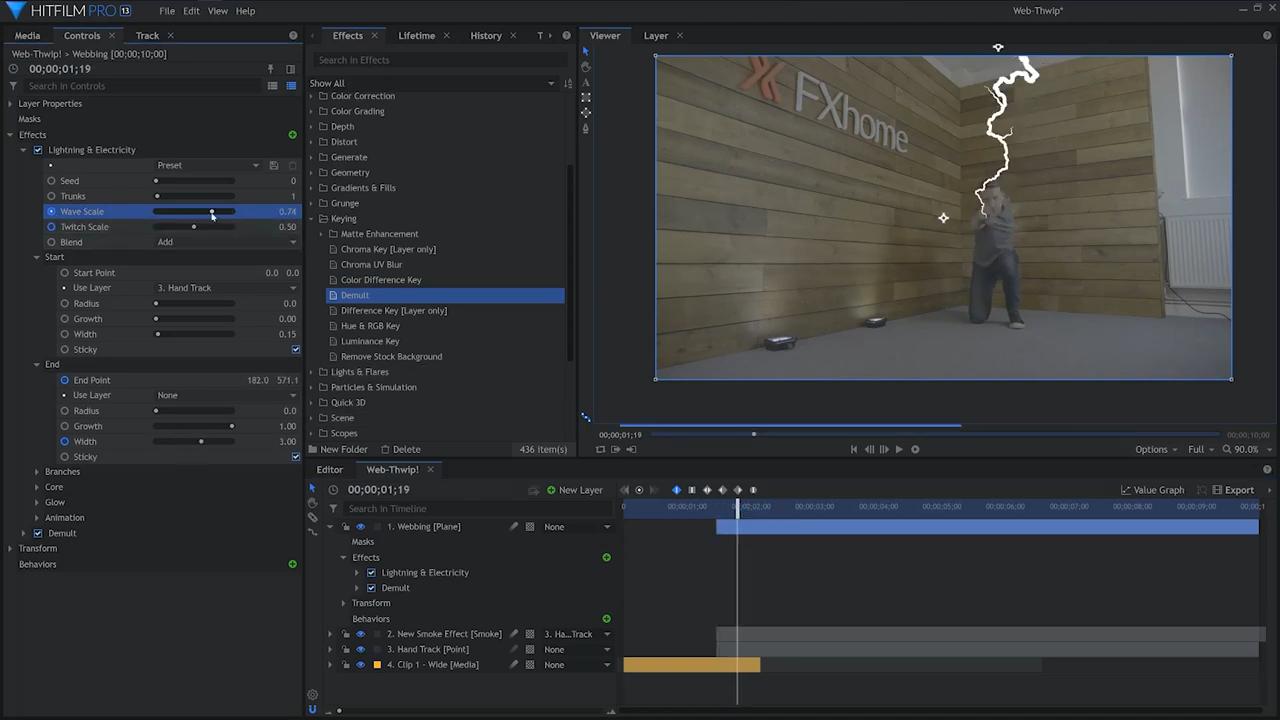
For the position of the webs, we’ll be using a tracking point for the beginning while keyframing the end position. Open the Start dropdown and set the Start Point values to 0, then in Use Layer, select Hand Track. Next, in the End dropdown, by using the point values or anchor, move it to the location of origin. When aligned, drop down a keyframe. Then move forward a few frames on the timeline and drop another keyframe by moving the anchor above the frame – this is to appear as if it is grabbing the camera’s top handle. To make it appear as it is getting closer, keyframe the width to increase with the motion of the lightning growth. You should now have the basis of the web motion
To imitate the appearance of tension on impact with the camera, animate the Wave scale and Twitch down to 0
Step 5: Add texture to the web
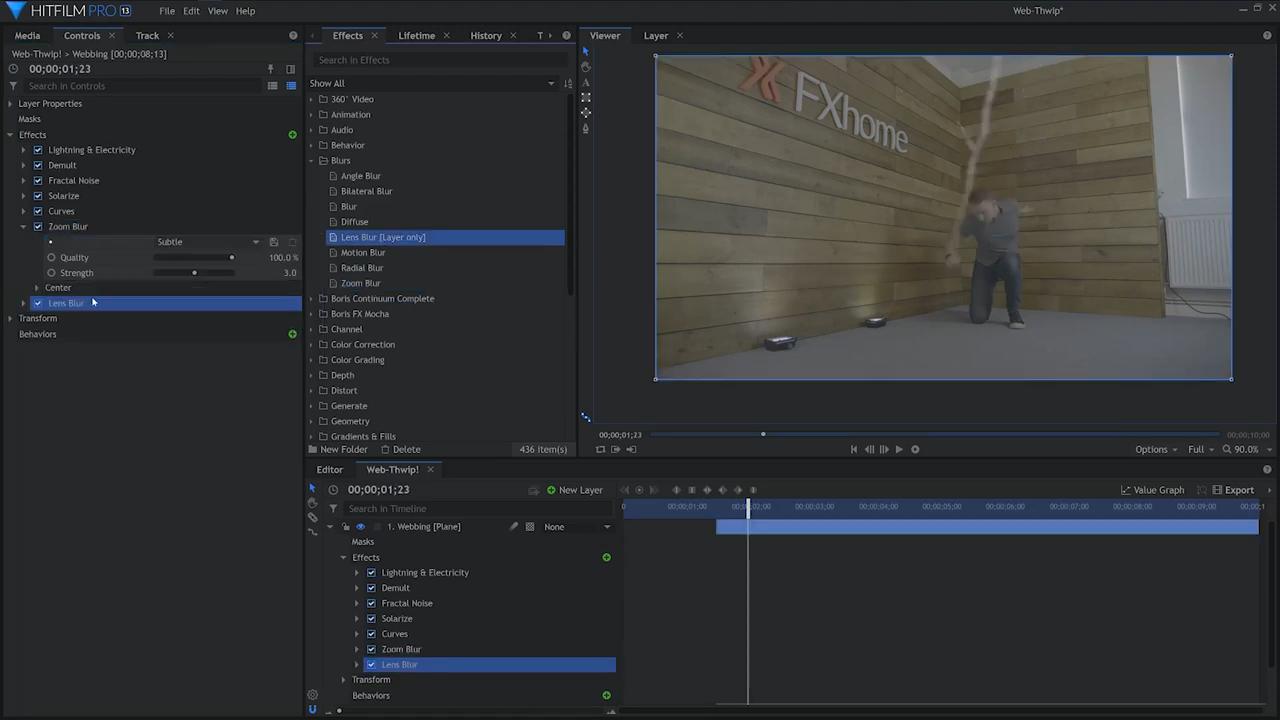
To make the web look less lightning-like, add a Fractal Noise effect to the Webbing layer. Then, select the Solar preset under the effect’s settings, scale it down and remove the color by setting Color 1 to an off-white and Color 2 to black. For additional detail, apply the Solarize effect to the Webbing layer and increase its Threshold value – this effect uniquely inverts the layer, enhancing the detail. To improve the appearance of the shadows, apply a Curves effect and adjust the values.
To scale up the realism of the motion, apply a Zoom blur effect and use the Subtle preset. In addition to this, apply a Lens Blur effect to soften the appearance of the movement.
Step 6: Imitate camera movement
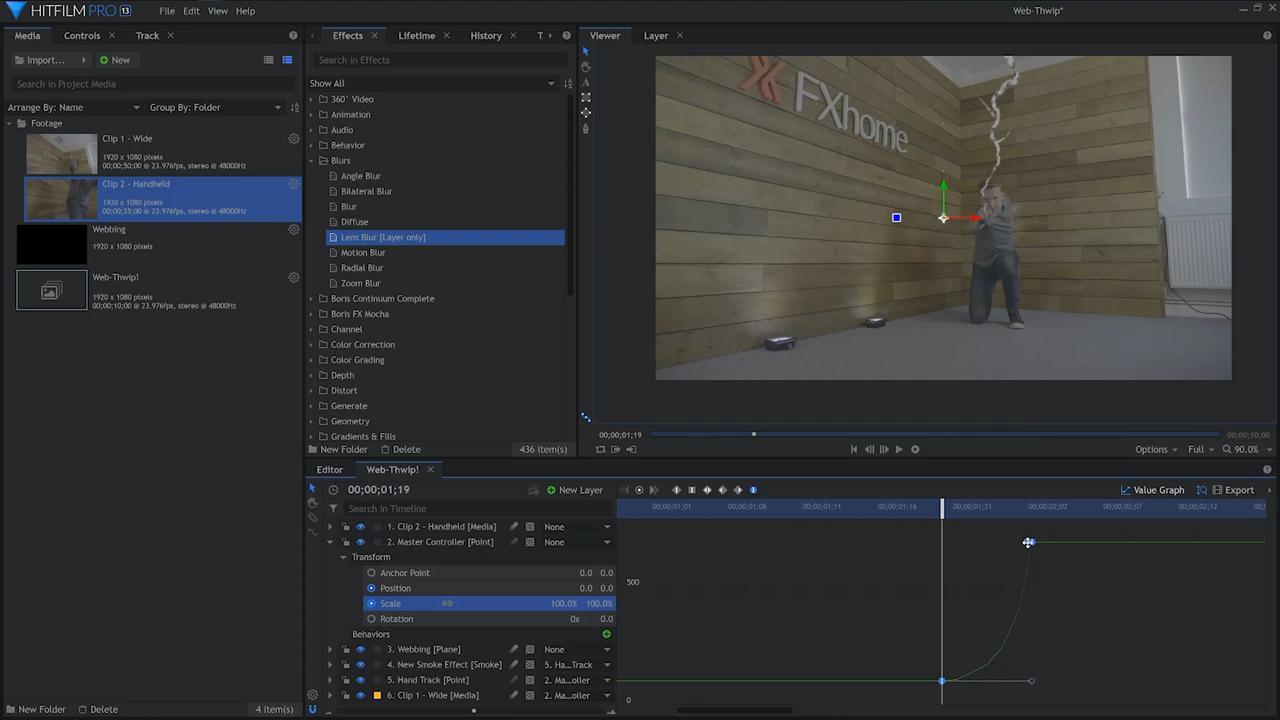
In this shot, we faked the camera movement for the zoom, which required another Point layer that acted as a master controller for all of the layers involved. Add a new Point layer to your composite and rename it Master Controller. Parent the footage and the other tracking point to Master Controller. At the beginning of the impact of animation, add a keyframe for the point’s position and scale. Then, import the handheld camera footage into the timeline and Trim it into position – the point at which the camera is “caught”. In our footage, we pulled the camera into the bottom left corner, so by using the Master Controller, we altered the Scale and Position of the Master Point to allow the wide shot footage to match the framing of the handheld footage. To add more of an impact, highlight the keyframes and set their type to smooth using the keyframe icons above the timeline. With this set, you can go into the value graph and increase the velocity of the pull by creating a steeply inclined slope – this intensifies the sense of speed. Lastly, activate Motion Blur on all of the layers
Step 7: Add the finishing touches
For a final touch, generate a new grade layer, name it Shake, and apply the Shake effect to this layer. Under the effect’s settings, keyframe the amount to increase and decrease over the course of the motion.
There you have it! Now you have become the ultimate web-slinger by creating an epic Spider-Man web shooter effect. See you next time!