This tutorial will show you how to create an epic 3D space battle scene inspired by Star Wars. We’ll be using 3D models and the Particle Simulator, which are only available without watermark in the Pro tier (see pricing).
Step 1: Import the 3D models into a HitFilm Composite Shot
We sourced both the Razor Crest and TIE Fighter 3D models from Sketchfab.com and ensured that we downloaded the .gltf versions of the models.
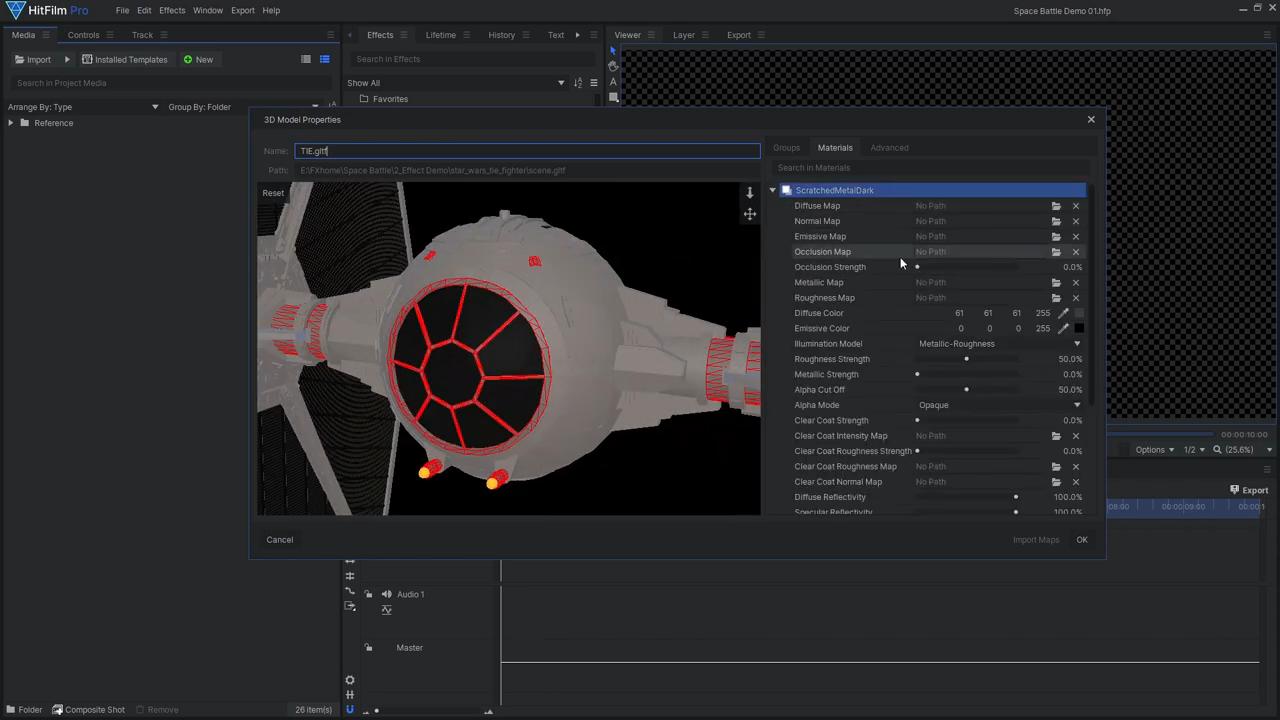
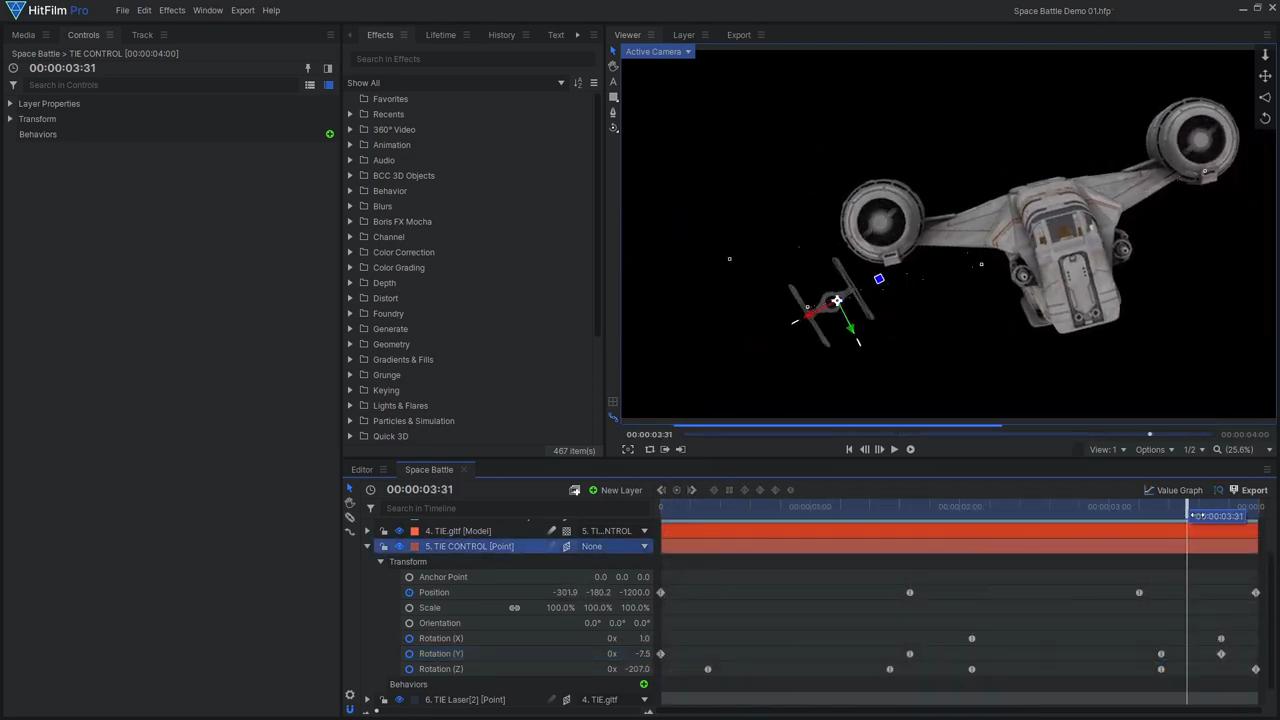
Once you have downloaded the TIE Fighter model, import it into HitFilm and adjust the Materials setting until you achieve the desired result. Then, create a new Composite Shot and drag in the model. Add a new Point Layer and make it 3D, then parent the model to the Point. We will later animate this point to move the TIE Fighter. Add two more 3D Points, position them on the TIE Fighter’s laser cannons, then parent them to the TIE Fighter. We will later use these Points to fire the lasers.
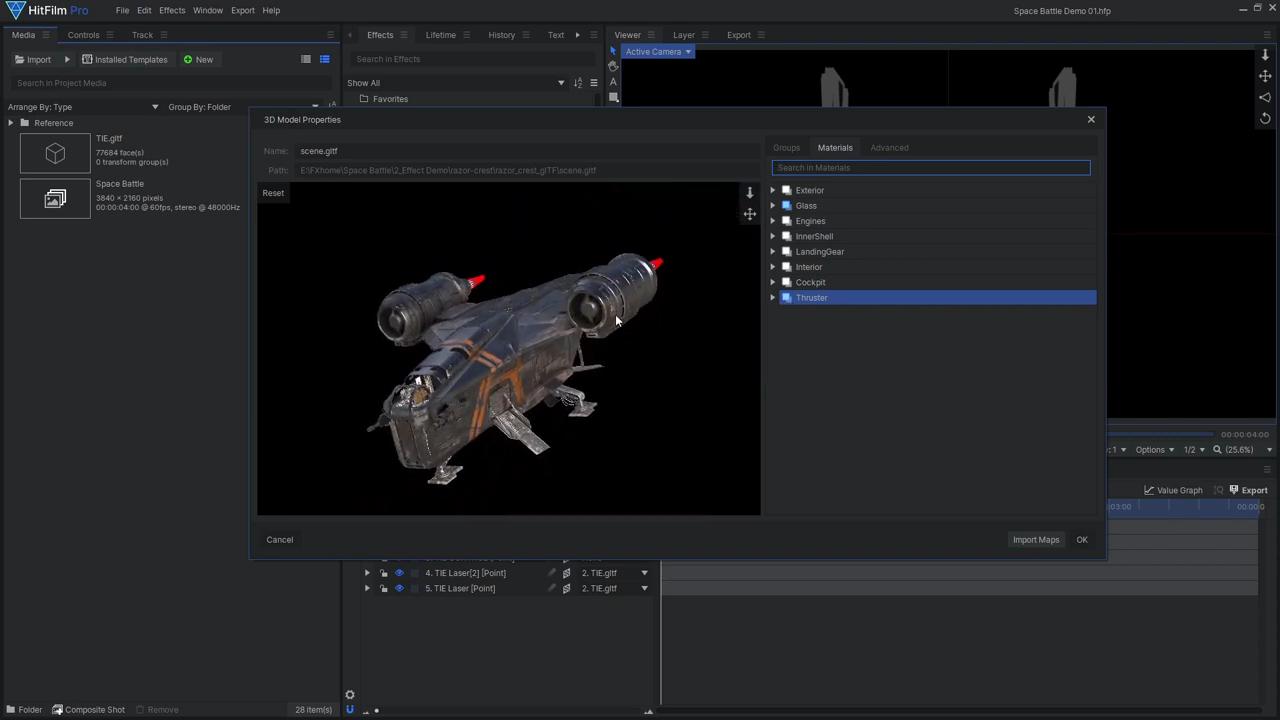
Next, import the Razor Crest model. As we don’t want the glass to be transparent, enable Material Override – this will allow us to use a HitFilm layer for the texture. Additionally, enable Material Override for the thrusters so that we can adjust their color. Then, click ‘Import Maps’ to bring the image textures into HitFilm, allowing us to edit them and hit OK. We also recommend that you reduce the Maximum 3D Model Map Size while working in the file. The Razor Crest model has three different animation files – we applied the Flying animation, as it puts the ship in a flying pose and animates the engines. Be sure to tick ‘Loop’ so the animation continues. Then, add another new 3D Point, this time parenting the Razor Crest model. Lastly, Scale the model down to 30%.
Step 2: Animate the 3D models
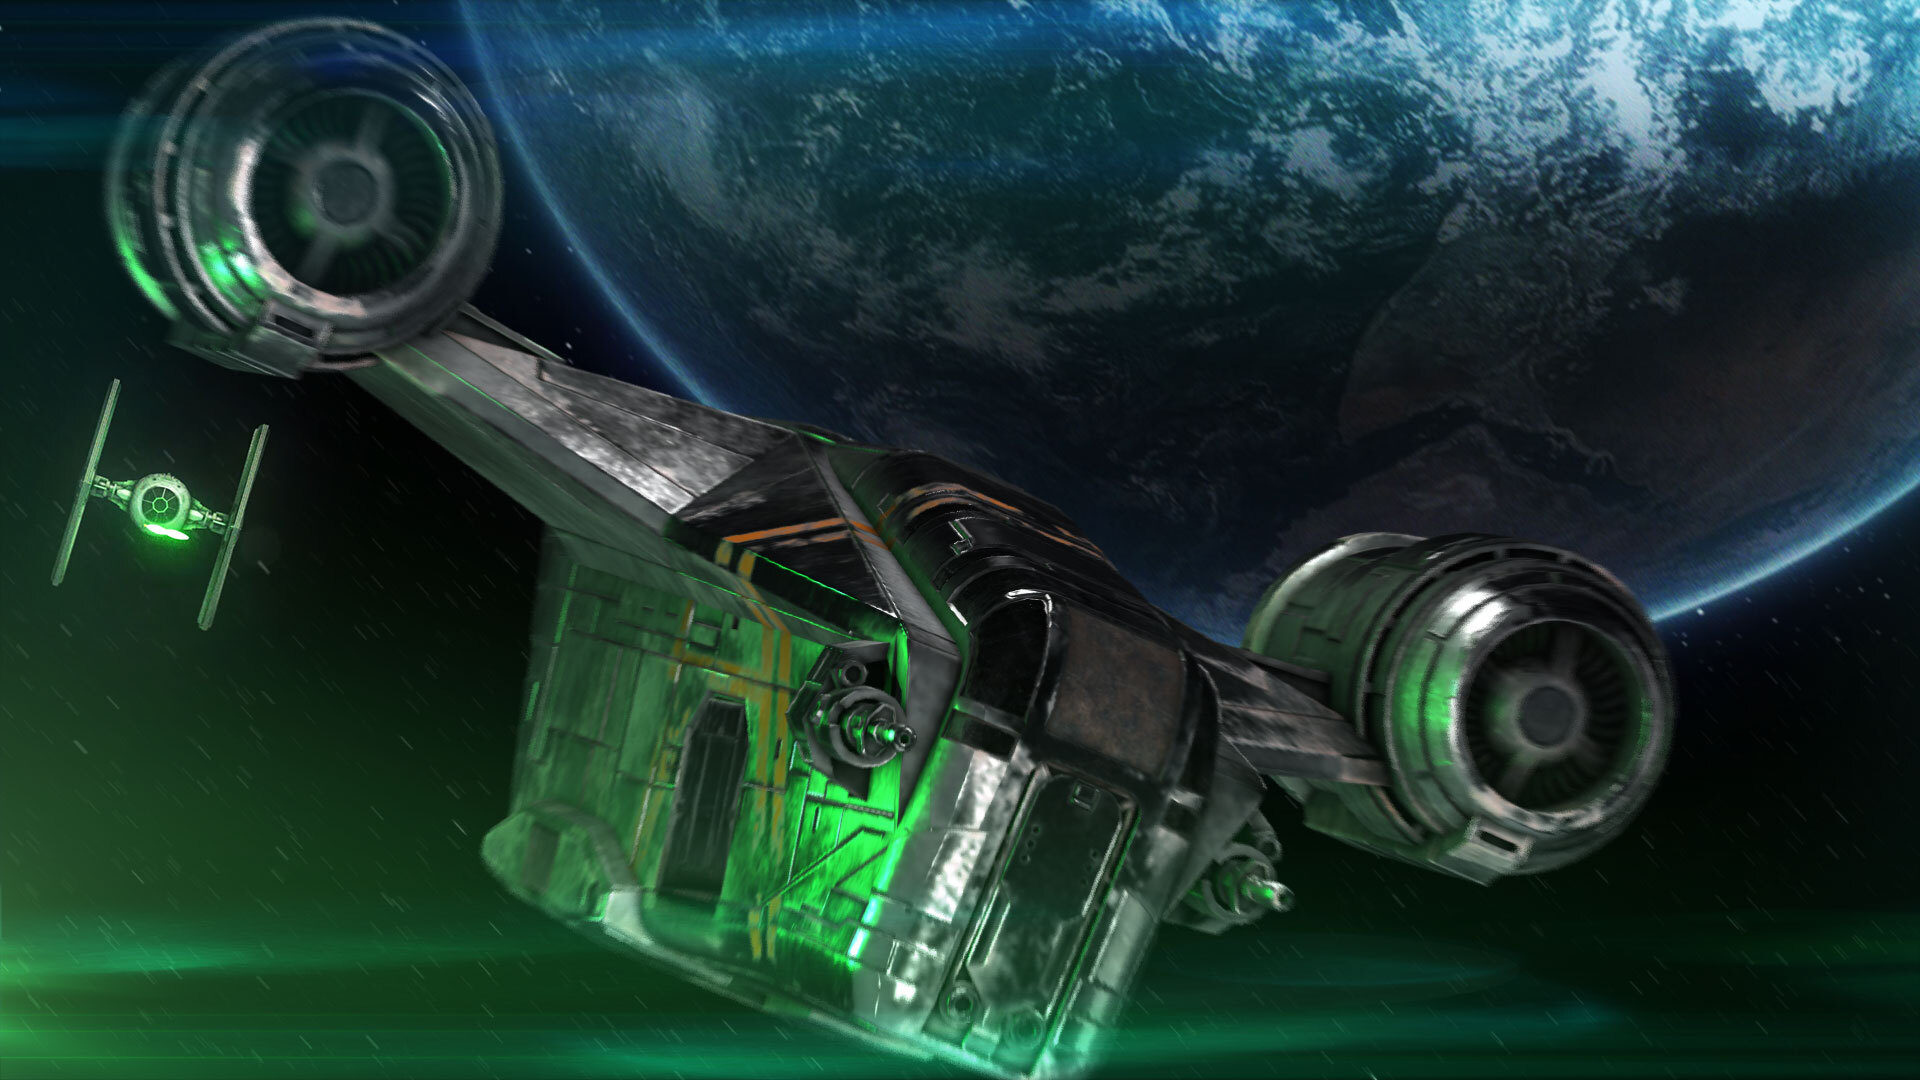
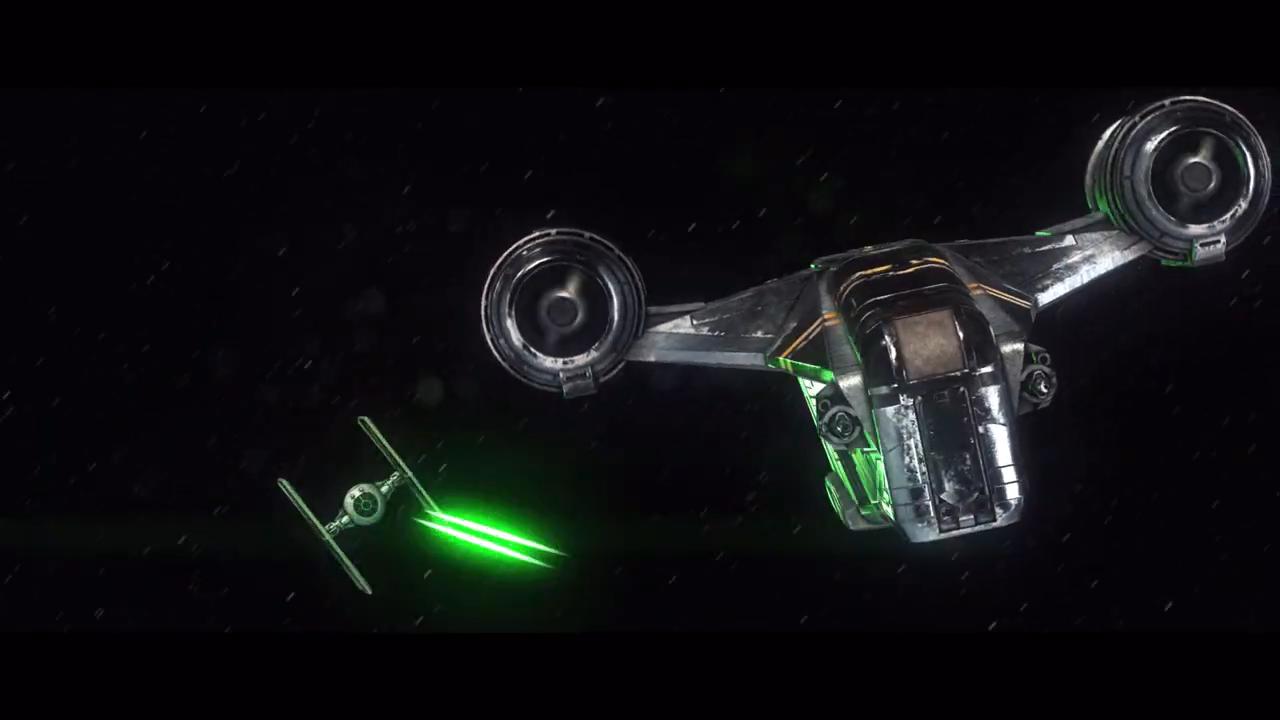
A scene from The Mandalorian heavily inspired our space battle scene. For the animation, we first animated the Razor Crest. We began by enabling keyframing for the Point’s position, and rotation values, then moved and rotated the model into place. We then jumped ahead on the timeline and adjusted the position and rotation again, resulting in a rocking motion. For a more interesting movement, the rotation keyframes were offset from the position keyframes. Additionally, we used the Manual Bezier Keyframe type to create a much smoother movement than the default Linear Keyframes. However, we didn’t set every keyframe to this type; the shot’s start and end keyframes were linear, making it seem like the motion would continue beyond the shot instead of slowing down at each end.
This process was repeated to animate the TIE Fighter model, which was placed behind the Razor Crest in Z space. The TIE Fighter animation was very similar to the Razor Crest, except for the addition of a spinning motion. We also animated the Y rotation so the model would point towards its target. Animation like this can take some time to get right, so it’s beneficial to have reference material to learn from, such as the actual Star Wars movies and shows.
Step 3: Create a starfield

We used a starfield to imitate the appearance of 3D camera movement. To create the starfield:
- Create a new Composite Shot.
- Apply the Atomic Particles effect to a white Plane layer.
- Select the Starfield preset.
- Adjust the settings until you are happy with the star’s appearance.
- Drag this Composite into the main Composite Shot
Typically you would create a 3D starfield by applying the 360 viewer effect, resulting in the starfield reacting to the 3D camera movement. However, an easy trick to fake the appearance of a camera move is to simply animate a 2D image of a starfield. For this shot, we enlarged the starfield beyond the dimensions of the viewer and animated the position to move diagonally towards the top right. This technique gave the ships the appearance of diving as the camera is following them. This 2D star technique essentially replicates what would have been done practically for the original Star Wars films. Back in 1976, they filmed the practical models against a blue screen. To make the models appear to move, they moved the camera with a motion control system and then filmed a 2D starfield as a separate element to be added in later. By moving and rotating the starfield, they were able to give the illusion of more dynamic movement for the ships and cameras.
Step 4: Add some 3D lighting to the shot

Now that your spaceships are flying, it’s time to make them look more realistic.
- Begin by enabling Ambient Occlusion on the models to bring out some more detail.
- Add a new Light layer, setting the type to Directional as they best represent a distant light source, such as the sun.
- Adjust the position to angle the light in a way that creates nice highlights on the models.
- Enable shadow casting on the light and model layers, and adjust the shadow settings if needed.
- Enhance the appearance of the ships’ reflective metal materials with a HDRI (we sourced one from HDRIHaven.com). We chose a studio HDRI as it doesn’t contain any vibrant colors and mimics the look of filming a practical model in a studio like the original Star Wars films.
- Hide the HDRI from view, and select it as the model’s environment map.
As the Razor Crest’s glass was still transparent, we needed to make each of its textures into their own composite shots. We added a new black Plane layer underneath the image layer in the Glass composite so it was no longer transparent. In the Thruster composite, we desaturated the image, then made it orange. We achieved this with the Color Vibrance effect, but you could use almost any color correction effect to do so. These texture composites were brought into the main composite and hidden. Then we selected each layer in the model’s override materials controls (found in Controls > Models > Razor.gltf > Override Materials). This was achieved by setting the Diffuse Map Source to Use layer and the Diffuse Map Layer to the associated texture composite. We set both the Diffuse Map Layer and the Emissive Map Layer to the thruster texture layer for the Thruster.
Step 5: Add the animated lasers
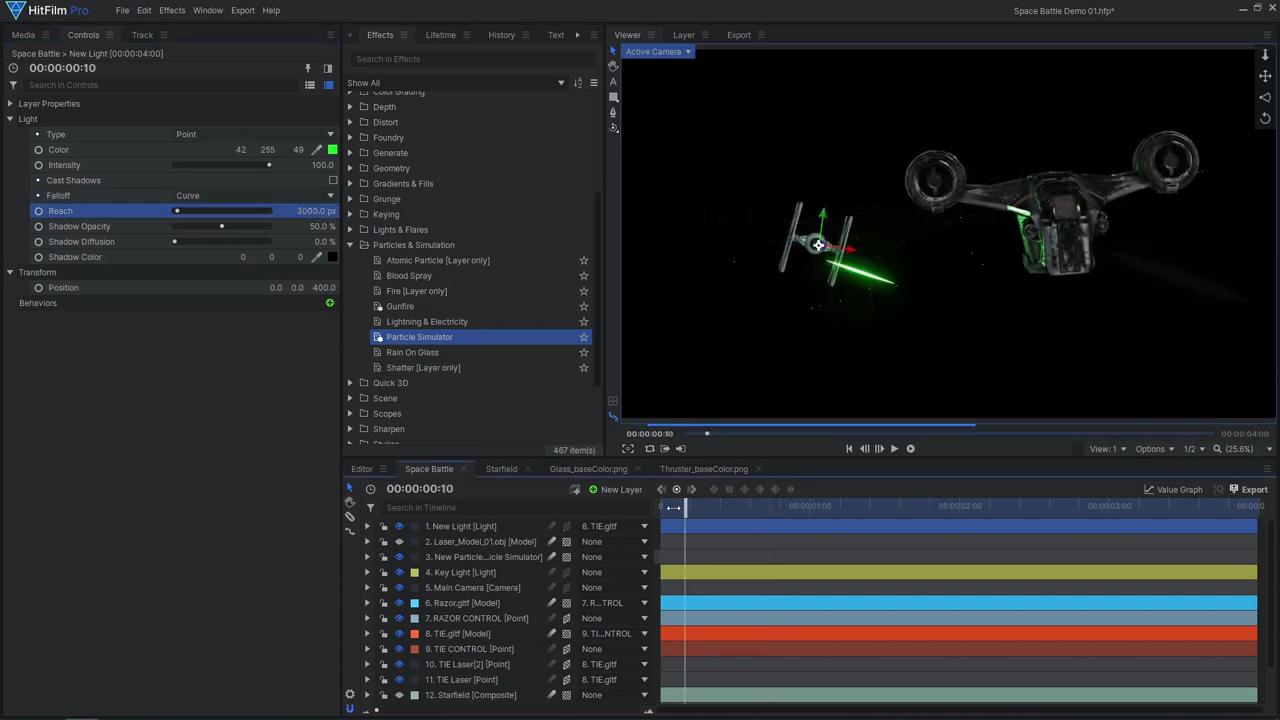
A Star Wars space battle isn’t complete without some lasers! There are various ways to create laser blasts in HitFilm. A more manual approach would be to use one of the Lightsword effects or the Animated Lasers effect. We chose to use an effect that’s slightly more automated – the Particle Simulator.
- Drag the Particle Simulator effect into the main composite.
- Open up the Emitter settings and attach it to one of the TIE Fighter laser Points.
- Set the Trajectory to Cone and set the Radius to 0.
- Then, adjust the rotation to make the particles fire in the right direction.
- Reduce the Particles Per Second, then increase the Speed.
- To make the particles look like laser blasts, We created a simple 3D model in Blender to use as the particle texture. This laser model is included in the downloadable project file. Once Imported into your project make the diffuse color white.
- Drag the model onto the timeline and select it as the texture source layer of the Particle System.
- Tick ‘Align to Motion,’ then adjust the laser model’s rotation to reorient the particles.
- Set the particle system Velocity From Emitter to 100%. This way the laser speed is affected by the TIE Fighter’s speed. If this value wasn’t changed and the ship was flying forward very fast, the lasers would fall behind the ship.
- When the laser blasts are created, they overlap the TIE Fighter. To fix this, adjust the Anchor Point on the laser model so it is at the end of the laser. You can also adjust the scale of the model to change the laser’s shape.
- Set the Particle Simulator’s Depth Source Layer to be the Razor Crest, so the lasers will intersect with the model instead of sitting on top.
- To stop the lasers from firing, animate the Active property on the Particle Emitters. We chose to deactivate the particles when they aren’t firing anywhere close to their target and when they actually hit their target.
- When you are happy with this laser, duplicate the particle Emitter, and attach it to the other laser Point.
- Add several Glow effects to the lasers. For each effect adjust the Radius value and the Per Channel Intensity till you’ve reached the desired color.
- To add some interaction between the lasers and the models, add a new Light layer with the color set to match your laser blasts.
- Parent the Light to the TIE Fighter, then set the light’s position to “0,0,0”. Then move it just in front of the Razor Crest model.
- Adjust the light’s falloff and reach so it only lights up the area close to the laser.
- When a laser appears, animate the Light’s intensity to increase, and animate its position to follow the general direction of the laser.
- Then animate the Intensity to fade out. You can then copy and paste these keyframes for each laser blast.
Step 6: Add the finishing touches
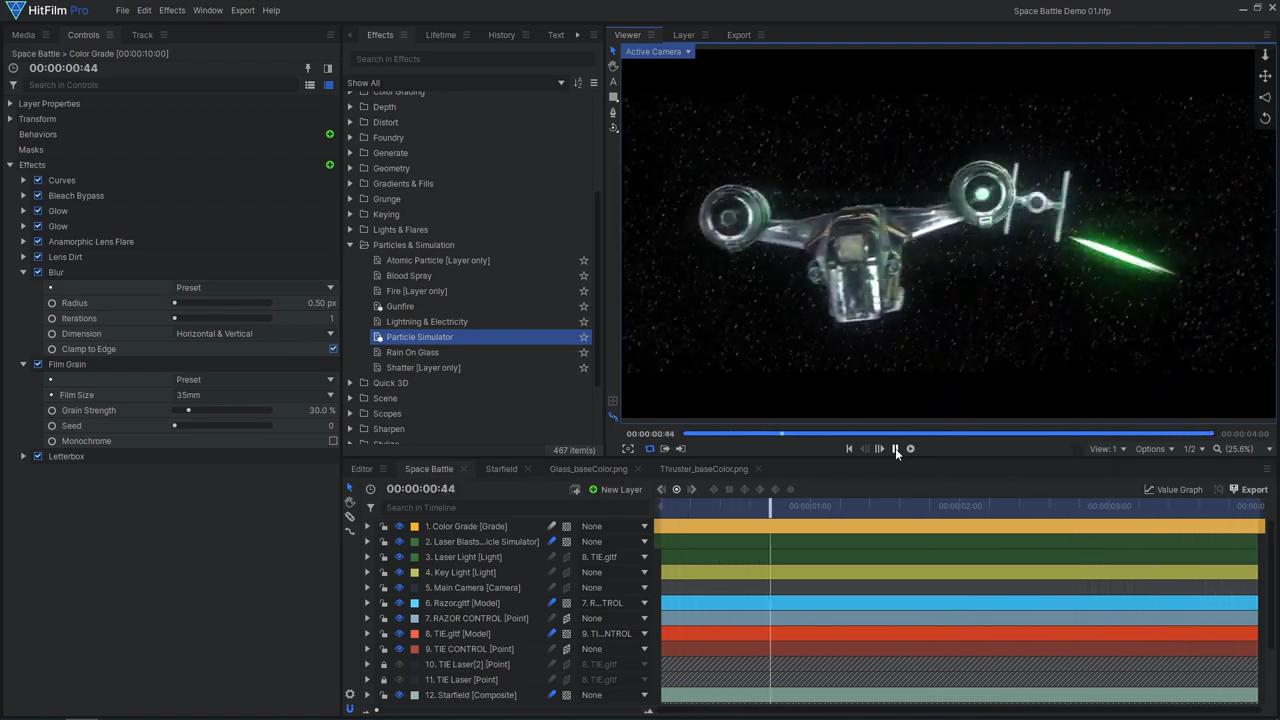
To finish off the shot, we can add some lens effects to add more detail and make the shot look even more striking. Firstly, enable motion blur for all of the moving layers. Then, set the Color Bit Depth to 16-bit float by navigating to File > Project Settings > Rendering > Color Bit Depth. Do a simple color grade, using Curves and Bleach Bypass to adjust the color and contrast. If your spaceship’s engines or thrusters are visible in the shot, you can enhance their bright appearance with some Glow effects. Here’s a tutorial showing you how to add glowing effects to 3D models:
Next, add an Anamorphic Lens Flare effect to enhance the bright spots of your shot. Ensure that you set the orientation to Horizontal and disable the Pivot options. Adjust the threshold, intensity, and offset until you have some nice flares on the bright spots of your shot. Another useful lighting effect is the Lens Dirt effect. When using Lens Dirt, be sure to use an image texture for the dirt instead of the built-in dirt texture. You can find the image we used in the downloadable project file. Finally, finish off the shot with some Film Grain, then a Letterbox effect to create the wide aspect ratio.
That’s how you can create your own Star Wars-style space battle in HitFilm! There are many other Star Wars and 3D model tutorials on the FXhome YouTube channel, so be sure to check those out as well. See you next time!