In this tutorial, we will show you how to convert 2D images into 3D scenes, perfect for creating cinematic establishing shots when you’re unable to reach the location!
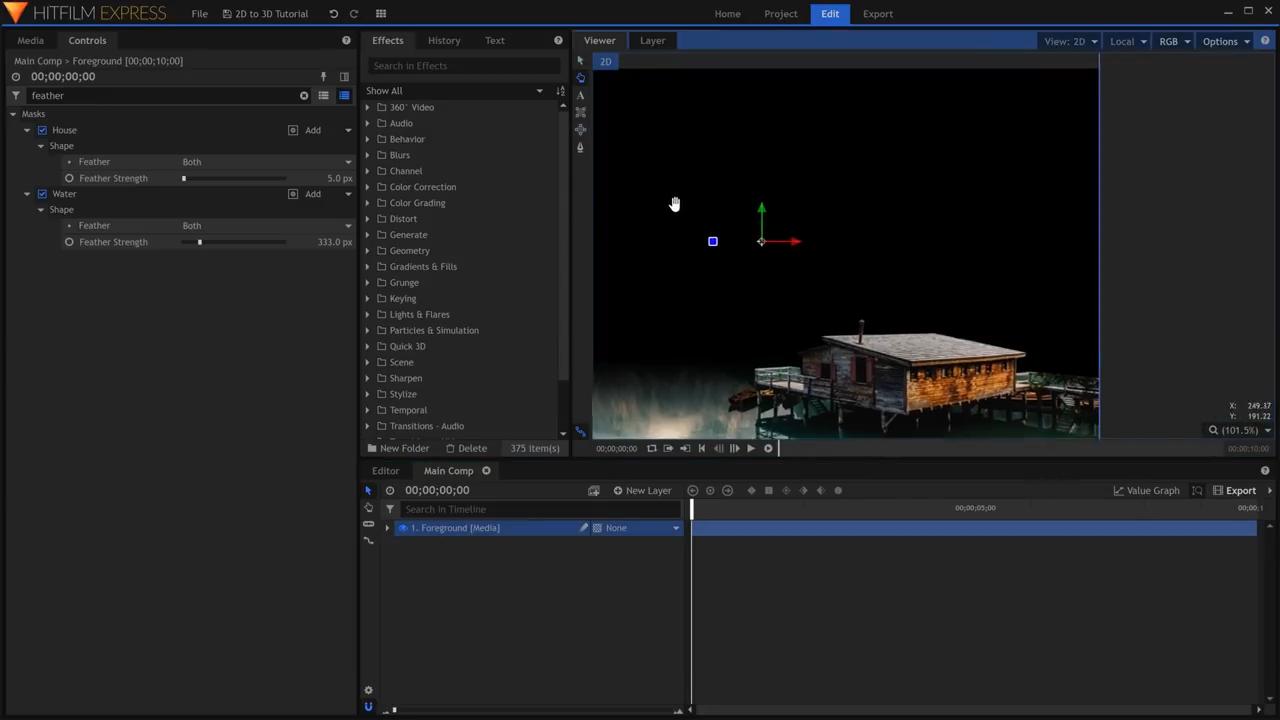
Begin by creating a new Composite Shot and moving the 2D image onto the timeline. To keep track of the resulting images, rename the current image layer to Foreground. Go into the freehand mask tool and mask around any of the shapes that are in the foreground to isolate it from the background – in this instance, we masked around the house. The mask for this must be precise as rough edges will make it obvious that the scene is a cut-out. Next, create a Rectangular mask for the bottom of the frame, and position it accordingly. We used a separate mask for the terrain of the foreground so we can vary the feathering.
In the Mask controls, Keep the Feather Strength of the foreground object masks low to preserve the sharp edges; however, for the terrain, increase the Feather Strength so it fades in more drastically.
With the foreground isolated, duplicate the layer and rename the duplicate Midground. Then, in the Midground layer delete all of the masks. Temporarily hide the Forground layer while working in the Midground layer to be able to better see what you’re doing. As before, begin to mask around the elements that are present in the appropriate depth from the camera – in this instance, these midground elements include the waterline, the near distant mountains, and the tree line. Lastly, duplicate the Midground layer, rename the duplicate Background and delete all of the masks present in the background layer.
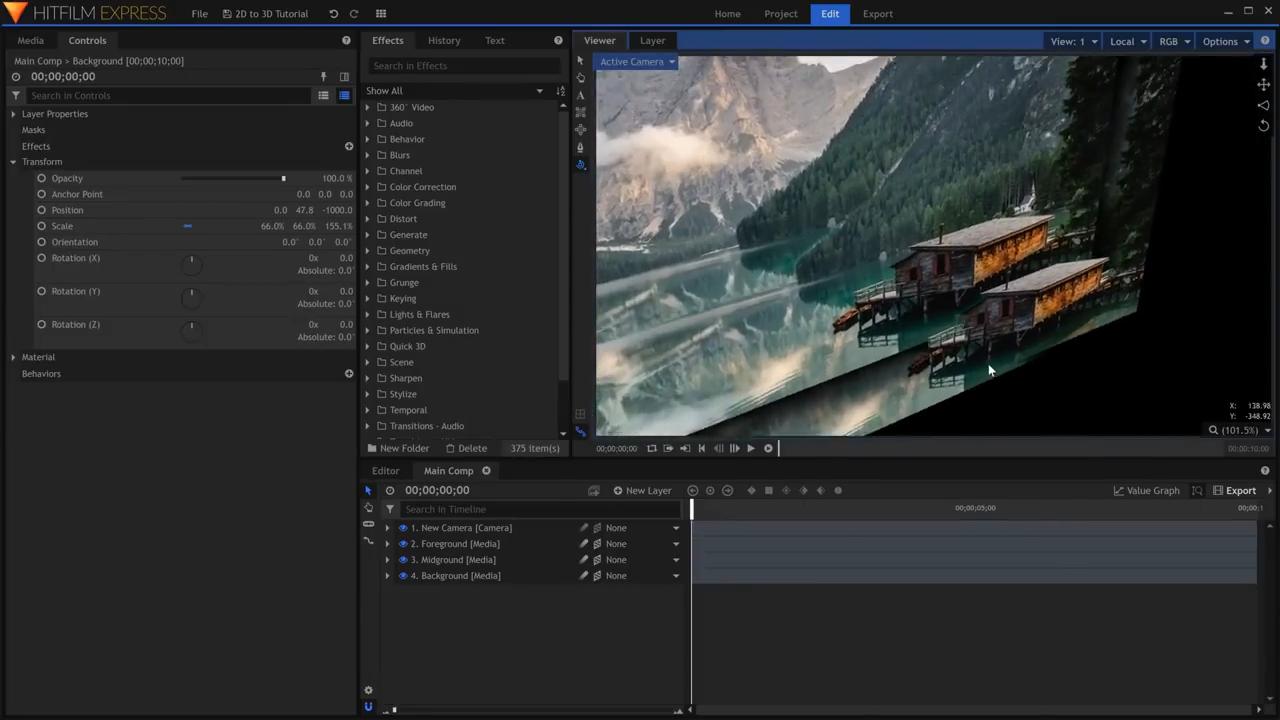
Now that we have isolated the foreground, midground, and background, select the composite shot layers and change them from 2D to 3D – this will automatically create a new Camera. The Foreground layer will remain where it is. Select the midground layer and go into the controls panel. Under the transform, set the Position to something negative like -500; the exact number depends on the picture you use and how far it should appear from the camera. Because the Midground layer has been pushed back in space, it no longer fills the screen anymore, to rectify this, increase the scale until it looks like it did before. Now for the background layer, doing the same thing, increase how far back it is in Z space. We brought our background back to -1000. As before, increase the scale to bring the background to the correct size.
The different layer depths result in a parallax effect when the Camera is moved which is what happens in real life. To move the camera, in the controls panel activate keyframing for the camera’s position. Animate the camera’s position however ensure that you do not go overboard with the amount of movement as too much will give away that the screen is just a compilation of flat picture layers.
And that’s how you create a 3D scene from a 2D image!

