


Getting the sound right is every bit as important as the pictures when making a video. Any spoken dialog, sound effects and music are crucial for telling a story or setting the mood. As leading video and audio editing software, HitFilm includes great features for the noisier parts of post-production.
To help you master the process, we’ll look at HitFilm’s audio support and the controls you need to know. Preset effects are covered, too, along with tips on monitoring loudness.
But first, what’s so special about sound?
Why good audio matters in your videos
Audio plays a huge part in the experience of any film or video project. It can sometimes be more important than the on-screen action for delivering narrative impact.
These sounds are very often also multi-layered. This means that many audio elements are overlapping and happening at once.
Balancing these voices, noises and any musical parts or “tracks” in an effective way is called mixing. Professionally, a video sound editor will be responsible for getting this right.
Common pitfalls in video production sound
When this mixing work is less effective, it can harm the viewing experience. These sound editing mistakes or “pitfalls” are worth considering while editing.
- Speech is unclear. Spoken dialog is either too low in volume or muffled by other competing sounds, making it hard to understand.
- Out of sync. Audio, such as speech or sound effects, is not synchronized to match the timing of the on-screen images.
- Mismatched music. Background music is either too loud or not well-suited in terms of a scene’s theme or style.
- Audio is abrupt. Sounds come in or end too quickly, with a jarring effect that isn’t intended.
TIP: Using good studio headphones is recommended when monitoring any music mixing.
How to edit audio in video
One of the many great things about HitFilm is that it’s both a video and sound editor.
HitFilm’s editing timeline allows for an unlimited number of audio tracks. Using the Media Panel, you can import sound files of a number of file types:
| Supported import formats* | Supported export formats |
| AAC, MP3, M4A, MPA, WAV & WMA (Windows only) | AAC & WAV |
*Support for AC3 (Dolby Digital AC-3) is now discontinued in all versions of HitFilm.
Also, video captured with a separate audio track can be imported and automatically synced. This is hugely helpful for matching pictures with sound before you begin editing.
TIP: You can use HitFilm to delete audio by either removing a track or muting the volume.
Audio controls in HitFilm
To identify the various controls for HitFilm audio editing, let’s explore the interface. You can follow this layout by switching to Window>Workspaces>Audio from the File menu.
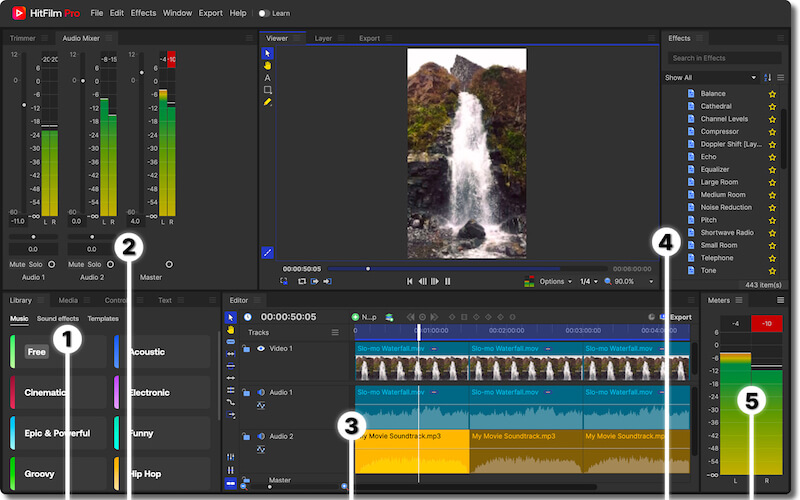
| 1 | Library Panel | HitFilm gives access to a creative library of royalty-free music and sound effects. Browse the menus in this panel to find, preview and download assets to use on any project |
| 2 | Audio Mixer | This panel shows stereo channel meters for every audio track plus the Master audio track. You can set the volume (dB) using the sliders, pan left/right using the Balance control and Mute or Solo using the toggle buttons. |
| 3 | Audio Tracks | Audio clips appear on the editing timeline just like video. They show as waveforms and can be moved and sequenced to layer up your soundtrack. |
| 4 | Audio Effects | The Effects>Audio folder has 16 effects from Audio Reverse to Tone. Simply drag these onto timeline audio and edit the properties inside the Controls panel, bottom left. |
| 5 | Audio Meters | These meters display the L/R volume levels for the Master audio track. When the levels peak above zero (0) dB the indicators show red. |
Setting sound levels in HitFilm
One of the most important techniques if you want to learn how to edit sound on a video is adjusting the volume level.
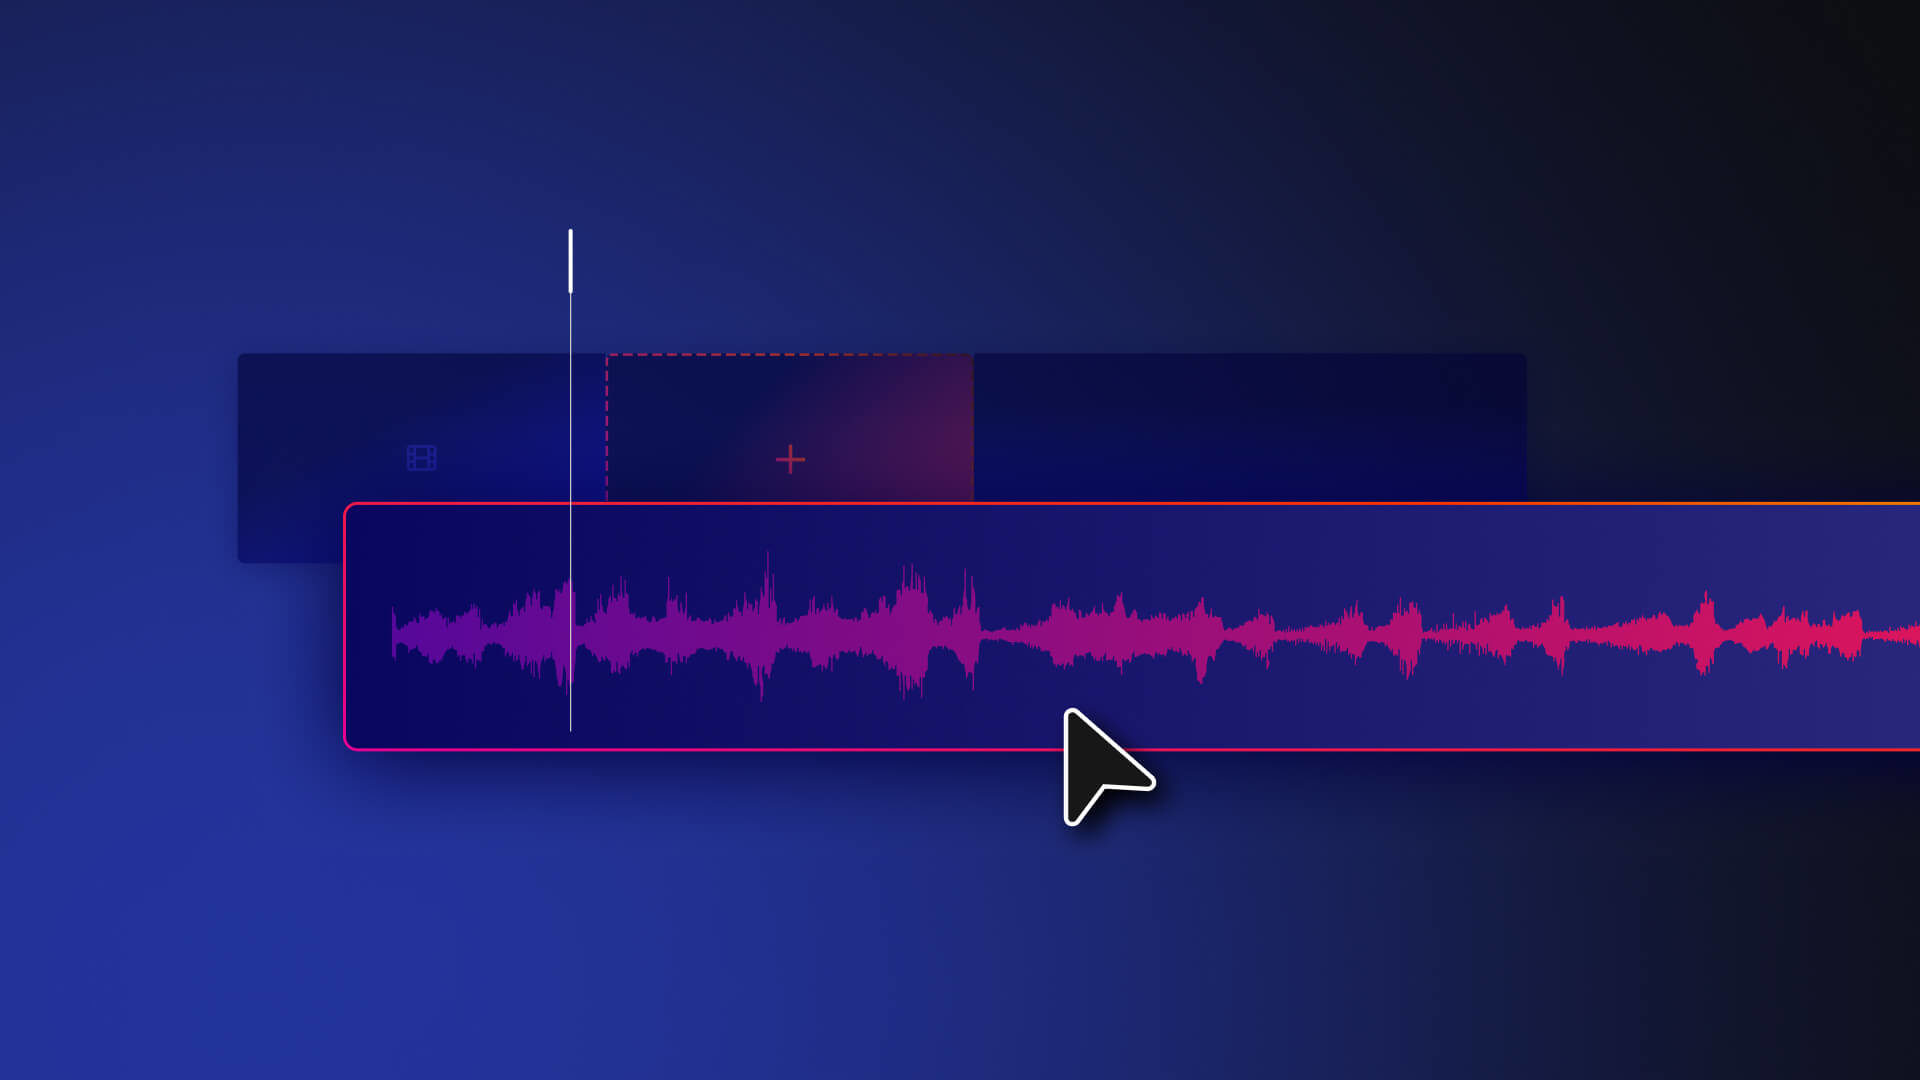
The simplest way is to drag the white line shown on audio clips. Audio regions show as a waveform on the timeline, and dragging this “level” line up or down will raise or lower its volume.
TIP: You can adjust the volume over time using a Fade or Cross Fade transition effect.
Why does loudness matter?
Measuring the loudness of our content is an important consideration when mixing and mastering audio.
We want to feel that our sound is loud enough and impactful but not harsh or harmful to the audience’s ears.
When a source sound is too loud, it can also distort. Think about when you turn up a speaker to maximum and how the output gets fuzzy or breaks up.
Sound mixers and engineers avoid these problems by never exceeding peak loudness.
What are LUFS?
The new industry standard for measuring audio loudness is called LUFS.
LUFS stands for “Loudness Units Full Scale” and gauges the overall loudness of something. It gives us an aggregate or “integrated” reading of a song, album or video over its entire duration.
This is important because it offers a consistent LUFS level to mix for. For video makers, this varies across film, TV and particularly YouTube.
➜ -23/-24 LUFS is generally accepted as a standard across film and TV.
➜ -13 to -15 LUFS is YouTube’s recommended loudness level.
YouTube will “normalize” video audio that is too quiet or too loud to around -14 LUFS.
✓ A single LUF is roughly equivalent to 1 decibel (dB) unit.
Measuring your video’s loudness
HitFilm’s audio meters show your audio volume levels in decibels. This is a typical way to monitor loudness and any volume peaking at any given moment.
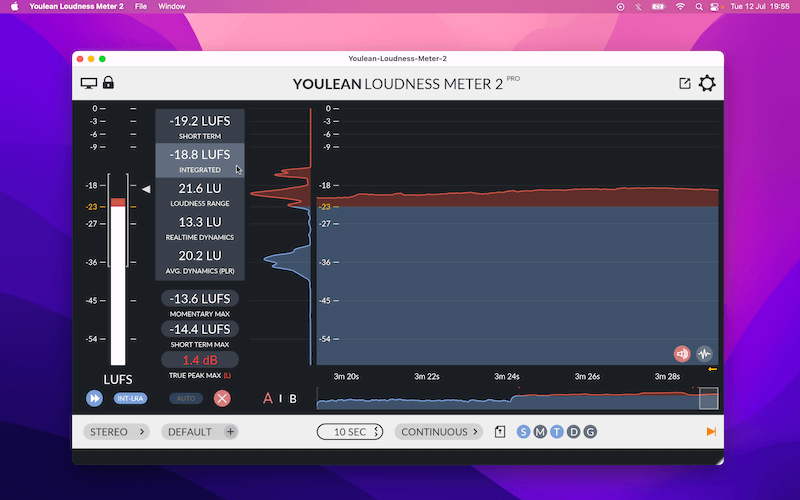
To measure LUFS, you will need a meter like YouLean Loudness Meter 2. Available to download for free, it can be used as a standalone app or as a plugin for other software.
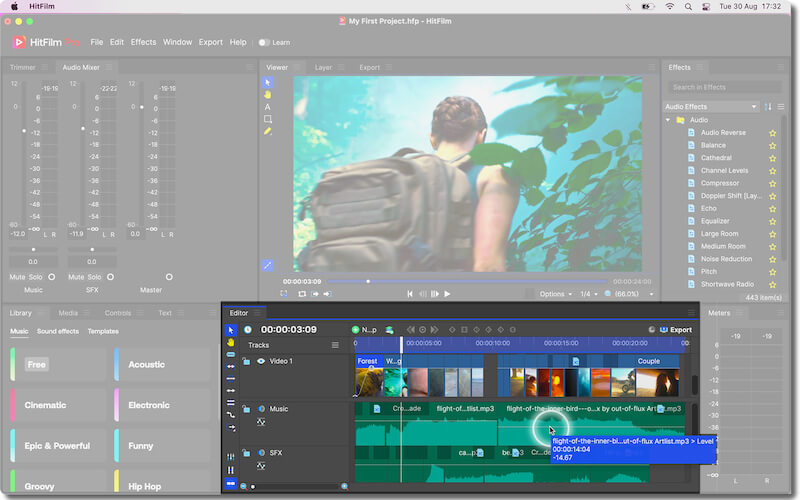
On Mac computers, you can use YLM2 as an Audio Unit (AU) plugin with a free DAW like GarageBand. Video clips (.mov) can be imported to not only measure loudness but also edit the audio track and add music.
Applying audio effects in HitFilm
Just like for video, HitFilm includes a collection of ready-made effects for audio.
You can find them in the Effects panel inside the Audio Effects folder. Each can be dragged onto a timeline audio track and tweaked within the Controls panel.
Audio effects have a varying number of parameters to play with. Some also have presets to explore and help you pick certain sounds more quickly.
- Cathedral: Instant big echo is applied to house the sound within a large hard space.
- Shortwave Radio / Telephone: Uses a Gain slider to add a distinctive “lo-fi” quality.
- Pitch: Changes audio pitch with a Semitone Shift (halftone) up or downwards.
- Compressor: Uses a Threshold level to even out the volume for a fatter overall sound.
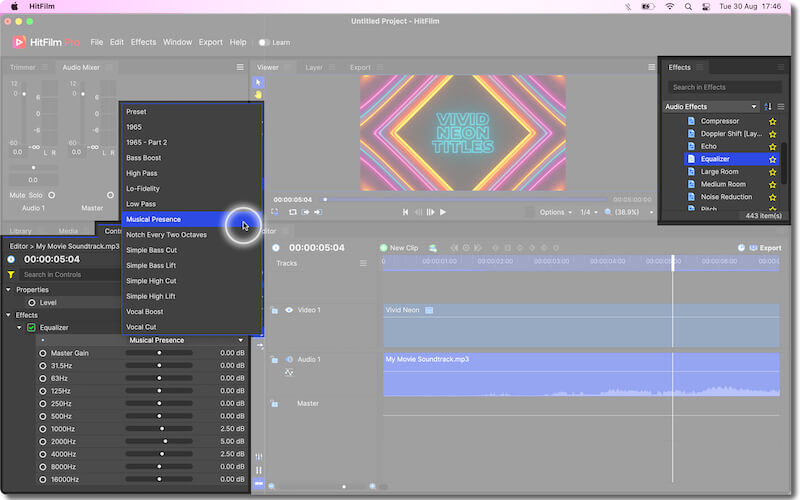
The Equalizer is a crucial advanced effect for shaping tone. It uses 10 slider controls to adjust the volume of bands (Hz) from low (31.5) to high (16000) frequencies.
TIP: Use Equalizer presets to preview how the control levels affect your audio.
Importing sound effects and music
The new Library Panel in HitFilm makes it easy to add pre-recorded sound effects and music to your videos.
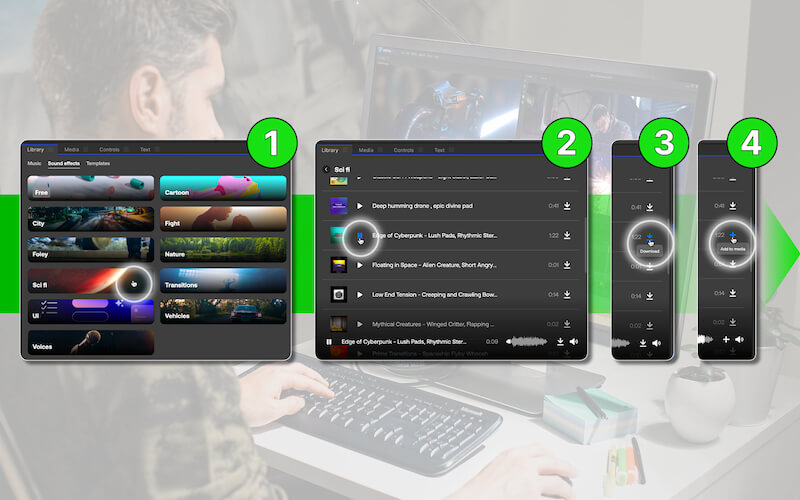
- Visit the Music or Sound effects menus within the Library Panel.
- Preview a listed asset with the Play/Pause button.
- Click the Download icon to initiate a download of the chosen asset.
- Click the plus (+) to add the downloaded asset to the project’s Media.
You can now drag and drop the imported music or sound effect asset from Media onto the project timeline.
✓ HitFilm assets are royalty-free, which means they are licensed for use in any project without copyright issues.
Conclusion: Audio editing glossary
To finish, let’s define some of the key terms and phrases associated with audio editing:
Mixing – Setting the levels of audio tracks to achieve an effective overall output mix.
Normalization – The reduction or raising of gain to take a signal’s amplitude to a constant target level.
Volume – A degree/unit of loudness or “intensity” of a sound, typically measured in decibels (dB).
Panning – Moving audio between degrees of the left and right (L/R) stereo channels.
Loudness – Overall intensity or subjective perception of a sound’s intensity level.
