The launch of our new blog featured a striking image of the globe surrounded by arcs of light, set against a blanket of stars. Something to do with communications. Or nuclear war. Who knows?!
Once the dust had settled from the launch, the first question asked was about recreating that very image inside HitFilm.
FXHOME’s first new tutorial should be creating in HitFilm the image from the new community page.
Michael James
When it comes to sourcing this kind of image there’s two options: make it yourself, or use a stock image. For the launch blog post we used a beautiful stock image by Sergey Nivens, as it perfectly represented the concept of a connected world. We recommend checking out Nivens’ other work as it’s all high quality stuff.

If somebody has already made exactly what you need, there’s no point doing it all over again. That is, until Michael James gives you a challenge. That’s when I had to pick up tools and see what I could come up with. This will be very much about the creation of a specific still image, rather than a shot designed for motion.
The sky, full of stars
I’ve covered starfields in previous tutorials, focusing in particular on using the full-on particle simulator to make a genuine, wrap-around 3D star map. Majahr Pictures also contributed a guest tutorial which looked at a range of procedural techniques.
The starfield in Nivens’ original has a very particular construction. It’s not simply a random scattering of dots; it also appears to have a kind of lattice-like structure, with stars clumping together in an organic fashion. There’s also a wide variation of star size, from tiny one-pixel dots to larger glowing orbs.
Using the particle simulator to create this kind of look would have been overkill: it would require far too much particle wrangling. Atomic particles, on the other hand, is very efficient at creating the desired structure.
Atomic structure
An atomic particles effect always starts off as an array of dots in a flat grid pattern, which you can then push and pull and twist.
When atomic is first added to a white plane it creates what appears to be a noise pattern. Reducing the number of particles makes it a little more obvious what is going on. Take a look at this atomic grid of 10,000 particles, in which you can easily identify each individual particle:

Atomic is an effect which begs for experimentation. It’s a malleable, deceptively versatile construct. For this starfield I immediately dived into the fractal controls, which are used to apply a more organic warping to the pattern.

The fractal displace property twists and folds the array, like a flag in the wind, creating the appearance of clusters. After being combined with heavy fractal dispersion to break the grid apart, the result is already heading in the right direction.

10,000 particles doesn’t really cut it for this, so I increased the X and Y particle counts to 200 and then set the Z to 3. The Z count determines the number of pattern ‘sheets’, which become all entangled once fractal warping is applied. The additional sheets provide extra depth, with some particles much closer to camera than others.
The particles are far too large at this point, creating an over-busy starfield. Rather than reducing the number of particles I instead adjusted their size properties, first by adjusting the core size property to 4 and then setting the size random to 1. This creates more variation but everything is still too large. Returning to the fractal controls and boosting the size fractal up to 1 introduced an organic size variation and a pleasing final result:

Nivens’ original featured a subtle glow around the star clusters, which can be easily achieved through the addition of a simple glow effect.
Planetary construction
Celestial bodies are pretty easy to create in HitFilm. We’ve covered all the techniques already, so I won’t repeat myself here. Instead, check this out if you’ve not already watched it:
The only differences between making a star and a planet is the particular design of the fractal surface textures and, of course, the omission of the solar flares. You can also, of course, simply use an existing image of the Earth from space, which may be more suitable if you want recognisable land masses.
Arcs of communication
For the arcing lines of information/nuclear armageddon I turned to the full-on particle simulator. To get the perfect arcs I decided to use physics rather than any manual keyframing.
Mobile emitters are your best friend; you just might not know it yet. They’re a special type of emitter/particle hybrid. Check out our old fireworks video for a quick overview of how they work.
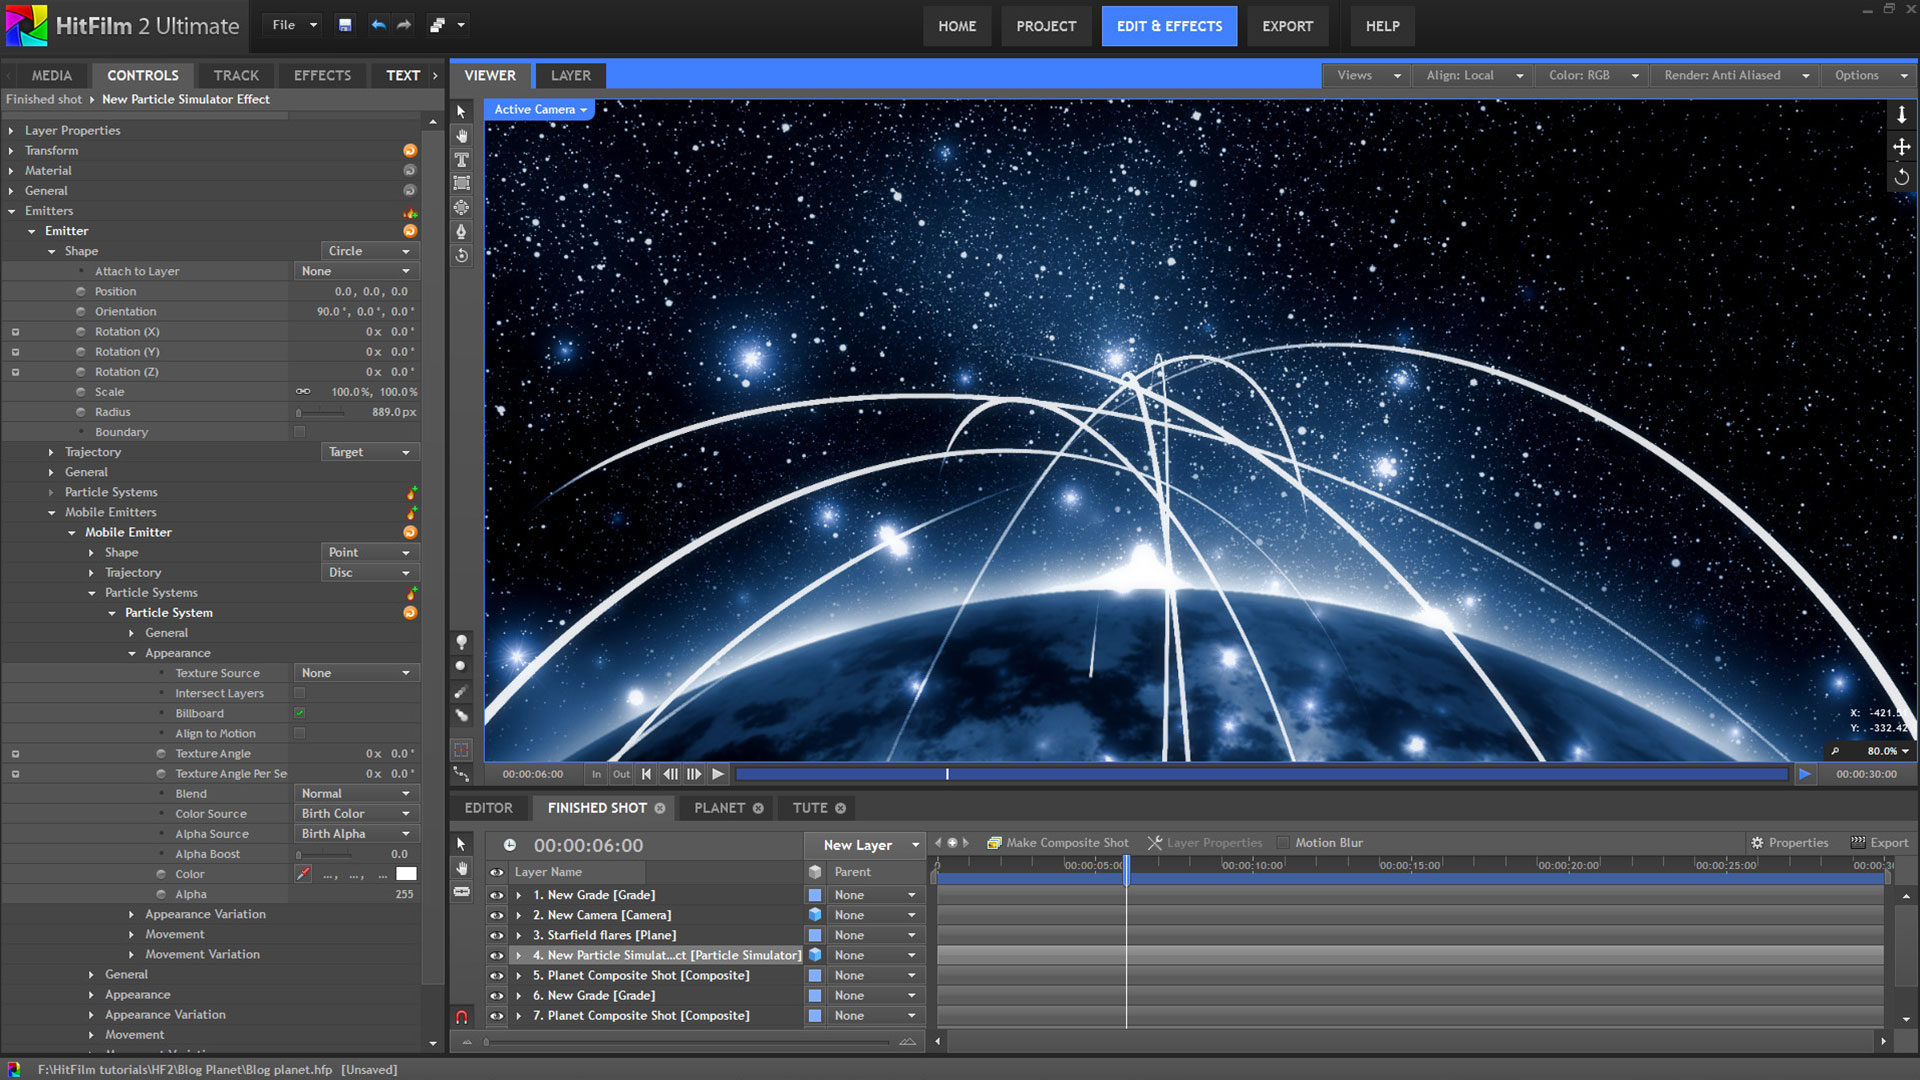
For the arcs I set up a circle emitter to spew out mobile emitters. An attraction force was then used to draw all the mobile emitters in towards a central point, creating the arcing motion.
As you can see, the arcs begin at random points on the flat surface, before arcing up towards the center. The red dots represent the mobile emitters, while the white arcs are actually made up of hundreds of little particles which are being left behind by the mobile emitters. Crucially, the spawned particles are not affected by the attractor force, so that they remain in their original positions, thus drawing the arc.
As the goal of this project is a still image, I simply moved through the timeline until the arcs were at a suitable position, then tweaked the particle layer’s vertical position.
Orbiting spheres
Nivens’ original image featured glowing orbs on the arcs. I went with a slightly different approach, having the orbs floating independently above the planet.

To do this I duplicated the starfield layer and added the auto light flares effect. This generates flares based on the position of the stars. Using 120,000 stars as a flare source is a little extreme, so I reduced the number of atomic particles on this new layer down to just 800 (20x20x2 in the X, Y and Z number properties).
Auto light flares always needs a bit of customization to get the flare generation right, in this case requiring a lower threshold of 0.15. I also bumped the max flares up to 100, so that they weren’t being artificially limited.
I did have an idea for having the flares appear only on the arcs, which would have involved creating an embedded comp of the particle arcs, adding a random alpha or color gradient to break up the lines, and then using that as the flare source. As tends to be the case, there’s a number of different ways to achieve the end result.
Feeling blue
All of the core visual elements were in place – starfield, planet, arcs, orbs. They’d all been purposely created to be largely greyscale, resulting in a colorless image.
")
There are countless ways to add color to a greyscale image, using various different tools. In this particular case I used a combination of glow, color correction wheels, diffuse and crush blacks & whites.
Glow and diffuse served to soften the image, while the color correction wheels tool was used to push the shadows and mids towards the dark blue-purple. Crush blacks & whites was used simply to add contrast.
All that was left was to export a still image using the Options menu in the Viewer.
")
There’s more tweaking that could be done, as always. Nivens’ original has a subtle vignette around the lower edge of the planet, dropping it away into darkness, and his overall composition is slightly different. The purpose of this article isn’t to directly duplicate his work but to show how HitFilm’s built-in techniques can be used to achieve similar results.
Most of our tutorials over the years have focused on creating animated visuals, either for motion graphics or visual effects – and those are, of course, the primary, designed purpose of HitFilm. While Photoshop remains the go-to tool for image work, HitFilm can nevertheless make efficient, high quality contributions to still images, particularly when creating this kind of procedural content.
Overall the image took about 30 minutes from start to finish, including experimentation time. In terms of productivity, that’s not bad going. Let’s not forget that you can sell original stock images, illustrations and videos, turning your HitFilm VFX tests into a passive revenue stream.